


Service and Maintenance
3–2
7KC Series Service Manual
R
EPLACING
PARTS
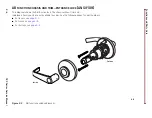
Replacing the lever
To remove the keyed lever:
Note:
For instructions regarding non-IC levers, see
BEST Installation
Instructions for 7KC Non-IC Cores and Throw Members (T80628).
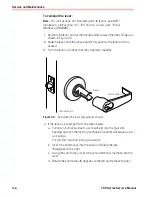
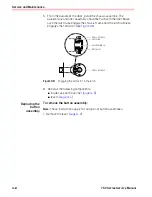
1. Insert the control key into the core and rotate the key 15 degrees to
the right.
2. Remove the core and throw member from the lever.
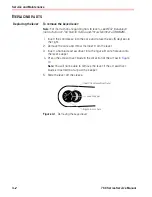
3. Insert a flat blade screwdriver into the figure-8 core hole and into
the lever keeper.
4. Press the screwdriver blade in the direction of the arrow in
Note:
You will not be able to remove the lever if the screwdriver
blade is inserted too far past the keeper.
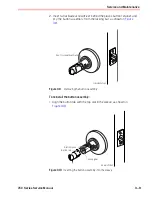
5. Slide the lever off the sleeve.
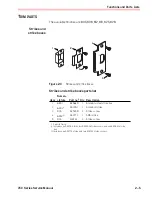
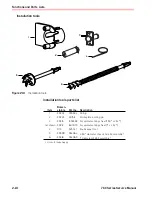
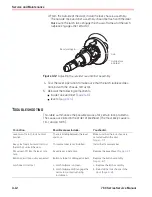
Figure 3.1
Removing the keyed lever
Insert the screwdriver here
.
Figure-8 core hole
Lever keeper
Summary of Contents for 7KC Series
Page 1: ...7KC GRADE 2 CYLINDRICAL LOCKS 7KC SERIES S E R V I C E M A N U A L...
Page 6: ...Figures vi 7KC Series Service Manual...
Page 10: ...Getting Started 1 4 7KC Series Service Manual...
Page 22: ...Functions and Parts Lists 2 12 7KC Series Service Manual...
Page 36: ...Installation Instructions A 2 7KC Series Service Manual...
Page 41: ...T80621_C BEST is a trademark of dormakaba USA Inc 2021 All rights reserved...