

Service and Maintenance for Mortise Locks
W Series Service Manual
4–55
Replacing the latch
status switch
Removing the latch status switch
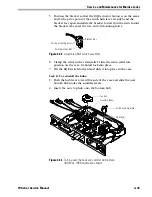
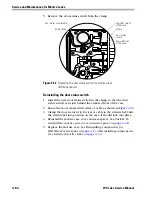
1. Remove the mortise case. See
Removing components for IDH Max
2. Remove the mortise case cover and spacer. See
the mortise case cover and case spacer:
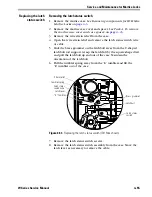
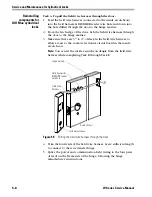
3. Remove the wire strain relief from the case.
4. Open the wire strain relief and remove the latch status switch wire
or cable.
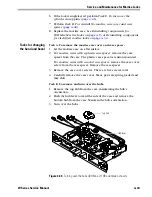
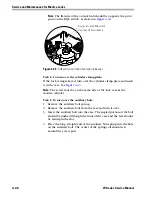
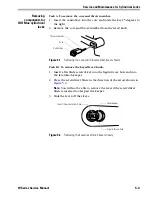
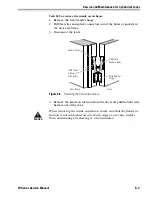
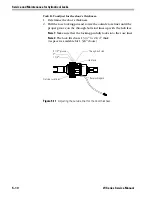
5. Slide the brass grommet on the latchbolt away from the U-shaped
latchbolt rod support. Grasp the latchbolt by the square-shaped tail
and pull the latchbolt up and out of the case. Maintain the
orientation of the latchbolt.
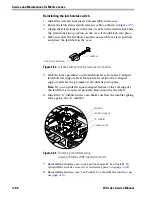
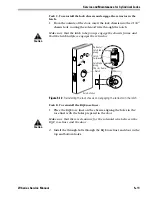
6. Pull the tumbler spring away from the “E” tumbler and lift the
“E” tumbler out of the case.
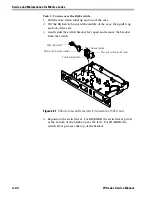
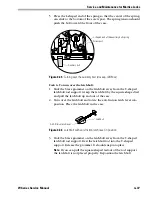
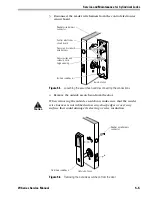
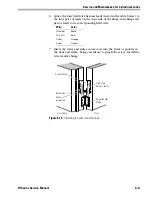
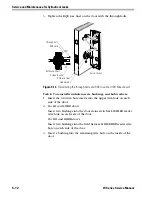
7. Remove the latch status switch screws.
8. Remove the latch status switch assembly from the case. Move the
latch lever as necessary to remove the cable.
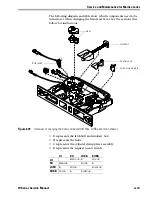
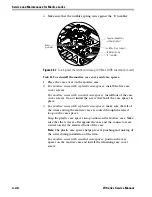
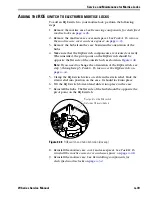
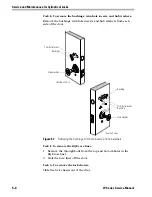
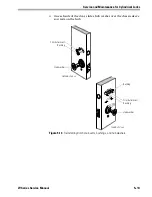
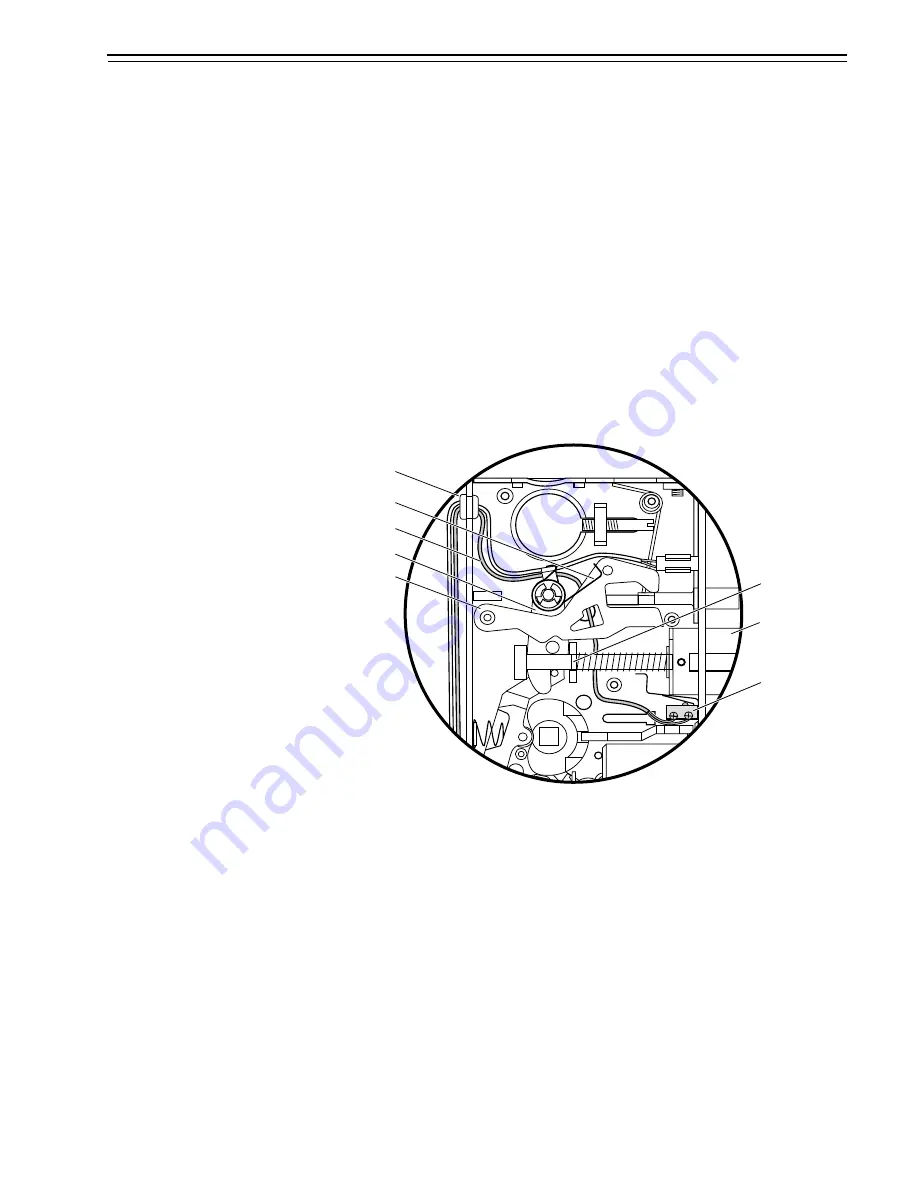
Figure 4.53
Replacing the latch status switch (IDH Max shown)
Latchbolt
Tumbler spring
“E” Tumbler
Latch lever
Latch status
switch
Strain relief
Latch status
switch wire
Brass grommet
Summary of Contents for 34HW
Page 1: ......
Page 6: ...Contents vi W Series Service Manual...
Page 38: ...IDH Max Locks Functions and Parts 2 24 W Series Service Manual...
Page 54: ...Electrified Locks Functions and Parts 3 16 W Series Service Manual...
Page 140: ...Service and Maintenance for Cylindrical Locks 5 30 W Series Service Manual...
Page 158: ...Additional Service and Maintenance for IDH Max Locks 6 18 W Series Service Manual...
Page 162: ...Glossary A 4 W Series Service Manual...
Page 164: ...Installation Instructions B 2 W Series Service Manual...