


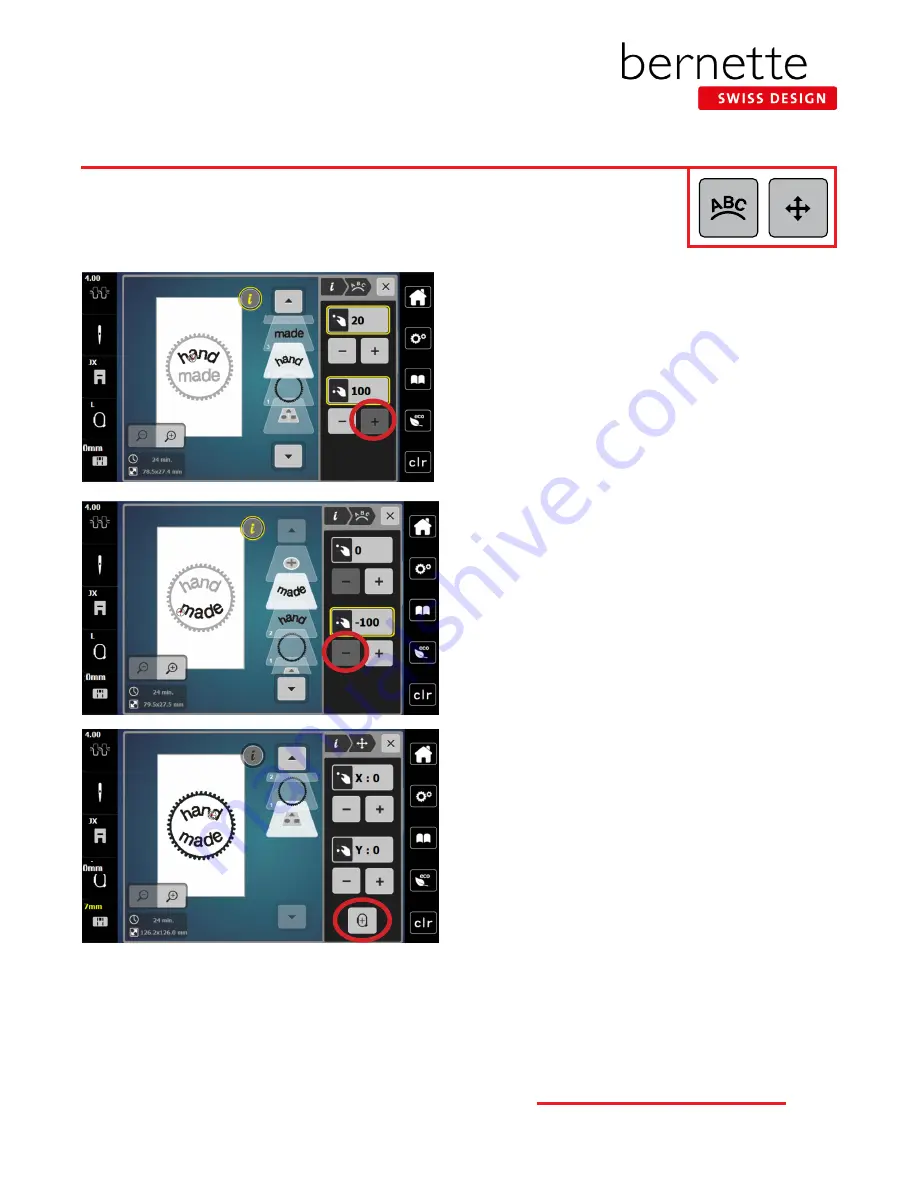
Word Art
Use Word Art to create curved lettering baselines. You will use the Lower Multi-function (Length)
knob or the lower set of -/+ icons to change the baseline.
1.
Word Art should still be open in the “i” menu.
2.
The word “hand” should still be selected.
3.
Turn the Lower Multi-function knob to the right (or use
the + icon at the lower part of the screen) to bend the let-
ters as shown (maximum of 100).
4.
Select the word “made” in the Layer Panel.
5.
Turn the Lower Multi-function knob to the left (or use the
- icon at the lower part of the screen) to bend/arc the let-
ters as shown (maximum of -100).
NOTE:
You may need to move the words or change the
spacing after bending the letters so there is no overlap.
6.
To center the combined design, select the bottommost
layer in the panel (the layer with no number).
7.
Select the “i” in the breadcrumb path and select Move
Motif.
8.
Select Center the Motif.
NOTE:
a combined design should be centered before
being stitched out.
9.
Follow the directions on Page 25 to save this design.
10.
If desired, stitch this design out as homework.
24
b e r n e t t e E M B R O I D E R Y M A C H I N E W O R K B O O K


