13
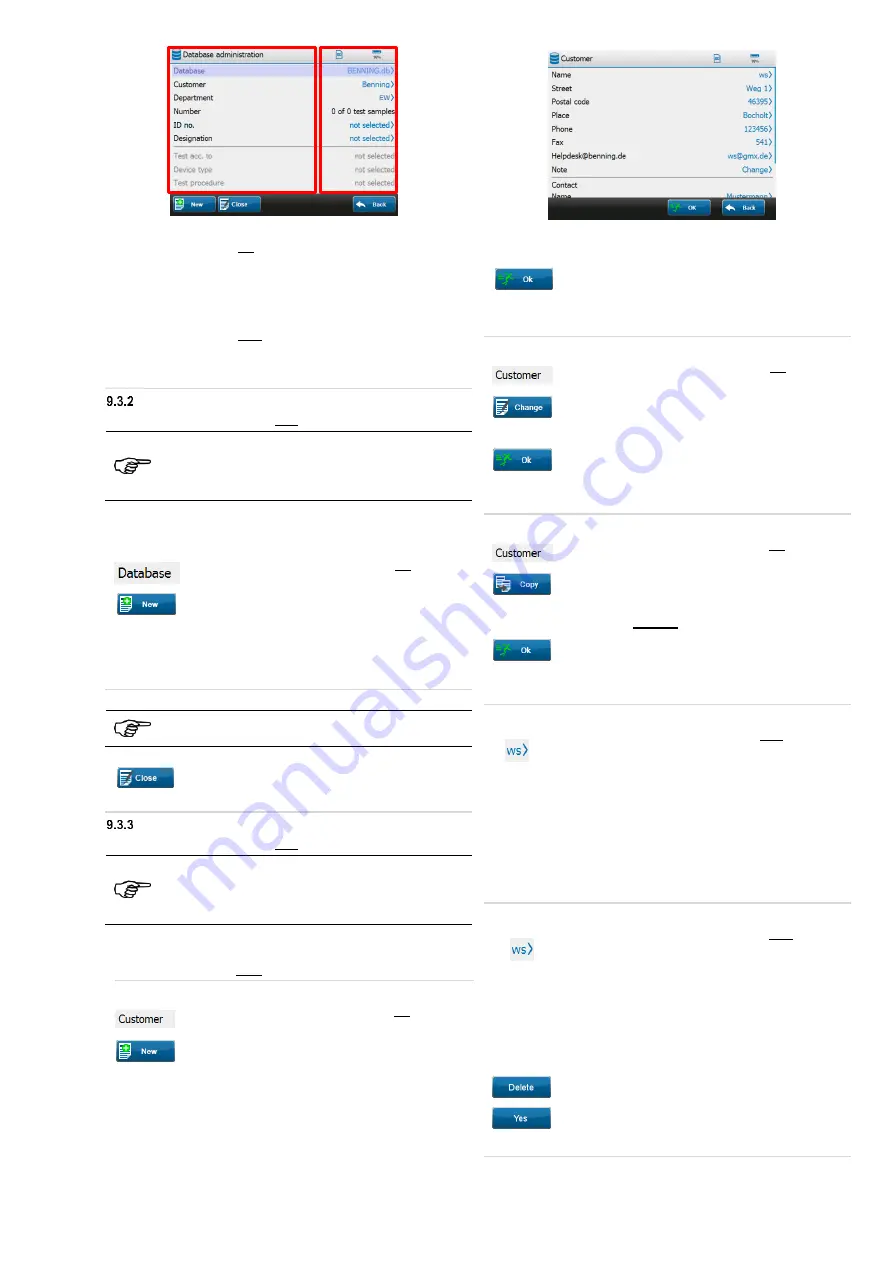
left
right
Touch a line on the left half of the screen to select it.
o
The corresponding line is marked in light blue.
o
Further entries can be made using the buttons in
the footer.
Touch a line on the right half of the screen.
o
The different
options for selection
of the
corresponding line are displayed.
Creating a database
You can select a database to filter already created test samples.
The system displays all test samples that have been
created under the currently selected database.
Test samples that are assigned to another database will
be hidden.
If no databases are available, the "
not selected
" status is
displayed in the "
Database
" line. At least one database must be
created.
Touch the "
Database
" line on the left of the
screen.
Tap the “
New
” button and follow the prompt.
Enter the name of the database and confirm by touching the
“
Confirm entry
” soft key.
The created database will be set automatically as the current
database.
9.3.2.1 Changing the database name / Deleting a database
These steps can only be carried out using the PC
software (BENNING PC-WIN ST 750-760).
9.3.2.2 Closing the database
Tap
the „
Close
“ button
The selected database will be closed.
Customer
You can select a customer to filter already created test samples.
The system displays all test samples that have been
created under the currently selected customer.
Test samples that are assigned to another customer will
be hidden.
If no customer entries are available, the "
not selected
" status is
displayed in the "
Customer
" line.
At least one customer must be created and selected.
9.3.3.1 Creating a customer entry
Touch the "
Customer
" line on the left of the
screen.
Tap the “
New
” button and follow the prompt.
Fill in the "
Customer
" input mask with the customer data you
need.
Confirm your entries by tapping the “
OK
”
button.
The created customer entry will be set automatically as the
current customer.
9.3.3.2 Changing a customer entry
Touch the "
Customer
" line on the left of the
screen.
Tap the “
Change
” button.
The “
Customer
” input mask opens.
Change the corresponding customer data and
confirm your entries by
tapping the “
OK
” button.
The change will be applied and automatically set as the current
customer.
9.3.3.3 Copying a customer entry
Touch the "
Customer
" line on the left of the
screen.
Tap the “
Copy
” button.
The “
Customer
” input mask opens (the customer name will be
changed automatically to “
Copy of
<customer name>”).
Change the customer data of the copy and
confirm your entries by tapping the “
OK
” button.
The copy will be applied and automatically set as the current
customer.
9.3.3.4 Switching to another customer entry
Touch the "
Customer
" line on the right of the
screen.
(Example: customer name “ws”)
The “
Customer
” screen opens.
If further customer entries are available, you can choose from
these.
To do this, touch the line with the corresponding
entry.
The selected entry will be set automatically as the current
customer.
9.3.3.5 Deleting a customer entry
Touch the "
Customer
" line on the right of the
screen.
(Example: customer name “ws”)
The “
Customer
” screen opens.
If further customer entries are available, you can choose from
these.
Select the customer entry to be deleted.
(The selected entry will be set automatically as the current
customer.)
Tap the “
Delete
” button.
Confirm the confirmation prompt on the display
with "
Yes
".
The selected customer entry will be deleted.


