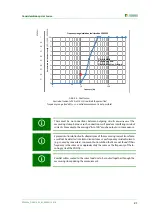


Operation
35
EDS309x_D00012_03_M_XXEN/11.2014
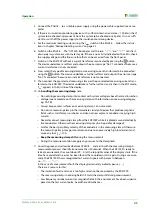
6.6.2
Changing the measuring clamp
Two methods can be used to change the measuring clamp.
Changing with EDS195P switched off:
– Disconnect clamp no longer required
– Switch on EDS195P
– Wait for "No CT connected" message
– Set required clamp type
– Connect related clamp
– Wait for end of self-test.
Changing with the EDS195P in operation:
– Disconnect clamp from the device
– Wait for "No CT connected" message
– Set required clamp type
– Connect related clamp
– Wait for end of self-test.
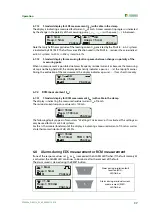
6.6.3
Improved legibility due to display lighting
Press the
button at the bottom left to improve the legibility of text and symbols.
Switch off the lighting by pressing the button again.
6.6.4
Changing between insulation fault location
I
ΔL
and
residual current measurement
I
Δn
operating modes
Here you can select the measuring function.
I
Δ
n
for residual current measurement preferably in
TN/TT systems.
I
Δ
L
for insulation fault location in IT systems.
Avoid changing the mode during insulation fault location.
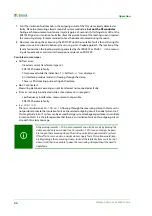
6.6.5
Quickly checking the response values for
I
ΔL
and
I
Δn
Press the INFO button three times to display the actual response values.
6.6.6
Checking Info menu
The following information appears on the display in succession on pressing the INFO button:
Device name, time, date and manufacturer
Software version with date
Actual response values
I
Δ
L
and
I
Δ
n
Status information, coded, see page 58
Summary of Contents for EDS3090
Page 6: ...Table of Contents 6 EDS309x_D00012_03_M_XXEN 11 2014...
Page 26: ...Considerations prior to use 26 EDS309x_D00012_03_M_XXEN 11 2014...
Page 62: ...Frequently Asked Questions 62 EDS309x_D00012_03_M_XXEN 11 2014...
Page 65: ......
Page 66: ......
Page 67: ......


