


11
Belkin Secure Web Camera Adapter User Manual
SECTIONS
InsTallaTIon
3
Installation
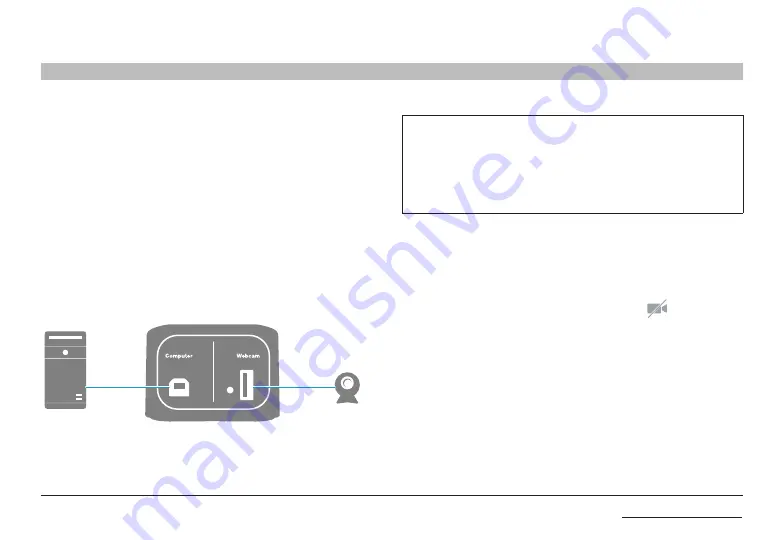
step 1 – Connect the web camera
• In the Secure Web Camera Adapter’s back panel, insert the USB
plug of the web camera into the USB port marked Webcam.
• Mount the web camera on a stable and secure surface, where it
can clearly view the computer user or the subject.
step 2 – Connect to the computer
• In the Secure Web Camera Adapter’s back panel, insert the USB
type B plug of the USB cable into the USB port marked Computer.
• Insert the other end of the USB cable into an open USB A port on
the connected computer.
Web Camera
Computer
Web Camera Adapter
USB Cable
USB Cable
Connecting the Secure Web Camera Adapter
note:
Use the following USB cables to connect the Belkin Secure
Web Camera Adapter to the computer:
• Up to 3 ft. (0.95m): F3U133-03-TAA
• From 3 ft. (0.95m) to 6 ft. (1.8m): F3U133b06 or F3U133-06-TAA
• From 6 ft. (1.8m) to 10 ft. (3m): F3U133-10-TAA
• From 10 ft. (3m) to 16 ft. (4.8m): F3U133b16
step 3 – restart the computer
• Restart the connected computer.
• Verify the Secure Web Camera Adapter is receiving power from
the computer. On the back panel, the LED next to the webcam
port should light up solid Green.
• The
red
LED light on the
disconnect
button
should light up.
• When the computer is starting up, press the Activate button to
connect the web camera to the computer.
• Verify that the computer is identifying the connected web camera.
• Open the web camera software on the computer and verify that
the computer is receiving a video signal from the web camera.


