background image

773232AH 

10-37

Using Navios Software

File Menu     

10

These changes may also be saved permanently within the open protocol by 


File > Save 

Protocol or 


File > Save Protocol As

.

NOTE  

 Modifying the scale options should only be done during offline analysis. Replaying of the listmode 

files always uses the calibration set at acquisition.

NOTE  

 Leaving the Edit FCS  Header Attributes dialog box open or editing the contents during acquisition 

may prevent some FCS keywords values from being saved to the listmode file.

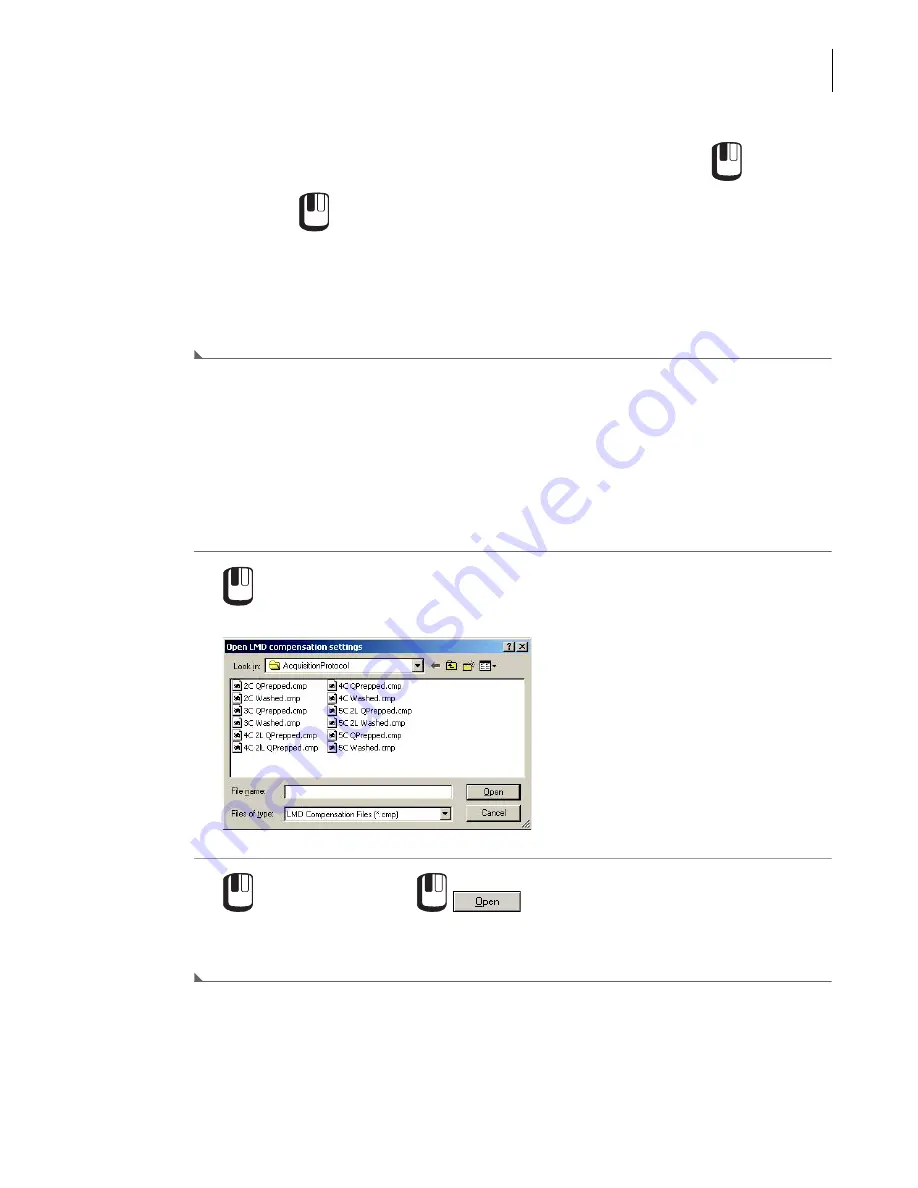
Import

Settings From CMP File

This option allows compensation settings obtained from the 

Listmode Playback

 option or 

Save 

Listmode Compensation As

 option to be imported into the current protocol.

1


File > Import > Settings from CMP 

File. 

2

 the appropriate file and 


.

The compensation settings from the stored file are then read into the current Navios software 
protocol.

Summary of Contents for Navios

Page 1: ... CARO USEL WITH SOLUTION LIGHT LY RUB IF NECE SSARY IMMEDIATE LY RINSE WITH CLEAR WATER CARO USEL CLEANING PREPARE A SOLUTION OF 1 PART HOUS HOLD BLEAC H 5 SOLUTIONO F SODIU M HYPO CHLO RITE AND 9 PARTS WATER RINSE CARO USEL WITH SOLUTION LIGHT LY RUB IF NECE SSARY IMMEDIATE LY RINSE WITH CLEAR WATER Beckman Coulter Ireland Inc Lismeehan O Callaghan s Mills Co Clare Ireland 353 65 683 1100 ...

Page 2: ... in the USPTO All other trademarks service marks products or services are trademarks or registereed trademarks of their respective holders Contact Us If you have any questions contact our Customer Support Center Worldwide find us via our website at www beckmancoulter com customersupport support In the USA and Canada call us at 1 800 369 0333 Outside of the USA and Canada contact your local Beckman...

Page 3: ...rate address Issue AE 09 2013 Software Version 1 1 Updates were made to Figure 13 5 Laser Label on the Cytometer Back Panel Issue AF 06 2014 Software Version 1 1 Updates were made to the following sections Multi tube Carousel Loader MCL Ambient Temperature and Humidity Forward Scatter Collection Fluorescent Light Figure 3 6 Integral Signal Time Of Flight Signal Fluorescence Gains Table 4 2 Bar Cod...

Page 4: ...773232AH iv Revision Status Note Changes that are part of the most recent revision are indicated in text by a bar in the margin of the amended page ...

Page 5: ...ier protection This may include but is not limited to protective eyewear gloves and suitable laboratory attire when operating or maintaining this or any other automated laboratory analyzer Alerts for Warning and Caution WARNING WARNING indicates a potentially hazardous situation which if not avoided could result in death or serious injury May be used to indicate the possibility of erroneous data t...

Page 6: ... Report any broken parts to your Beckman Coulter Representative Open remove and close replace doors covers and panels with care Use the proper tools when troubleshooting CAUTION System integrity could be compromised and operational failures could occur if This equipment is used in a manner other than specified Operate the instrument as instructed in the Product Manuals You introduce software that ...

Page 7: ...from a third party and would like further information concerning this topic contact your Beckman Coulter Representative Safety Symbols Safety symbols alert you to potentially dangerous conditions The symbol applies to specific procedures and appears as needed throughout this manual Symbol Meanings Biohazard Caution Warning A CE mark indicates that a product has been assessed before being placed on...

Page 8: ...773232AH viii Safety Notice Safety Symbols ...

Page 9: ... xxxvii Dialog Box xxxvii Description of Reporting Units xxxvii Graphics xxxvii Use And Function 1 1 System Components 1 1 Cytometer 1 2 Supply Cart 1 2 Workstation 1 2 Multi tube Carousel Loader MCL 1 2 Navios Flow Cytometer Software 1 3 Options 1 3 Hardware Options 1 3 Printer 1 3 Workstation Network Server 1 3 Additional PMTs 1 3 Third Laser 1 4 Reagents And Quality Control Materials 1 4 Sheath...

Page 10: ...tware 2 7 Operation Principles 3 1 What This Chapter Explains 3 1 Sample Flow 3 1 Sample Loading 3 1 Hydrodynamic Focusing 3 1 Laser Beam Shaping 3 2 Cell Illumination 3 3 Forward Scatter 3 3 Side Scatter and Fluorescent Light 3 3 Light Collection Separation And Measurement 3 4 Forward Scatter Collection 3 4 Side Scatter and Fluorescent Light Collection 3 4 Side Scatter 3 4 Fluorescent Light 3 5 S...

Page 11: ...oise Level 4 1 Cytometer 4 2 Flow Cell 4 2 Flow Rate 4 2 Sheath Consumption 4 2 Lasers 4 2 Optional third laser 4 2 Laser Power Monitoring 4 2 Beam Shaping Optics 4 2 Blue Laser Beam Spot Size 4 2 Red Laser Beam Spot Size 4 3 Violet Laser Beam Spot Size 4 3 Laser Beam Separation 4 3 Optical Filters 4 3 Sensors 4 3 Signal Processing 4 3 Dynamic range 4 3 Workstation resolution 4 4 Digital Sampling ...

Page 12: ...17 Database Login 4 20 Report Generator Database Schema 4 20 Performance Characteristics And Specifications 4 33 Carryover 4 33 Acquisition Rate 4 33 Data Acquisition Throughput 4 33 Precision for Surface Markers 4 33 Scatter Resolution 4 34 Forward Scatter 4 34 Fluorescence 4 34 Sensitivity 4 34 Fluorescence 4 34 Laser Characteristics 4 34 Day To Day 4 34 Within Day 4 34 System Overview 5 1 Navio...

Page 13: ...s 5 18 Repositioning a Quadrant Region 5 19 Create Linear Regions 5 20 Create Multiple Linear Regions 5 21 Creating Gates 5 21 Create AutoGate 5 21 Convert a Polygonal Region to an AutoGate Region 5 24 Automatic Gate Creation 5 24 Creating Flowpages 5 25 FlowPAGE Example 5 25 Delete FlowPAGES 5 26 Creating Panels 5 27 Use Plots and Gates from Previous Test 5 29 Use Plots and Gates from Protocol 5 ...

Page 14: ...ut Down 6 8 Extended Shutdown 6 8 Cytometer Auto Startup 6 12 Quality Control 7 1 Introduction 7 1 Instrument Setup 7 1 Parameters 7 1 Angle of Forward Light Scatter 7 1 Discrimination Parameter 7 2 Discriminator Value 7 2 Flow Rate 7 2 Voltages and Gains 7 2 Plot Selection 7 2 Regions and Gating 7 2 QC Processes 7 2 Daily QC 7 3 Preparing AutoSetup Samples 7 3 Autosetup Scheduler 7 4 Autosetup II...

Page 15: ...are in the Quality Control chapter 9 1 These procedures are in the Using Navios Software chapter 9 1 Hardware Procedures 9 2 Using Navios Software 10 1 Welcome To Navios Software 10 1 Multi user Sign On 10 1 Overview 10 1 Configure System Administrator 10 1 Cytometer Startup Page 1 10 2 User ID 10 3 Logged In 10 3 Password 10 3 Admin Button 10 3 Next Button 10 3 Page 2 10 4 Connect 10 4 Work Offli...

Page 16: ...2 Patient ID 10 12 Sample ID1 10 12 Panel Name 10 12 Restore Archive 10 12 User Profile User ID 10 13 User ID 10 13 First Name 10 13 Last Name 10 14 Title 10 14 Privileges 10 14 System Administrator 10 14 Lock Unlock Protocols 10 14 User Configuration 10 14 Access other files 10 14 Remember last accessed LMD directory 10 14 Automatically Overwrite acquired data files 10 14 Overwrite other data fil...

Page 17: ...ng a Protocol for Analysis 10 27 New Panel 10 28 New Worklist 10 28 Open Listmode File 10 28 Using the File Menu 10 29 Using Drag and Drop 10 29 Save Listmode File As 10 30 File Name 10 31 Save Histogram File As 10 31 Save All FCS Format Files 10 32 Open Protocol 10 33 Save Protocol 10 33 Save Protocol As 10 33 Lock Protocol 10 34 Unlock Protocol 10 34 Save Listmode Compensation As 10 35 Save in 1...

Page 18: ...Institute 10 46 Institute Street 10 46 Institute Town 10 46 Sample Source 10 46 Project 10 46 Cell Type 10 47 Experiment 10 47 Cytometer Serial Number 10 47 Currently logged on user 10 47 Workspace Preferences Plot Display 10 47 Show in Region on Plots 10 48 Black Plot Backgrounds 10 48 Opaque Region Labels 10 48 Print Plot Frames 10 48 Print Dots Black 10 48 Log Scale Density Plots 10 48 Smooth H...

Page 19: ...nu 10 56 Acquisition Manager 10 57 Acquisition Manager Docking Options 10 57 Allow Docking 10 57 Hide 10 57 Float in Main Window 10 58 Acquisition Manager Modifying Panels and Worklists 10 58 Panels 10 58 Worklists 10 59 Worklist Columns Available 10 59 Acquisition Manager Panel 10 60 Acquisition Manager Protocol 10 60 Acquisition Manager Plots 10 60 Acquisition Manager Region Sources 10 61 Acquis...

Page 20: ... 71 FlowPAGE Plot 10 72 Insert Plot 10 72 Inserting Drag Drop Plot 10 72 FlowPAGE Statistics Table 10 73 FlowPAGE LMD Compensation Grid 10 73 FlowPAGE Textbox 10 73 Other FlowPAGE Object 10 74 Inserting a Rectangle 10 74 Inserting a Line 10 75 Inserting a Picture 10 75 Inserting a Text File 10 76 Tools Menu 10 78 Publish Results Now 10 78 Open Excel Workbook 10 79 Open PDF 10 79 Open Text File 10 ...

Page 21: ...n plot to all plots 10 91 Show on plot 10 91 Dot Plot Events 10 91 No of Events to Show 10 92 Apply to All Plots 10 92 Dot Plot Resolution 10 92 Dot Plot Labeling 10 92 Show Plot Title on Output 10 93 Show Axis Tick Marks 10 93 Show Axis Labels 10 93 X and Y Axis Labels 10 93 Font 10 93 Histogram Plot 10 94 Histogram Plot Data Source 10 95 Parameter 10 95 Histogram Plot Configuration 10 95 Use Gat...

Page 22: ...g Prism Dividers 10 107 Removing Prism Dividers 10 107 Navios Software Prism Compatibility 10 107 Legend 10 108 Data Source Legend 10 109 Legend Options Tab 10 109 Show Phenotype Logic Columns 10 109 Gated 10 110 Total 10 110 Number 10 110 Absolute Count 10 110 FCS Information 10 110 Info Plot Data Source 10 111 Info Plot FCS Tab 10 111 Acquisition Stop and Save 10 111 Setting a Stop Counter 10 11...

Page 23: ...imum Count 10 127 Linked Region 10 127 Polygonal Region Format Tab 10 127 Interactive Polygonal Region Editing 10 127 Rectangular Region 10 127 Rectangular Region Properties 10 128 X and Y Coordinate 10 128 Interactive Rectangular Region Editing 10 128 Quadrant Region 10 128 Quadrant Region Properties 10 129 Interactive Quadrant Region Editing 10 129 Elliptical AutoGate 10 129 Contour AutoGate 10 ...

Page 24: ... 138 View Modify Prism 10 138 Select Results 10 139 Statistic Type 10 140 Mean Calculation Method 10 140 FCS Information 10 140 Number 10 141 Total 10 141 Gated 10 141 Mean 10 141 CV 10 141 Median 10 141 HP CV 10 141 Mode 10 142 Cells μL 10 142 Min and Max 10 142 Select Numeric Precision 10 142 Enter Numeric Value 10 142 Advanced Statistics Configuration 10 142 Differences Between Log Log and Log ...

Page 25: ...dditional FlowPAGE Formatting Options 10 149 Edit Text 10 152 Change Plot 10 152 Grow to Largest 10 153 Shrink to Smallest 10 153 Align Left 10 154 Align Right 10 154 Align Top 10 154 Align Bottom 10 154 Space Evenly Across 10 155 Space Evenly Down 10 155 Save FlowPAGE As 10 155 Do Not Show Plot Events 10 156 Cytometer Menu 10 157 Cytometer Control 10 157 Cytometer Control Acquisition Setup Tab 10...

Page 26: ...10 166 Start 10 166 Stop 10 166 Pause 10 166 Abort 10 166 Abort the Tube 10 167 Abort the Panel 10 167 Abort the MCL worklist 10 167 Repeat the Tube 10 167 Repeat the Panel 10 167 Restart 10 167 Pause and Rotate 10 168 Idle Mode 10 168 Prime 10 168 Cleanse 10 168 Laser Control 10 168 Status Bar 10 169 Cytometer Status 10 169 Event Rate 10 169 Acquisition Time Elapsed Time 10 169 Number of Events 1...

Page 27: ... 10 178 Delete Plot 10 179 New Plot 10 179 File Menu 10 180 Print 10 180 Print Preview 10 180 Page Setup 10 180 Close 10 180 Template Menu 10 180 Clear Template 10 180 Select Template 10 180 Save Template 10 180 Save Template As 10 180 Associate Default Template Files To Your Instrument 10 180 Modifying Template Files 10 182 Select Parameter 10 182 Select Mean 10 183 Select Limits 10 184 QC Data T...

Page 28: ...Printing Panel Reports 10 203 Tips for Selecting Reports 10 205 Editing Report Comments 10 206 Patient Database Editor 10 208 Entering Editing Database Information 10 209 Database Management 10 209 Archive Data 10 211 Restore Archive 10 213 Report Generator Error Log 10 214 Error Log Screen 10 215 Error messages list 10 215 OK 10 215 Print 10 215 Save 10 215 Cleaning Procedures 11 1 What This Chap...

Page 29: ... 1 List of Replacement and Adjustment Procedures 12 1 Replacement adjustment Schedule 12 1 Replace Reagents 12 2 About the Reagent Containers 12 2 Reagent Container Capacity 12 2 Cleaning Agent Container 12 2 Replace The 10 L External Sheath Fluid Container 12 2 Fill The Internal Sheath Fluid Container 12 7 Fill The Cleaning Agent Container 12 11 Empty The 20L Waste Container 12 14 Procedure 12 14...

Page 30: ... Cytometer log File 13 13 From Navios Software 13 13 From Windows Desktop 13 14 Cytometer Log Entry Description 13 14 How to Search the Cytometer log File 13 14 Other Functions Available 13 14 Print 13 14 Change Font 13 15 Find Help Topics 13 15 Cytometerarchive log File 13 15 Cytometer Messages Table 13 15 Software Messages 13 25 Navios Software Messages 13 25 Operating System Error Messages 13 2...

Page 31: ...B 1 Introduction B 1 Maintenance Log B 1 Menu Options B 2 File Menu B 2 Admin B 3 Legend B 3 Help B 3 Using The Maintenance Log B 3 User Entry B 3 Administrator Entry B 4 Service Log B 6 Menu Options B 6 File Menu B 7 Help B 7 Navios Maintenance Log B 7 Using The Service Log B 7 Enter Condition Noted B 7 Enter Action taken B 8 Start Date and End Date B 8 References Glossary Index Beckman Coulter I...

Page 32: ...ence plot 3 12 3 11 Prism Plot 3 13 13 1 Laser Labels on the Sensing Compartment Cover 13 2 13 2 Laser Labels in the Sensing Compartment Cover Removed 13 3 13 3 Labels on the Lasers in the Sensing Compartment Cover Removed 13 4 13 4 Laser Labels on the Filter Array Cover Removed 13 5 13 5 Laser Label on the Cytometer Back Panel 13 6 13 6 Laser Labels on the MCL Bar Code Reader 13 7 13 7 Internatio...

Page 33: ...strument_flags Table 4 26 4 15 instrument_installation Table 4 26 4 16 instrument_signals Table 4 26 4 17 instrument_statistic Table 4 26 4 18 lis_transfer Table 4 26 4 19 qc_base Table 4 27 4 20 qc_comment Table 4 29 4 21 qc_data Table 4 30 4 22 qc_instance Table 4 30 4 23 qc_maintenance Table 4 30 4 24 qc_mainttype Table 4 31 4 25 qc_products Table 4 31 4 26 qc_servicelog Table 4 31 4 27 qc_temp...

Page 34: ...xxxiv Tables A 2 Code Related Specifications A 6 ...

Page 35: ...ontents Tab Select a heading table or illustration to view it Select the Index Tab Type in a keyword Double click on any of the related index entries that appear to view them Select the Search Tab Type in a word or phrase for example sample probe Double click on any of the related headings that appear to view them All instances of the word s are highlighted in the text for this example sample samp...

Page 36: ... sequence 1 Press down on thefirst key listed and while continuing to press it press down on the second key listed 2 Release both keys at the same time indicates to press and release the first key listed then press and release the next key listed For example Y Enter Icons buttons to select functions on the software screen are shown within text Example indicates to use the mouse to select the scree...

Page 37: ...ion of Reporting Units Unless otherwise stated all parameter units are shown in the US unit format cells μL throughout the manuals Graphics All graphics including screens and printouts are for illustration purposes only and must not be used for any other purpose Command Function Enter Accepts your selection Esc Stops the operation discarding your choices Tab Moves cursor over different choices if ...

Page 38: ...773232AH xxxviii Introduction Graphics ...

Page 39: ...RT HOUSHO LD BLEACH 5 SOLUTIO NOF SODIUM HYPOCH LORITE AND 9 PARTS WATER RINSE CAROUS EL WITH SOLUTIO N LIGHTLY RUB IF NECESS ARY IMMEDIA TELY RINSE WITH CLEAR WATER CAROUS EL CLEANIN G PREPAR E A SOLUTIO N OF 1 PART HOUSHO LD BLEACH 5 SOLUTIO NOF SODIUM HYPOCH LORITE AND 9 PARTS WATER RINSE CAROUS EL WITH SOLUTIO N LIGHTLY RUB IF NECESS ARY IMMEDIA TELY RINSE WITH CLEAR WATER B C d e g f h ...

Page 40: ...ube Carousel Loader MCL The MCL is an automated sample loader for the instrument It uses a carousel that holds thirty two 12 x 75 mm test tubes The MCL reads the following bar code types Codabar Code 39 bar code Code 128 Interleaved 2 of 5 For additional information on the bar code specifications see Bar code Specifications The MCL mixes each sample before analysis You can use the MCL to automatic...

Page 41: ...ilable for the system are subject to change so contact your Beckman Coulter Representative for the current model selection Workstation Network Server A Beckman Coulter Workstation can be used as an offline acquisition workstation and network server for data and worklist transfer Additional PMTs Additional PMTs and filters are available to configure your system for 8 colors with the standard 2 lase...

Page 42: ...ght Low background Compatible with the characteristics of the sample being measured such as pH osmolality conductivity The internal sheath container has a working capacityof aproximately 500 mL The amount ofsheath fluid the container holds beyond the working capacity is for pressurization and level sensing Cleaning Agent When the Cytometer is in the Cleanse mode FlowClean cleaning agent flushes sa...

Page 43: ...erythrocytes and leukocytes with a known quantity of surface antigens Used to verify monoclonal antibody performance as well as verify the process of sample staining lysing and analysis IMMUNO TROL Low Cells Stabilized erythrocytes and leukocytes with a known quantity of surface antigens Used to verify monoclonal antibody performance as well as verify the process of sample staining lysing and anal...

Page 44: ...773232AH 1 6 Use And Function Material Safety Data Sheets MSDS ...

Page 45: ...ncrates it for installation and setup When you receive your instrument carefully inspect all cartons If you see signs of mishandling or damage file a claim with the carrier immediately If separately insured file the claim with the insurance company Special Requirements Before your Beckman Coulter Representative arrives to install the instrument you must determine where you want the system placed a...

Page 46: ...Total clearance needed 60 5 cm 23 8 in 45 7 cm 18 in min 106 2 cm 41 8 in Width Additional clearance on right for servicing Additional clearance on left for servicing Total clearance needed 95 3 cm 37 5 in 15 2 cm 6 in 15 2 cm 6 in 125 7 cm 49 5 in Depth Additional clearance behind instrument for sufficient cooling and room for servicing Total clearance needed 70 1 cm 27 6 in 3 8 cm 1 5 in 73 9 cm...

Page 47: ... from the Cytometer is connected to a 20 L waste container Dispose of the waste in accordance with your local regulations and acceptable laboratory procedures Europe and other applicable countries One dedicated line at 220 Vac 50 60 Hz at 10 A for the Supply Cart or One dedicated line at 240 Vac 50 60 Hz at 10 A for the Supply Cart Two non dedicated lines at 220 Vac 50 60 Hz at 10 A one for the to...

Page 48: ...lean up spills immediately Dispose of the contents of the waste container in accordance with your local regulations and acceptable laboratory procedures The waste line supplied with the instrument can be connected to an open drain If you use an open drain mechanically secure the waste tube into the drain so the tube cannot accidentally come out of the drain This prevents spillage System Connection...

Page 49: ... Connections 2 Figure 2 1 Power and Signal Cable Connections Waste and Pneumatic Tubing Figure 2 2 shows the interunit connections for waste and pneumatic tubing NOTE Ensure the waste tubing does not exceed the height of the MCL head ...

Page 50: ...773232AH 2 6 Installation System Connections Figure 2 2 Waste and Pneumatic Tubing Connections 1 Vent orange 2 Air blue 3 Vac yellow 4 Sheath white 5 Waste red d f c e b ...

Page 51: ...em operating system and SQL Server NOTE Do not change Windows locale setting Install Navios Software If you are reinstalling Navios Software remove the existing Navios software before proceeding with the installation Uninstalling the Navios software does not remove any of your data files protocols panels or worklists 1 Insert the Navios installation CD into the CD Rom drive 2 to begin installing t...

Page 52: ...8 Installation Installing Navios Software 3 Read the license agreement and if acceptable I accept the terms in the license agreement and 4 to install files in the default folder or to install in a different folder ...

Page 53: ...773232AH 2 9 Installation Installing Navios Software 2 5 the default protocol configuration and the sample protocols you would like to install and 6 the Installation Type and ...

Page 54: ...773232AH 2 10 Installation Installing Navios Software 7 to start the Navios installation 8 9 to exit the installation wizard ...

Page 55: ...e carousel and the tube position number Also you can put bar code labels on the sample tubes See Bar code Specifications The MCL has a bar code reader that reads the carousel number the sample tube position and the sample tube bar code labels as the carousel rotates The MCL handles a sample tube as follows It lifts the tube out of the carousel into a centering cup It moves the bottom of the tube i...

Page 56: ...the sample stream so that the cells flow through the laser beam single file If the cells were to move through the laser beam in different ways during sample flow sample analysis could be distorted Figure 3 1 Flow Cell Laser Beam Shaping Before the laser beams reach the sample stream cross cylindrical lenses focus the beams see Figure 3 2 Focusing keeps the beam perpendicular to the sample stream f...

Page 57: ... and Fluorescent Light The amount of laser light scattered at about a 90 angle to the axis of the laser beam is called side scatter SS The amount of SS is proportional to the granularity of the cell that scattered the laser light For example SS is used to differentiate between lymphocytes monocytes and granulocytes In addition to the SS the cells emit fluorescent light FL at all angles to the axis...

Page 58: ...n for optimal versatility of a wide range of particle size characterization The three FS angle collection options are Wide used for the majority of particles between 1 micron and 20 microns This forward angle collection provides the best non specific size performance blend 1 to 19 FALS angle collection Narrow used for larger particle resolution 40 microns 1 to 8 FALS angle collection Wide Enhanced...

Page 59: ...ned to reduce the number of optical surfaces fluorescence light must pass to reach the photo sensors Their locations relative to the optical axis have also been optimized for light to pass symmetrically through each filter You can individually interchange the optical filters There is no need to realign the optical system when the filters are changed Figure 3 4 Two Laser 6 Color Filter Block Config...

Page 60: ...e intensity of light the sensor received The Cytometer electronics amplify condition integrate and analyze these pulses Peak Signal Figure 3 7 shows how a peak voltage pulse signal forms as a cell crosses the laser beam Part I of Figure 3 7 shows when the cell enters the laser beam and some light is scattered 525 BP 40 575 BP 30 695 BP 30 725 BP 20 620 BP 30 755 LP 755 LP 660 BP 20 550 DC SP 595 D...

Page 61: ...ter or fluorescence determines the height of the peak pulse see Figure 3 7 The time the particle is in the laser beam determines the width of the pulse Therefore the total fluorescence intensity and time determines the area under the pulse Figure 3 8 shows how three cells with the same amount of total fluorescence but with different fluorescence intensities produce different peak pulses Figure 3 7...

Page 62: ...ure 3 8 The height of the integral pulse is proportional to the total fluorescence and is obtained when the cell exits the laser beam The pulse height however represents the most intense amount of fluorescence produced The area under the pulse is proportional to the total fluorescence Figure 3 8 Integral and Peak Pulses 1 Direction of sample flow 2 Cell in laser beam 3 Peak pulses 4 Volts 5 Time 6...

Page 63: ...ion Figure 3 9 Time Of Flight Pulses Amplification Some voltage pulses must be amplified so that the characteristics of the cells can be measured The system lets you Increase the gain to linearly amplify the integral peak and Time of Flight signals Logarithmically transform the linear intregral and peak signal data A logarithmic transformation accentuates the differences between the smaller pulses...

Page 64: ...s Log and linear scaling of the Integral and Peak signals are also available but when Lin and Log parameters are selected for the same signal Peakor Integral thiswill be counted asone parameter TOF is available in linear only Protocols A Protocol is a collection of information about how the Cytometer and Navios software is set up Protocols can be created for acquiring samples or analyzing stored d...

Page 65: ...nse di water PRO that you should use at the end of the working day or shift on your Navios flow cytometer Automated Software Features Navios software contains the following automated software features AutoSetup Wizard QuickCOMP QuickSET Automatic Gate Creation Automatic Gate Maintenance Automatic Color Precedence Elliptical and Contour AutoGating AutoMATOR Analysis Parameters TIME Parameter The TI...

Page 66: ...vide by 64 128 256 or 512 depending upon the plot resolution you are using RATIO Parameter The RATIO parameter is calculated not acquired directly When you select a parameter you specify which signal is the numerator and which is the denominator A ratio of 1 is at channel 1 023 If you assign RATIO to a plot axis RATIO events appear at a lower channel if the intensity of the numerator signal is les...

Page 67: ... With multicolor immunofluorescence a cell is either positive or negative for each of up to ten cell surface markers A particular combination is called a phenotype Prism allows you to display percentages on all phenotypic populations in a single plot It is software derived and can be acquired in either run time or listmode Prism is available on up to ten parameters TIME RATIO and Prism itself cann...

Page 68: ...AutoGate Elliptical AutoGate Positives analysis Minimum Count These functions are not available for all region types Gating The software lets you use gating to specify that only certain cells are to be analyzed A gate can be defined as the events that are inside or out of one or more regions Data Storage Sample results can be printed out saved to removable media saved to a local hard drive or save...

Page 69: ...annels Mean channel number rounded to nearest whole channel For Mean and SD the summations are performed over all the channels that lie within the region Median intensity the smallest intensity such that sum intensity Sum intensity sum of events from the lower edge of the region to the intensity Where FWHM the Full Width Half Max value of a Normal or Gaussian peak Log Region Statistics The method ...

Page 70: ...counts between including marker channels Mean channel number rounded to nearest whole channel For Calibrated values the calculation is reported as the calibrated value in the range Log Offset to The log offset cannot be zero since a log offset of zero is 10 minus infinity which is not possible to represent on paper or on screen Navios software does not allow log offset values of less than 0 1 Numb...

Page 71: ...eported as a value in the range Log Offset to Log offset 10 Decades Full Scale thus The log offset cannot be zero since a log offset of zero is 10 minus infinity Since the graphical scale is actually proportional to the exponent it is not possible to represent this on paper or on screen Because of this problem Navios software does not allow log offset values of less than 0 1 Numbers entered in the...

Page 72: ...773232AH 3 18 Operation Principles Plot Display ...

Page 73: ...Category II per IEC 1010 1 standard Acoustic Noise Level Measure Level 60 dBa Component Height Width Depth Weight Computer 43 2 cm 17 in 20 3 cm 8 in 45 7 cm 19 in 12 3 kg 27 lb Cytometer and MCL 60 5 cm 23 8 in 95 3cm 37 5 in 70 1 cm 27 6 in 104 kg 230 lb Monitor typical 53 34 cm 21 in 50 8 cm 20 in 25 4 cm 10 in 7 0 kg 15 5 lb Supply Cart 29 8 cm 11 75 in 72 4 cm 28 5 in 49 5 cm 19 5 in 30 39 kg...

Page 74: ...y Lasers Solid state software controlled 22 mW blue laser operating at 488 nm and Solid state software controlled 25 mW red laser operating at 638 nm Optional third laser Solid state software controlled 40 mW violet laser operating at 405 nm Laser Power Monitoring Laser power is monitored by each laser individually If the laser power deviated more than 10 a Laser Power Error is displayed on the St...

Page 75: ...750 represents a 1 to 4 change in gain Linear amplification gain by 1 0 2 0 5 0 7 5 10 20 50 75 100 200 500 or 750 for FS and SS Linear amplification gain by 1 0 or 2 0 for FL1 FL10 Four decade digital logarithmic transformation of FS SS and FL1 FL10 Note A scale of 0 1 to 1 000 is displayed on the plot axis for logarithmic parameters but the default statistics are based on an actual scale of 0 10...

Page 76: ...ors that use available RAM RAM is limited by other factors such as other software applications running simultaneously total number of events acquired number of parameters data rate FlowPAGEs present autogating movement of regions with many events in cache memory linked regions For example if you have several parameters FlowPAGEs a high data rate and you are moving regions you may receive a RAM mem...

Page 77: ...n FCS 3 0 dataset Copy and Paste or Drag and Drop plots images to third party programs such as MS Word Full color printouts with the appropriate optional Printer Printout of sample results and patient reports with FlowPAGE and desktop printing PDF format for Acquisition printouts or FlowPAGE reports Printout of Worklist for the MCL Compatibility with ALTRA Elite XL XL MCL and FC 500 flow cytometer...

Page 78: ...te counts are automatically printed on the Panel Report Dual Platform Method The Dual Platform Method calculates absolute counts by combining results from hematology and flow cytometry and using the following formula Absolute Count cells μL Total White Blood Cell Count cells μL x Lymphocytes x Positively Stained Cells of Interest 104 Absolute counts are obtained using the Report function of the Na...

Page 79: ... Polygonal Elliptical Contour Listmode Analysis The instrument can store up to 16 parameters including TIME and RATIO as listmode data The amount of available random access memory RAM in the computer determines the maximum size of a listmode file See RAM Random Access Memory Locked Protocols User defined protocols can be locked or unlocked by a System Administrator and password protected to preven...

Page 80: ...r the panel in the current user s panel folder and panel subfolders and then searches the common panel folder and panel subfolders Default AutoSetup Protocols and Panels The following AutoSetup panels and protocols are included with Navios software NOTE Do not delete any protocol that is associated with an Application Name All protocols must be present for an application to run correctly LMD FCS l...

Page 81: ...tion Wizard may be edited If different regions widths are desired open the appropriate _Stand protocol onto the workspace and edit the regions Save the protocol Subsequent scheduling of the application uses the edited regions Forward Scatter linear 20 Side Scatter linear 50 Fluorescence Parameters logarithmic 1st decade beginning or low end 0 1 1st decade high end 0 3 2nd decade beginning or low e...

Page 82: ... to the beginning and end of the other parts as specified by the FCS 2 0 standard The standard also calls for an optional ANALYSIS part The data files generated by the Navios cytometer do not contain an ANALYSIS part and its offsets are left blank in the HEADER part Each offset specified in the HEADER part is referred to the beginning of the HEADER part itself TEXT Part The TEXT part contains a se...

Page 83: ...periment name from Workspace Preferences FIL File name excluding path INST Institution name from Workspace Preferences INSTADDRESS The address of the facility MODE Single character defining mode of data L listmode NEXTDATA Byte offset into binary data for next data item In this case it is the offset to the beginning of the FCS 3 0 section OP Operator ID that is user ID PAR Number of parameters sel...

Page 84: ...at end of acquisition BLUELASERPOWER_START Blue laser power at start of acquisition BLUELASERSHUTTER Blue laser shutter status BLUETARGETPOWER Blue laser target power BUILDNUMBER Software build number CAROUSEL Carousel number read from the sample loader CYTOLINKMULTIPLECLIENT Indicates whether other Cytolink client was connected to CytoLink during acquisition of the LMD file TRUE or FALSE CYTOMETE...

Page 85: ...START Red laser power at start of acquisition REDLASERSHUTTER Red laser shutter status REDTARGETPOWER Red laser target power RESAVEDFILE Displays Runtime Protocol if the current file is exactly as at the end of acquisition if any changes are made post acquisition and the LMD file is resaved the new file displays New Protocol SAMPLEID1 User defined string SAMPLEID2 User defined string SAMPLEID3 Use...

Page 86: ...inal non Baseline Offset data The following image displays an example of Baseline Offset data where 1 represents Parameter data and 2 represents Event data Acquisition Protocol Section This section contains the protocol used during data acquisition The protocol offset is obtained by reading the value of ACQUISITIONPROTOCOLOFFSET keyword from the TEXT part of the FCS 2 0 section The format of the a...

Page 87: ...on matrix The order of the parameters in the matrix is determined by the index assigned to each parameter in the TEXT segment See the PAR keyword for more information about acquired parameters DATATYPE Single character defining base data type of binary data I integer ENDANALYSIS Offset to the end of the ANALYSIS segment This value is always 0 ENDDATA Offset to the end of the DATA segment This valu...

Page 88: ...n a pre release version of the FCS 3 1 its implementation does not match the released version of the FCS 3 1 standard TOT Total number of events acquired BARCODE Barcode read from the sample loader or NoRead if nothing is read BLUELASERPOWER_END Blue laser power at end of acquisition BLUELASERPOWER_START Blue laser power at start of acquisition BLUELASERSHUTTER Blue laser shutter status Open or Cl...

Page 89: ...g there is the ordered list of parameters as reported by the cytometer Up to a maximum of 16 parameters from this list can be collected Parameter indices are assigned incrementally starting from 1 following the order listed FS Peak FS Int FS TOF SS Peak SS Int SS TOF FL1 Peak FL1 Int FL1 TOF FL2 Peak FL9 TOF FL10 Peak FL10 Int FL10 TOF TIME Database Structure The information in this section specif...

Page 90: ...773232AH 4 18 Specifications Software Specifications 1 2 3 ...

Page 91: ...773232AH 4 19 Specifications Software Specifications 4 4 5 Navigate to C Program Files Microsoft SQL Server MSSQL 1 MSSQL BINN and double click on sqlservr 6 7 and close the Control Panel windows ...

Page 92: ...llow Nulls Y Instance int 4 Y idx tinyint 1 file_path nvarchar 256 image_file nvarchar 48 protocol nvarchar 48 plot_id int 4 plot_string nvarchar 48 Table 4 4 cytoinfo Table Key Column Name Data Type Length Allow Nulls Y instance int 4 Y line_number smallint 2 description nvarchar 32 Y info_count decimal 15 3 Y lo_count decimal 9 3 hi_count decimal 9 3 info_percent decimal 15 4 Y lo_percent decima...

Page 93: ... 260 Y cyto_serial_run nvarchar 10 panel_name nvarchar 48 panel_path nvarchar 199 panel_complete nvarchar 1 panel_match nvarchar 1 run_datetime datetime 8 entry_datetime datetime 8 run_source nvarchar 1 ivd nvarchar 1 algorithm_name nvarchar 12 Y algorithm_version nvarchar 8 Y user_id nvarchar 24 si_units nvarchar 1 count_method nvarchar 1 comment nvarchar 750 Y specimen_id nvarchar 24 patient_id ...

Page 94: ... Y platelets int 4 Y other_name nvarchar 15 Y other_val int 4 Y wbc int 4 Y rbc int 4 Y specimen_datetim e smalldatetime 4 Y print_ranges nvarchar 1 first_tube_id nvarchar 24 Y last_tube_id nvarchar 24 Y dil_factor decimal 6 2 Y harvest_vol decimal 6 2 Y body_weight decimal 5 2 Y results_decimal_pl aces smallint 2 first_lmd_revision_ number int 4 Y last_lmd_revision_ number int 4 Y panel_revision_...

Page 95: ... Y mi nvarchar 1 Y birth smalldatetime 4 Y sex nvarchar 1 Y ssn nvarchar 12 Y specimen_type tinyint 1 Y physician nvarchar 31 Y hemo_instrument nvarchar 12 Y hemo_datetime smalldatetime 4 Y lymphs decimal 4 2 Y monos decimal 4 2 Y ne decimal 4 2 Y eo decimal 4 2 Y ba decimal 4 2 Y platelets int 4 Y other_name nvarchar 15 Y other_val int 4 Y wbc int 4 Y rbc int 4 Y specimen_datetime smalldatetime 4...

Page 96: ...nt nvarchar 1 auto_pdf nvarchar 1 auto_xls nvarchar 1 ivd nvarchar 1 algorithm_idx smallint 2 comment nvarchar 750 Y entry_datetime datetime 8 user_id nvarchar 24 print_ranges nvarchar 1 results_decimal_places smallint 2 Table 4 9 cytotemplate_image Table Key Column Name Data Type Length Allow Nulls Y panel_name nvarchar 48 Y cyto_serial_num nvarchar 10 Y panel_path nvarchar 199 Y plot_num smallin...

Page 97: ...ype nvarchar 3 Y lo_percent decimal 7 3 hi_percent decimal 7 3 lo_count decimal 11 3 hi_count decimal 11 3 optstat1_name int 4 Y optstat2_name int 4 Y prt nchar 1 do_percent bit 1 do_count bit 1 do_opt1 bit 1 do_opt2 bit 1 do_result bit 1 Table 4 11 in_use_flags Table Key Column Name Data Type Length Allow Nulls Y user_id varchar 24 Y table_name varchar 64 in_use bit 1 cytometer varchar 12 Y lockD...

Page 98: ...1 when_updated datetime 8 Y Table 4 15 instrument_installation Table Key Column Name Data Type Length Allow Nulls Y subject varchar 32 content varchar 64 Y cytometer varchar 10 Y user_id varchar 24 Table 4 16 instrument_signals Table Key Column Name Data Type Length Allow Nulls Y signal_index int 4 signal_name varchar 10 Table 4 17 instrument_statistic Table Key Column Name Data Type Length Allow ...

Page 99: ...varchar 48 qc_protocol varchar 48 FL1_FL2 float 8 FL1_FL3 float 8 FL1_FL4 float 8 FL1_FL5 float 8 FL1_FL6 float 8 FL1_FL7 float 8 FL1_FL8 float 8 FL1_FL9 float 8 FL1_FL10 float 8 FL2_FL1 float 8 FL2_FL3 float 8 FL2_FL4 float 8 FL2_FL5 float 8 FL2_FL6 float 8 FL2_FL7 float 8 FL2_FL8 float 8 FL2_FL9 float 8 FL2_FL10 float 8 FL3_FL1 float 8 FL3_FL2 float 8 FL3_FL4 float 8 FL3_FL5 float 8 FL3_FL6 floa...

Page 100: ...t 8 FL5_FL4 float 8 FL5_FL6 float 8 FL5_FL7 float 8 FL5_FL8 float 8 FL5_FL9 float 8 FL5_FL10 float 8 FL6_FL1 float 8 FL6_FL2 float 8 FL6_FL3 float 8 FL6_FL4 float 8 FL6_FL5 float 8 FL6_FL7 float 8 FL6_FL8 float 8 FL6_FL9 float 8 FL6_FL10 float 8 FL7_FL1 float 8 FL7_FL2 float 8 FL7_FL3 float 8 FL7_FL4 float 8 FL7_FL5 float 8 FL7_FL6 float 8 FL7_FL8 float 8 FL7_FL9 float 8 Table 4 19 qc_base Table K...

Page 101: ...FL9_FL3 float 8 FL9_FL4 float 8 FL9_FL5 float 8 FL9_FL6 float 8 FL9_FL7 float 8 FL9_FL8 float 8 FL9_FL10 float 8 FL10_FL1 float 8 FL10_FL2 float 8 FL10_FL3 float 8 FL10_FL4 float 8 FL10_FL5 float 8 FL10_FL6 float 8 FL10_FL7 float 8 FL10_FL8 float 8 FL10_FL9 float 8 Table 4 20 qc_comment Table Key Column Name Data Type Length Allow Nulls Y qc_instance int 4 qc_comment varchar 32 Table 4 19 qc_base ...

Page 102: ... 8 qc_gain float 8 qc_percent_pos float 8 qc_reference char 1 qc_user_id varchar 24 qc_inc int 4 qc_code int 4 qc_lot varchar 9 qc_mode float 8 qc_gate_pcnt float 8 qc_total_pcnt float 8 qc_xy bit 1 Table 4 22 qc_instance Table Key Column Name Data Type Length Allow Nulls Y qc_instance int 4 qc_characteristic char 1 Table 4 23 qc_maintenance Table Key Column Name Data Type Length Allow Nulls Y mn_...

Page 103: ...qc_assay int 4 Y qc_expiration smalldatetime 4 Y qc_received smalldatetime 4 Y qc_enter_service smalldatetime 4 Y Table 4 26 qc_servicelog Table Key Column Name Data Type Length Allow Nulls Y sv_cytometer char 10 Y sv_date smalldatetime 4 Y sv_user nvarchar 24 Y sv_condition nvarchar 256 sv_action_date smalldatetime 4 Y sv_action_user nvarchar 24 Y sv_action_taken nvarchar 256 Y Table 4 27 qc_temp...

Page 104: ...1 qc_plot_statistic varchar 31 qc_plot_region varchar 31 Y qc_user_id varchar 31 Y qc_instrument varchar 31 qc_application varchar 48 Y qc_user_label varchar 20 qc_xy bit 1 Table 4 28 SettingsTable Key Column Name Data Type Length Allow Nulls Y Description varchar 50 Value varchar 50 Table 4 29 SexTable Key Column Name Data Type Length Allow Nulls Y Sexcode varchar 1 SexName varchar 10 Table 4 27 ...

Page 105: ...second Electronic pulses were counted from the beads passing through the aperture as measured by discriminator events The count from the histogram display printout was assessed against the number of pulses counted electronic count Yield percentage was taken from the Stored Events counter At 25 000 events per second the yield was measured to be 90 Data Acquisition Throughput Throughput including pr...

Page 106: ...asurements of multi level fluorescence sensitivity particles were taken on 3 Navios Flow Cytometers Acquisition was conducted on 10 000 bead stop count at the medium flow rate For the FITC and PE measurements 8 peak Spherotech Rainbow Calibration Particles RCP 30 5A were used For the PeCY5 and APC Spherotech Ultra Rainbow Calibration Particles URCP 38 2K were used The following values represent th...

Page 107: ... of biological and physical properties of cells and other particles to generate multiparametric results for In Vitro Diagnostic use The instrument can simultaneously measure forward scatter side scatter and up to ten fluorescent dyes using three solid state lasers at 488 nm 638 nm and 405 nm Therefore the instrument can perform correlated multiparameter analyses of individual cells ...

Page 108: ...G PREPARE A SOLUTION OF 1 PART HOUS HOLD BLEAC H 5 SOLUTIONO F SODIU M HYPO CHLO RITE AND 9 PARTS WATER RINSE CARO USEL WITH SOLUTION LIGHT LY RUB IF NECE SSARY IMMEDIATE LY RINSE WITH CLEAR WATER CARO USEL CLEANING PREPARE A SOLUTION OF 1 PART HOUS HOLD BLEAC H 5 SOLUTIONO F SODIU M HYPO CHLO RITE AND 9 PARTS WATER RINSE CARO USEL WITH SOLUTION LIGHT LY RUB IF NECE SSARY IMMEDIATE LY RINSE WITH C...

Page 109: ...773232AH 5 3 System Overview Cytometer Controls And Indicators 5 Cytometer Indicator Panel 1 Level Sense and Flow Indicators 2 Signal Amplitude Indicators FLOW CLEANSE WASTE SHEATH STATUS b c ...

Page 110: ...efaults to the log signal Cytometer Ready and Sheath Flow Indicators 1 Blue indicates the signals from the 488 laser FS SS FL1 FL2 FL3 FL4 and FL5 2 Red indicates the signals from the 638 laser FL6 FL7 and FL8 3 Green indicates the signals from the 405 laser FL9 and FL10 FLOW CLEANSE WASTE SHEATH STATUS b c d FLOW ready when green STATUS ready when green FLOW CLEANSE WASTE SHEATH STATUS ...

Page 111: ...LEA NING PREP ARE A SOLU TION OF 1 PART HOUS HOLD BLEA CH 5 SOLU TIONO F SODI UM HYPO CHLO RITE AND 9 PART S WATE R RINSE CARO USEL WITH SOLU TION LIGHT LY RUB IF NECE SSAR Y IMME DIATE LY RINSE WITH CLEA R WATE R CARO USEL CLEA NING PREP ARE A SOLU TION OF 1 PART HOUS HOLD BLEA CH 5 SOLU TIONO F SODI UM HYPO CHLO RITE AND 9 PART S WATE R RINSE CARO USEL WITH SOLU TION LIGHT LY RUB IF NECE SSAR Y ...

Page 112: ...get the Windows Administrator password you must reimage your hard drive causing the loss of all data Taskbar At the bottom of the screen is the Taskbar It contains the Start button on the left hand side and a clock on the right Other icons are displayed on the Taskbar depending on the configuration of the hardware and software of your particular computer When a program is opened a button for that ...

Page 113: ...u need to use a basic technique but cannot remember how use the System Help Index or Search tab to look it up and get the step by step instructions MCL Carousels The Navios Flow Cytometry System starter kit has Two carousels each with 32 tube positions A sheet of bar code labels numbered 01 to 99 for you to use to identify the carousels Bar Code Labels You can put a bar code label on each sample t...

Page 114: ...r code labels to prevent incorrect sample identification Bar code label incorrectly placed on sample tubes could cause misidentified tubes To prevent misidentified samples affix the bar code label as shown below so the MCL can read the label Putting a Bar Code Label on a Sample Tube 1 Carefully align the label with the tube 2 Press the label down securely including edges and corners without wrinkl...

Page 115: ...s not matter The MCL rotates the tube to find the bar code label Do not skip tube positions within a panel The Navios flow cytometer does not skip a protocol in a panel when a carousel tube position is empty If you lose a sample delete that protocol from the panel using the Acquisition Manager You can skip a single tube position to separate two panels based on your tube location setup in Acquisiti...

Page 116: ...ARO USEL CLEA NING PREP ARE A SOLU TION OF 1 PART HOUS HOLD BLEA CH 5 SOLU TIONO F SODI UM HYPO CHLO RITE AND 9 PART S WATE R RINSE CARO USEL WITH SOLU TION LIGHT LY RUB IF NECE SSAR Y IMME DIATE LY RINSE WITH CLEA R WATE R CARO USEL CLEA NING PREP ARE A SOLU TION OF 1 PART HOUS HOLD BLEA CH 5 SOLU TIONO F SODI UM HYPO CHLO RITE AND 9 PART S WATE R RINSE CARO USEL WITH SOLU TION LIGHT LY RUB IF NE...

Page 117: ... HOUS HOLD BLEA CH 5 SOLU TIONO F SODI UM HYPO CHLO RITE AND 9 PART S WATE R RINSE CARO USEL WITH SOLU TION LIGHT LY RUB IF NECE SSAR Y IMME DIATE LY RINSE WITH CLEA R WATE R CARO USEL CLEA NING PREP ARE A SOLU TION OF 1 PART HOUS HOLD BLEA CH 5 SOLU TIONO F SODI UM HYPO CHLO RITE AND 9 PART S WATE R RINSE CARO USEL WITH SOLU TION LIGHT LY RUB IF NECE SSAR Y IMME DIATE LY RINSE WITH CLEA R WATE R ...

Page 118: ...ndard Windows techniques for providing shortcuts to functions Keyboard Shortcuts Drag And Drop Toolbar Buttons Keyboard Shortcuts Where Ctrl X means hold Ctrl down and press X Ctrl C Copy Ctrl V Paste Ctrl X Cut Ctrl Z Undo Ctrl Y Redo Ctrl W Workspace Preferences Ctrl T Tile Special Ctrl P Print Ctrl N New Protocol Ctrl S Save Protocol ...

Page 119: ...te new Histogram Plot Ctrl 4 Create new Density Plot Ctrl 8 Create new Prism Plot Ctrl 9 Create new Legend Plot Ctrl 0 Create new Info Plot Alt F4 Exit active window F1 Context Sensitive Help F5 Refresh Screen F7 Publish to Excel or text file F9 Start Acquisition F10 Stop Acquisition F11 Pause Acquisition F12 Abort Acquisition Table 5 1 Drag And Drop Table Drag From Action Resource Explorer Workli...

Page 120: ...ist Cytometer Toolbar Report Generator Toolbar Gates Drag a gate to gate ALL plots or with Ctrl pressed ONLY the current plot AutoMATOR Setup Rearrange files Reorder files for playback using the AutoMATOR application Modify Color Precedence Reorder Gates Drag gates into the required precedence order Plots Regions Drag copies of regions from one plot to another with Ctrl pressed gate logic is also ...

Page 121: ...given sample CAUTION Risk of erroneous results if the parameter order is changed or parameters are added or deleted To prevent reporting erroneous results verify the protocol s plots regions and gates before reporting results 4 If the parameters have changed a b Enter the desired protocol File name and c on the Cytometer Control screen 5 Create the Plots required for acquisition See Plots Menu 6 I...

Page 122: ...11 Set up the Worklist and run samples 12 Setup Mode on the Cytometer Control Acquisition Setup Tab and adjust the instrument settings 13 When satisfied with the data deselect Setup Mode and continue acquisition 14 Once sufficient data is collected File Save Protocol to update the protocol with the new instrument settings Creating Regions Create Polygonal Regions Create Rectangular Regions Create ...

Page 123: ... that it is not the one you want press Esc before the region is completed The Region is deleted To change the Region type stay in the current plot choose the desired region type from the Region menu or click a Region shortcut button for whatever Dual Parameter Region type you wish 7 Close the Region by returning the cursor to the starting box and clicking to conclude Region creation 8 The Region N...

Page 124: ...utton to complete the Region 6 The Region Name appears on the plot Create Quadrant Regions The Quadrant Region is a FlexQuad Quadrant Region You can adjust the angle of quadrant dividers to adequately analyze populations that are properly compensated with the negative data display The dividers between FlexQuad quadrants 1 and 2 and between quadrants 2 and 4 are flexible which allows you to better ...

Page 125: ...f you decide that it is not the one you want press Esc before the Region is completed The Region is deleted Repositioning a Quadrant Region 1 Mouse over the Quadrant region lines to get the or cursor 2 Reposition the region a hold and drag to move the vertical divider b hold and drag to move the horizontal divider c hold and drag to move the Quadrant region Before repositioning FlexQuad dividers 3...

Page 126: ... where you want the Region to begin Click two vertical lines with a horizontal bar appears 4 Move the cursor left or right up or down until the desired end point of the Region is reached to accept the settings and anchor the region When drawing a Region if you decide that it is not the one you want press Esc before the Region is completed The Region is deleted After setting the Region position the...

Page 127: ...he right hand top corner or the window 4 Move the cursor left or right up or down until the desired end point of the Region is reached to accept the settings and anchor the region 5 Repeat this procedure until all Regions are set 6 When you have drawn all of your Multi Linear Regions press Esc or move the cursor onto the stop box in the right hand top corner click This ends the Multi Linear sequen...

Page 128: ...773232AH 5 22 System Overview Creating Gates 2 or 3 on the population to AutoGate 4 To specify the AutoGate Sensitivity and Travel a the region ...

Page 129: ...Region Properties c Specify the AutoGating Sensitivity and Contour Travel if necessary and 5 Right mouse click on the plot you want to assign the AutoGate to and select Format to display the Plot Properties dialog 6 the gating drop down list and select the AutoGate to gate the plot on the AutoGate ...

Page 130: ...ygonal Region to an AutoGate Region 1 region to make it active 2 Click the right mouse button on the region and Region Properties 3 either Elliptical or Contour in the Polygonal Region Properties screen Automatic Gate Creation This option allows you to create a new gate automatically when a new Region is drawn If this option is not selected you must use Analysis Create Modify Gates to create gatin...

Page 131: ...mple of a FlowPAGE This is a screen view only A full printed page outputs at a much higher resolution See also FlowPAGE Menu in the Using Navios Software chapter 1 to create a blank FlowPAGE 2 to insert a picture 3 Insert Flowpage Plots 4 Insert a FlowPAGE Statistics Table 5 Insert a FlowPAGE Textbox c d e g f ...

Page 132: ...ensation Grid 7 Click the right mouse button on any object on the FlowPAGE to select additional formatting options Delete FlowPAGES 1 in the upper left corner of the FlowPAGE window to be deleted and Close NOTE FlowPAGES in a locked protocol can not be inserted deleted or edited ...

Page 133: ...nel must be recreated If the worklist is not re created the panel in the worklist may not match the newer version of the panel 1 File New Panel to start the Panel Wizard 2 Enter the New Panel name 3 Select the Number of Tests required The default value is 1 and the maximum is 32 4 Export the results of this panel to the Report Generator if you want a Patient Panel Report generated when you run thi...

Page 134: ...ol Use Instrument Settings 7 Choose your Region Settings Use Regions from Protocol Carry Regions from Previous Protocol Use Regions from This Protocol 8 Choose your Instrument Settings Use Instrument Settings from Previous Test Use Instrument Settings from External File 9 Double on parameter names under Probe Stain name to assign the Parameter Names ...

Page 135: ...trument settings from the selected Protocol If the checkbox is disabled this allows the Instrument Settings below to be active Use Regions from Protocol This option loads all regions stored within the current protocol Carry Regions from Previous Protocol Selecting this option allows region positions to be carried from the previous test in a panel Any regions of the same type and drawn on the same ...

Page 136: ...to be scheduled Do not add any protocols or panels to Acquisition Manager that has scheduled Applications or AutoSetup II protocols Always select New Worklist after scheduled QC Applications or Autosetup protocols are run Modifications to a multi tube panel may impact any associated panel templates or worklists Beckman Coulter recommends that all templates and worklists containing a panel that has...

Page 137: ...nt protocol is required in the protocol field Verifying A Worklist Always verify carousel and tube location fields before starting acquisition and ensure that the Acquisition Manager information accurately reflects the tubes in the carousel being run The order of the tubes in the carousel must match the order of the tubes in the Worklist The default protocol Ctrl N must be saved prior to being use...

Page 138: ...ch options The Help system is an electronic version of the Instructions For Use Manual It includes a table of contents an index for finding information quickly and a glossary of definitions See also Help Menu Access System Help Use one of these options to access the System Help Help Navios Help F1 NOTE If you cannot access the System Help contact your Beckman Coulter Representative How to Use Help...

Page 139: ...AH 5 33 System Overview Using The System Help 5 Information about the Help window and instructions for using help are displayed in the navigation pane 1 Toolbar 2 Navigation Bar 3 Topic Pane 4 Navigation Pane ...

Page 140: ...773232AH 5 34 System Overview Using The System Help ...

Page 141: ...y 4 If conditions cause static charge to exist in your lab be sure to properly ground yourself before touching the instrument 5 Shutdown and restart the system computer once per day to allow the virus protection program to run See Power the Computer and Cytometer OFF and Power the Computer and Cytometer ON Do not start a full disk virus scan while running Navios software Daily Startup Perform the ...

Page 142: ...ine Daily Startup Check Waste and Reagent Levels 1 Empty the waste container and verify tubing is connected to the cap 2 Check the sheath fluid level and Replace The 10 L External Sheath Fluid Container container if necessary ...

Page 143: ...3 Daily Routine Daily Startup 6 3 Check the cleaning agent fill level 1 and fill the cleaning agent container if necessary Power the Computer and Cytometer ON Turning On Power Turn on the system at the computer b ...

Page 144: ...n to Windows screen appears 1 Select your username icon 2 Enter your Password and NOTE If your computer is part of a network you may need to enter the User name and Password assigned by your network manager Logging Onto Navios Software 1 to start the software and power up the Cytometer ...

Page 145: ... At the Navios Cytometer Startup Wizard Page 1 of 2 screen a Highlight your User ID b Enter your Password c NOTE For additional information about this screen see Multi user Sign On If you need to set up User IDs see User Administration 3 4 During system startup the following series of Cytometer status messages are displayed The startup cycle includes a prime cycle Initialization Awaiting Sample ...

Page 146: ...place if necessary Daily Shutdown When to Shut Down the Cytometer Shut down the instrument at least once a day even if it is intended for use 24 hours per day Leave the instrument shut down for at least 30 minutes before restarting Shutdown and restart the system computer once per day to allow the virus protection program to run See Power the Computer and Cytometer OFF and Power the Computer and C...

Page 147: ...currently displaying the Idle mode If yes the message Press Idle Mode button to initialize appears at the bottom of the screen Go to step 2 If no Put The Cytometer In The Idle Mode 2 in all open windows 3 or 4 to turn off the Cytometer 5 to shutdown the Workstation 6 Turn off the monitor and printer separately ...

Page 148: ...d then 70 ethanol Pay special attention to the Sampling area 2 Keep the system shut down for 30 minutes Before running samples do the daily startup and quality control procedures Refer to the Maintenance Log for additional cleaning procedures 3 Record daily shutdown and cleaning on the electronic Maintenance Log Extended Shutdown If you intend to leave the instrument in the shutdown state for an e...

Page 149: ...TION Misleading results could occur if you contaminate the sheath fluid Be careful not to contaminate the sheath fluid Do not let your fingers paper towels or other objects touch the pickup tube assembly 3 Lift the pickup tube assembly straight up and out 4 Insert the pickup tube assembly into a container of distilled water ...

Page 150: ...773232AH 6 10 Daily Routine Extended Shutdown 5 Remove the internal sheath fluid and cleaning agent containers 6 Rinse the inside of both containers with water ...

Page 151: ...ocedure 8 Fill the cleaning agent container with distilled water 9 Cap and replace the internal sheath fluid and cleaning agent containers 10 Perform the Routine Cleaning Procedure except use tap water in all four tubes Do not use any bleach or IsoFlow sheath fluid 11 When you start up the instrument for the first time after the extended shutdown If disconnected reconnect the pickup tube assembly ...

Page 152: ...ner with sheath fluid Fill the cleaning agent container with cleaning agent Perform the Routine Cleaning Procedure Perform Daily QC before running samples Cytometer Auto Startup You can set up the system to automatically Startup or Shutdown the Cytometer The computer must be on with Windows running to allow Auto Startup to run 1 All Programs Navios Cytometer Tasks ...

Page 153: ...773232AH 6 13 Daily Routine Cytometer Auto Startup 6 2 and or 3 Set the desired Startup and or Shutdown time 4 Apply the settings as desired 5 ...

Page 154: ...773232AH 6 14 Daily Routine Cytometer Auto Startup ...

Page 155: ...your application These include Parameters Angle of Forward Light Scatter Discrimination Parameter Discriminator Value Flow Rate Voltages and Gains Plot Selection Regions and Gating Parameters Parameters are the signals generated by the instrument sensors See Signal Processing and Cytometer Control Parameter Setup for additional information about the available parameters Angle of Forward Light Scat...

Page 156: ...eating coincidence and higher CVs broadening of the peak See Flow Rate for instructions on changing the flow rate See Figure 3 9 in the Time Of Flight Signal section for an example of using the Time of Flight parameter to detect coincidence Voltages and Gains These settings are used to position the signal for each parameter in the desired position See Cytometer Control Acquisition Setup Tab for in...

Page 157: ...ing the fluorospheres QC Process QC Material Used Verify fluidics and laser alignment Flow Check Pro Fluorospheres Verify HPCV versus expected value Export results to the QC Database and review the QC data Adjust high voltage and gain for a given application Flow Set Pro Fluorospheres Ascertain target mean position based upon application and adjust high voltage and gain daily to that target Export...

Page 158: ...titute the Cyto trol Control Cells according to the instructions on the package insert b Stain the cells with the monoclonal antibodies you use for the protocol or panel 5 Run the AutoSetup Scheduler Autosetup Scheduler Use the AutoSetup Scheduler to select the applications that you need to run on the instrument in a given day or shift AutoSetup Scheduler groups the selected applications for effic...

Page 159: ...appear in the list use the Application Definition Wizard to define the application NOTE Using the descriptor QC in front of any protocol name appends the results of multiple Flow Check Pro runs to a single spreadsheet See Workspace Preferences Acquisition Options to automatically export data to MS Excel for Quality Control monitoring or basic spreadsheet data entry 3 Enter the Carousel number and ...

Page 160: ...red and use the Acquisition Manager to enter the CAL Factor 5 Place tubes in the carousel in the order shown on the Carousel Load Report 6 If you entered a CAL Factor in step 4 above on the Cytometer Toolbar to run AutoSetup II 7 If absolute counts are not required on the Carousel Load Report screen to run AutoSetup II ...

Page 161: ...ing Sample appears Record any error messages on the electronic Maintenance Log Set up Workspace Preferences Acquisition Options to print results Set up Workspace Preferences LMD File Name to specify listmode file names Follow the directions in the Flow Check Pro fluorospheres package insert for details on storage and handling Establish Flow Set Pro fluorospheres target channels foryourlaboratoryan...

Page 162: ... Application starts view all histograms to ensure peaks fall within regions a Setup Mode on the Cytometer Control Acquisition Setup Tab b Adjust voltages to place peaks within regions c Uncheck Setup Mode d When acquisition of the Alignment stops check that the AutoSetup II Wizard dialog does not have QC Failed due to the HPCV exceeding the limit identified in each region name ...

Page 163: ...he following troubleshooting steps and repeat scheduling and running the alignment application 1 Run a Cleanse Cycle 2 Clean The Sampling System 3 STANDARIZATION APPLICATIONS When the _STAND protocol s data acquisition starts view all histograms to ensure peaks fall within regions NOTE When running a negative control verify that the AutoGate is around the population of interest in the FS vs SS dot...

Page 164: ...e regions The Wizard dialog box displays a list of the parameters remaining to be adjusted If the Wizard cannot adjustpeaksto theregionswithin 60 seconds AutoSetup aborts and the parameters that failed are listed The compensation tubes are used to calculate the compensation coefficients required all these tubes are run in the same way ...

Page 165: ...L4 and FL5 Verification samples are run to ensure the calculated coefficients are satisfactory for the samples and antibodies you are using in your tests NOTE If multiple applications are scheduled together samples common to the applications are processed in tandem without dropping the tube The protocol is displayed during processing ...

Page 166: ...list before Finish is selected on the AutoSetup II Wizard and the desired Approve Instrument Settings option in Step 5 has been selected 5 Check the printed verification tube results to ensure instrument settings are correct and NOTE Due to differences between individual instruments settings files should not be transferred from one instrument to another If you attempt to use settings files from an...

Page 167: ...rs fluorochromes target channels verification and alignment requirements of a particular application Before Running the Application Definition Wizard Establish Flow Set Pro fluorospheres target channels for your laboratory Follow the directions in the Flow Set Pro fluorospheres package insert Ensure that the base protocolyou usetodefine anapplicationcontainsonly theparametersthat you use in the ap...

Page 168: ...nition Wizard 2 one of the following options Application available only to current user Application available to all users common 3 one of the following options Create a new application definition Modify an existing application definition and then ...

Page 169: ...select the protocol to use as the base protocol for the application The Protocol Summary displays a description of the parameters and laser setup for the selected protocol NOTE The Compensation Parameters in the Base Protocol must be in the first 16 Parameters selected ...

Page 170: ...r Block selected Alignment applications must have the appropriate laser selection made See Cytometer Control Parameter Setup NOTE The software displays a filter configuration in the Application Definition Wizard that does not represent the default filter configuration See Fluorescent Light in CHAPTER 3 Operation Principles for the default optical filter reference ...

Page 171: ...finition Wizard 7 6 the dyes you use for each fluorescence detector and 7 Select a QC product and enter a target channel for Forward Scatter Side Scatter and each fluorescence detector Refer to Target Value Entry Description for more information ...

Page 172: ...e application name will cause the Application Definition Wizard to create the applications protocols with AS as a part of the protocol name This will readily distinguish qc application protocols from other protocols Selecting the Create Playback Panel ppp checkbox automatically creates an equivalent panel for the Listmode Playback Tool to create compensation files if desired ...

Page 173: ...fication protocol or panel Use the buttons to add remove and reorder multiple verification protocols NOTE Any panels used for Quality Control must be constructed with unique individual protocols 10 A summary report is displayed for the application you just defined The application definition is available for use with the AutoSetup Scheduler ...

Page 174: ...o the Application Definition Wizard except where the value entered exactly matches a channel value The change in Target Channel value is due to the rounding effect on log scale data For example consider the third decade marker This equates to the log value of 102 4 on the 0 1024 to 1024 scale of the axis The next channel down has a value of 101 5 and the next channel up 103 3 Region positions are ...

Page 175: ...select which combination of lasers the Alignment Application is to process Only Laser Selection combinations appropriate to the current instrument hardware configuration will be enabled The selected Lasers will be used by the software to determine the template Alignment Protocol to be used by the Application Setting Up QC Products 1 on the Report Generator toolbar to display the Edit Products scre...

Page 176: ... Product in the appropriate fields 3 and Exporting Region Results To QC Database and Assigning QC Products 1 on a region to make it active 2 Right mouse click on the region and Region Properties 3 Ensure that Region Statistics exported for Quality Control 4 next to QC Product and select the QC Product to assign to the region ...

Page 177: ...ol Application Definition Wizard 7 5 and save the protocol Review QC Results 1 on the Report Generator toolbar to display the QC Levey Jennings screen 2 next to Application and to select an application 3 Template Select Template ...

Page 178: ...AH 7 24 Quality Control Application Definition Wizard 4 the desired template and 5 Repeat steps 2 4 to view other QC data plots See QC Levey Jennings Screen for information about creating and editing QC plots ...

Page 179: ...lus or PrepPlus 2 lets you prepare antibody labeled cells from an anticoagulated whole blood specimen for surface marker analysis In general the optimum concentration for analysis is 5 x 10⁶ cells mL When this concentration is not possible refer to the package insert for the preparation method you are using Before Running Samples 1 Check that the Daily Startup procedures were done 2 Check that the...

Page 180: ...ny in process samples Running Samples MCL Automatic Mode Verifying A Worklist Always verify carousel and tube location fields before starting acquisition and ensure that the Acquisition Manager information accurately reflects the tubes in the carousel being run The order of the tubes in the carousel must match the order of the tubes in the Worklist The default protocol Ctrl N must be saved prior t...

Page 181: ... the worklist is not re created the protocol or panel in the worklist may not match the newer version of the protocol or panel CAUTION Possible flow cell damage To avoid clogging the sample probe sample tubing or flow cell ensure that 12 x 75 mm test tubes are free of debris before you use them 1 Prepare samples according to the reagent package insert 2 Place the sample tubes in a carousel ...

Page 182: ...SE WITH CLEA R WATE R CARO USEL CLEA NING PREP ARE A SOLU TION OF 1 PART HOUS HOLD BLEA CH 5 SOLU TIONO F SODI UM HYPO CHLO RITE AND 9 PART S WATE R RINSE CARO USEL WITH SOLU TION LIGHT LY RUB IF NECE SSAR Y IMME DIATE LY RINSE WITH CLEA R WATE R CARO USEL CLEA NING PREP ARE A SOLU TION OF 1 PART HOUS HOLD BLEA CH 5 SOLU TIONO F SODI UM HYPO CHLO RITE AND 9 PART S WATE R RINSE CARO USEL WITH SOLU ...

Page 183: ... in the Acquisition Manager 7 to begin processing samples During the sample cycle the following series of Cytometer status messages appears Awaiting Sample Preparing Sample Acquiring Stopping 8 Observe the Events Sec counter on the Status Bar to monitor data acquisition NOTE While running a Worklist and using bar codes on your sample tubes if the Tube ID in the Worklist does not match the bar code...

Page 184: ...in which sample processing takes place is always based on the sequential rows in Acquisition Manager With a partially completed worklist the next sample to be processed will always be the next row in the Worklist that has not been run completed rows display in blue in Acquisition Manager The sequence of processing samples using the MCL Manual Mode is as follows The Location field in Acquisition Ma...

Page 185: ...CAUTION Possible flow cell damage To avoid clogging the sample probe sample tubing or flow cell ensure that 12 x 75 mm test tubes are free of debris before you use them 1 Prepare samples according to the reagent package insert 2 Place the sample tubes in a carousel ...

Page 186: ...ITH SOLU TION LIGHT LY RUB IF NECE SSAR Y IMME DIATE LY RINSE WITH CLEA R WATE R CARO USEL CLEA NING PREP ARE A SOLU TION OF 1 PART HOUS HOLD BLEA CH 5 SOLU TIONO F SODI UM HYPO CHLO RITE AND 9 PART S WATE R RINSE CARO USEL WITH SOLU TION LIGHT LY RUB IF NECE SSAR Y IMME DIATE LY RINSE WITH CLEA R WATE R CARO USEL CLEA NING PREP ARE A SOLU TION OF 1 PART HOUS HOLD BLEA CH 5 SOLU TIONO F SODI UM HY...

Page 187: ...use the New Panel Wizard to correct the problem Panel names for the corrected protocols are not displayed in the Worklist however they are displayed on the Panels tab 7 Enter the carousel ID number in the Acquisition Manager 8 to place the Cytometer in MCL Manual Mode 9 to begin processing samples 10 Enter the tube location to process and During the sample cycle the following series of Cytometer s...

Page 188: ...tube is aborted and the processing stops for the rest of the carousel 12 If you enabled Edit Sample IDs on Workspace Preferences Acquisition Options edit the sample ID after the tube finishes processing and NOTE After the first tube in a panel Sample ID 1 cannot be changed 13 Enter the location of the next tube to process and 14 Repeat steps 12 and 13 to process additional tubes 15 Verify all samp...

Page 189: ... Single Tube Mode The Single Tube Mode operates by introducing tubes individually into the MCL through the MCL Tube Access door NOTE When operating in the Single Tube Mode the Prime function is not available when the system is between samples even though the toolbar is active CAUTION Possible flow cell damage To avoid clogging the sample probe sample tubing or flow cell ensure that 12 x 75 mm test...

Page 190: ... a deleted Protocol the software prompts you to use the New Panel Wizard to correct the problem Panel names for the corrected protocols are not displayed in the Worklist however they are displayed on the Panels tab 4 to place the Cytometer in Single Tube Mode The MCL moves to put carousel position 21 under the Tube Access door WARNING Risk of injury Do not open the MCL cover while the MCL is movin...

Page 191: ...ng 7 Observe the Events Sec counter on the Status Bar to monitor data acquisition NOTE While running a Worklist if the Tube ID in the Worklist does not match the bar code on the tube a system message appears After you acknowledge the message the mismatched tube is aborted and the processing stops for the rest of the carousel 8 Verify all sample IDs before reporting results Review all data plots an...

Page 192: ...by a laboratory professional when interpreting the data If results are suspect follow your laboratory procedures to resolve 9 If you enabled Edit Sample IDs on Workspace Preferences Acquisition Options edit the sample ID and NOTE After the first tube in a panel Sample ID 1 cannot be changed 10 Repeat steps 5 through 9 to process additional tubes to exit Single Tube Mode and return to Automatic Mod...

Page 193: ...rify any population of interest is above the discriminator to ensure no cell loss Verify any population of interest is separated as much as possible from other populations that are present within biological constraints Review the antibody staining patterns Verify overall expected staining patterns are observed in other words verify the fluorescence staining correlates to the antibody used in sampl...

Page 194: ...773232AH 8 16 Running Samples Data Review ...

Page 195: ...g Regions Creating Gates Creating Flowpages Creating Panels Creating Worklists These procedures are in the Quality Control chapter AutoSetup II Wizard Application Definition Wizard define all your applications AutoSetup Scheduler multiple application AutoSetup These procedures are in the Using Navios Software chapter Batch AutoMATOR Advanced Color Precedence Listmode Compensation Setting a CAL Reg...

Page 196: ...re Procedures For system help click on the links below to Clean the MCL sample head and the sample probe procedure Replace the sample probe and sample pickup tubing procedure Replace the MCL sample head procedure Replace an optical filter procedure ...

Page 197: ...w When you start Navios software the Cytometer Startup Page 1 is displayed If a System Administrator has been configured on your system skip to Cytometer Startup Page 1 if not see Configure System Administrator Configure System Administrator On the initial Startup after installation there needs to be at least one System Administrator configured howeveritisrecommendedthatmore than one SystemAdminis...

Page 198: ...e 1 Displayed are the User IDs of all those who have access rights to Navios software and whether they are logged in to the system or not If you have been previously set up on the system highlight your User ID and enter your Password If you do not have a User ID and Password see your System Administrator NOTE If a red X appears next to your User ID Ensure the pathway for your user directory is not...

Page 199: ...r name is not included see your System Administrator Logged In Indicates whether or not the Users are logged in Password Enter your User Password Passwords are a minimum of 6 characters and a maximum of 24 characters Blanks are not allowed Admin Button Allows access to the User Administration Tools which allow the addition removal and modification of User profiles and Workgroups plus the creation ...

Page 200: ... Launches the Navios software without connecting to the Cytometer The software is configured according to the last instrument configuration to which the workstation was connected Sign on Administration User Administration This screen allows the Administrator to add remove and modify User profiles including passwords as well as the creation of user Workgroups and the creation of Export Logs Connect...

Page 201: ...ries and files for that User ID to different directories NOTE At least one folder must be selected for deletion in order for the User to be deleted If the User is a part of a workgroup remove the User from the Workgroup prior to deleting the User HighlighttheUserIDyouwishto deletefromthesystemand A confirmationdialog box is displayed Follow the screen prompts to indicate which folders you want to ...

Page 202: ...isplay and select other Workgroups Users Lists ALL the Users assigned to the system Those with the checkbox activated by their User IDs are members of the particular Workgroup shown in the Workgroup Selection box Users can be assigned to multiple Workgroups To add a user to the Workgroup click to enable the checkbox To remove a user from the Workgroup click to disable the checkbox Edit Button Open...

Page 203: ...ropriate Workgroup from the list displayed and to delete a particular Workgroup from the system To edit the name of a particular Workgroup first delete the Workgroup and then add it as a new Workgroup See also Workgroups User Administration Export Log Select Export Log to create a text log file showing the date and time each User has spent logged on to Navios software Add Delete ...

Page 204: ... Software Sign on Administration 1 Log in as Admin a on Cytometer Startup Page 1 b Select a User ID from the pull down list c Enter the password for that user d Enter the Admin Password e 2 3 Enter the date range for the log and ...

Page 205: ...log and 5 Choose to direct the information to the Clipboard or to a File If File is selected you can either enter a valid File Name in the box or use to select an appropriate file Select between Tab delimited MS Excel default or a Comma delimited text format file 6 to end See also User Administration ...

Page 206: ...ly Patient Demographics is checked then the Database Information screen will be set to read only Report Generator Database Utilities Use these controls to Backup the Report Generator Database Archive Data or Restore an Archive To Archive or Restore data see Database Management Backup Name Specify a name for the Report Generator Backup This name will be used to generate the filenames of the backup ...

Page 207: ...The default filename is RGArchiveXX rgarch where XX is an automatically incrementing number Archive Criteria On or Before Date Set the Archive Criteria to Archive data which was written on or before the selected Date Clicking the Date field allows you to specify the Date using the Date Selection control Archive Criteria Between Date and Date Set the Archive Criteria to Archive data which was writt...

Page 208: ...e archived according to the selected Dates and may be further filtered by selecting one or more of the following Panel Report specific criteria Patient Name Only Panel Reports for patients whose last name contains the phrase entered into this field are included in the archive All printable characters are allowed as input Patient ID Only Panel Reports for patients who s ID contains the phrase enter...

Page 209: ... a maximum of 24 characters First Name Accepts a minimum of 1 and a maximum of 100 characters All printable characters are allowed Leading and trailing spaces are removed While Restoration is in progress a warning message is displayed to indicate that Restoration may take some time and that you should not exit the software until the Restoration is complete User ID First Name Last Name Title System...

Page 210: ...inistrator is unchecked Disabled and checked when System Administrator is checked Access other files Check this checkbox to enable the User to access other files Leaving the box Unchecked allows access only to the User s own Directories NOTE If you open protocols from other users folders and you want to save the protocols to your folder you must use the Save Protocol As option and navigate to your...

Page 211: ...ocks the User after setting up the User ID information for the first time Whenever the user reaches the defined number of unsuccessful password attempts allowed Manually by the System Administrator Unlocked means this user can log into the software with all of their defined privileges Change Password Displays the Password Change dialog See also User Administration User Profile Paths The Administra...

Page 212: ...e Home Shows the Home Directory Path that applies to that User Path Details Shows the paths to the destination directories for the different File types within Navios software Backup Shows the path to the Backup or directory for data listmode files If a Backup path is specified for the current user in the User Profile dialog Paths tab the Back up User Data is launched when the user logs out or exit...

Page 213: ...e overwritten Move local HST files to the recycle bin Disabled if Overwrite existing backup files is not checked Disabled if the HST folder is not selected in the list control If selected the HST files of the user are moved to the recycle bin after they have been backed up Move local LMD files to the recycle bin Disabled if Overwrite existing backup files is not checked Disabled if the LMD folder ...

Page 214: ...pboard while retaining it in its original position Paste Paste a previously Cut or Copied item from Clipboard into the desired position Undo Undo the previous command Use the down arrow symbol to see a list of previous actions that can be Undone Redo Redo the previous Undo command Use the down arrow symbol to see a list of previous actions that can be Redone Color Dot Plot Create a Color Dot Plot ...

Page 215: ...h Prism Dividers Create or Edit a Dual Parameter plot with a set of Dual Prism Dividers Single Linear Region Insert a Linear Region Multiple Linear Region Insert a Multiple Linear Region Edit Single Prism Divider Create or Edit a Single Parameter Prism Divider Create Modify Gate Access the Create Modify Gates dialog box Modify Color Gate Blend Setup Access the Modify Color Gate Blend Setup dialog ...

Page 216: ...selected items to the top of the last selected item grey handles Align Bottom Align all the selected items to the bottom of the last selected item grey handles Align Left Align all the selected items to the left of the last selected item grey handles Align Right Align all the selected items to the right of the last selected item grey handles Space Evenly Across Space selected items within a FlowPA...

Page 217: ...uled Applications cannot be saved as Panels or Worklists Automator Toolbar The AutoMATOR Toolbar allows shortcuts to commonly used AutoMATOR functions New Worklist Clear the Acquisition Manager panel to create a new Worklist File Open Open a selected stored Worklist file into Acquisition Manager Save Worklist Save the current Worklist with a user definable name Save Panel Save the current Panel wi...

Page 218: ...il you decide to continue This function allows the test to stop without reverting to the beginning of the panel again To resume the test click the Pause button again Auto Pause The run of tests pauses and then carries on with the rest of the panel automatically after a 15 second wait The countdown is displayed on the AutoMATOR Status Bar When the tests are in the Auto Pause setting you can hold do...

Page 219: ...aving data or outputting reports Idle Mode Place the Cytometer in Idle mode in order to perform various cleaning and replacing procedures Prime Flush the sample line and flow cell with sheath fluid to declog or remove bubbles Cleanse Flush the sample line and flow cell with cleaning agent MCL Manual Mode Run a carousel of samples one tube at a time Single Tube Mode Run a single tube in fixed posit...

Page 220: ...C Template and data located in the QC tables Panel Template A Panel Template defines the content of the Panel Report that is produced when the export panel is run Panel Report Display a list of Patient Panel Reports available for display or print Database Entry Enter or view the specimen information in the database Product Editor Add or edit QC products Maintenance Log Electronic log of instrument...

Page 221: ...d the folder in which you wish to Save the Protocol Enter a valid File Name in File Name box and Save New Protocol New Panel New Worklist Open Listmode File Save Listmode File As Save Histogram File As Save All FCS Format Files Open Protocol Save Protocol Save Protocol As Lock Protocol Unlock Protocol Save Listmode Compensation As View FCS Header Edit FCS Header Attributes Settings From CMP File P...

Page 222: ...arameters button on the Cytometer Control Acquisition Setup Tab and choose the Parameters to be acquired 3 Create the Plots required for acquisition 4 If analysis is to be performed during acquisition create the required Regions and Gates and also select the required statistics from the Analysis Select Results option 5 File Save Protocol As to save the protocol 6 Set the required Listmode File nam...

Page 223: ...mode File to open a representative listmode data file You can also Drag and Drop a listmode file into the Workspace to load the runtime protocol 3 To modify a plot Right mouse click on the plot and Format Plot 4 To create a plot a Choose one of the buttons on the Plots Toolbar or use the Plots Menu to select a plot type b the correct parameters for the plot and c Right mouse click on the plot and ...

Page 224: ...option to open a new listmode file into all plots CAUTION Risk of erroneous results if the parameter order is changed or parameters are added or deleted When parameters are de selected from a protocol the parameter order is changed which impacts remaining plots and associated regions and gates To prevent reporting erroneous results verify the protocols plots regions and gates before reporting resu...

Page 225: ...he open runtime protocol is not selected the LMD replays into the plots currently displayed on the workspace NOTE Listmode replay uses the runtime protocol Cal Factor unless you select a different Cal Factor on the Absolute Count Calibration dialog box Using Drag and Drop A listmode file may be dragged and dropped from Resource Explorer to the workspace If the listmode file is dragged and dropped ...

Page 226: ... file is loaded and replaces the parameters with those of the listmode file If you select Abort the listmode file is not loaded NOTE Listmode Compensation must be performed using the runtime protocol or a protocol with equivalent parameters as the runtime protocol When loading listmode files from a different instrument This is not an Navios file appears Select Continue to load the file Save Listmo...

Page 227: ...utive spaces are not allowed Save Histogram File As The Save Histogram File As option allows a single histogram associated with the currently in focus plot to be saved directly to an FCS histogram file NOTE Navios software only saves one Histogram Plot in a single FCS histogram file 1 Highlight the Histogram Plot Current window 2 File Save Histogram File As 3 Specify the desired drives and folders...

Page 228: ...ghlight the required plot NOTE The individual Histogram s Plot Properties must be set to save 2 Plots Acquisition Stop Save menu option 3 Save Histogram Data In FCS Format NOTE An S is added to the plot title if you select this option Do not confuse this with an S that identifies a gate 4 Repeat for each histogram plot you wish to be saved 5 File Save All FCS Format Files ...

Page 229: ...otocol Selecting this option saves the Protocol in its current form Ctrl S is the shortcut option as is the Save Protocol button NOTE While acquiring a worklist avoid selecting Save Protocol when the system is transitioning to the next tube in the worklist NOTE If you open protocols from other Users folders and you want to save the protocols to your folder you must use the Save Protocol As option ...

Page 230: ...a suggested extension any standard DOS characterscan be used for the full File Name Youareurged tokeep the extension consistent for easy file searches Lock Protocol Lock the current protocol See Locked Protocols for details Disabled if the protocol is already locked the current user does not have the Lock Unlock Protocols Privilege Unlock Protocol Unlock a previously locked protocol See Locked Pro...

Page 231: ...ward slash backslash greater than sign less than sign asterisk comma question mark quotation mark pipe symbol colon or apostrophe Leading Trailing and consecutive spaces are not allowed Save as type combo box This combo box contains only one choice LMD Compensation Files cmp Save button Validates the file name If OK close the Save LMD compensation settings dialog and saves the compensation setting...

Page 232: ...ame of Parameters or change the scaling options Axis calibration information can be entered here This information is embedded in the listmode file 1 File Edit FCS Attributes to view the Edit FCS Header Attributes dialog box NOTE You cannot make any changes on this screen when running a locked protocol 2 Make the desired changes 3 or press Enter to accept 4 or press Esc to exit the dialog box witho...

Page 233: ...ving the Edit FCS Header Attributes dialog box open or editing the contents during acquisition may prevent some FCS keywords values from being saved to the listmode file Import Settings From CMP File This option allows compensation settings obtained from the Listmode Playback option or Save Listmode Compensation As option to be imported into the current protocol 1 File Import Settings from CMP Fil...

Page 234: ...and select the PDF driver from the Print name on the Print dialog box 1 File Print The Print dialog box is displayed 2 Make the desired changes 3 or press Enter to commence printing See also Print Plots Print Statistics Print FlowPAGEs Print to PDF 4 or press Esc to exit the dialog box without saving the changes Print Plots Select this option if you wish to Print Plots Choose ALL or CURRENT Plots ...

Page 235: ...he Print To PDF options only If you require additional functionality to create PDF reports you need to use a full version of Adobe Acrobat software This additional software is not included with Navios Software If you install the full version of Adobe Acrobat you should use the Adobe distiller to create PDF files rather than the NaviosPDF PDF compatible print driver If you continue to use the Print...

Page 236: ...Some available options for example Run Number and Time can only be defined at the time of acquisition If a printout of the Worklist is required with the final assigned file name it is only correct once acquisition of samples is complete CAUTION Risk of erroneous results if you overwrite listmode file names Either Tag number or Run Number must always be selected to ensure that unique filenames are ...

Page 237: ...D columns allowyou to enterinformation about the particularsample beingrun When any of the checkboxes are selected in Workspace Preferences the information in the corresponding columns is included as part of the listmode file name If Sample ID 2 4 are not displayed use Customize Worklist Columns to add them to the Acquisition Manager Sample ID 1 is the same for all tubes within a panel NOTE Be sur...

Page 238: ...Sample ID s or Tube ID are selected De selecting all the Sample IDs and Tube ID check boxes results in Run Number being automatically selected Y2K Date When selected this option includes the date as part of the listmode file name The format used is the standard Year 2000 format YYYY MM DD showing when the sample was analyzed Time When this option is selected the time HH MM SS that the sample was a...

Page 239: ...Name Extension Change the LMD File Name extension to one of the options listed below Append PDF File Name Append PDF to the listmode file name extension Replace Replace the current listmode file name extension with PDF This option should only be used when LMD is being used as the listmode file name extension Workspace Preferences Acquisition Options Sets the default Acquisition Options for Navios ...

Page 240: ...ager at the completion of the current panel and is useful if you wish to run samples in Panel Mode but do not wish to define a complete worklist in advance In Automatic mode the software will duplicate the last panel each time it reaches the end of the worklist and automatically begins acquisition on the first tube in that Panel Acquisition will stop when either the maximum 32 tubes have been acqu...

Page 241: ...it appears translucent Workspace Preferences User Info This option allows defined information and sample project information to be stored as part of the FCS header in listmode files This can be printed out as required via the Legend plot or with the exported data All of these are optional and can be filled in according to your preference ...

Page 242: ...e printed out as part of the statistics output Institute Street Enter the Institute street address It can be printed out as part of the statistics output Institute Town Enter the Institute town It can be printed out as part of the statistics output Sample Source This option allows you to enter information regarding where the sample came from Project The name for the project is entered here Institu...

Page 243: ...t be logged on as a System Administrator to enter the serial number Currently logged on user The User ID of the currently logged on user is displayed here and recorded in the listmode file Workspace Preferences Plot Display See also Workspace Preferences Workspace Preferences LMD File Name Workspace Preferences Acquisition Options Workspace Preferences User Info Workspace Preferences Gating Worksp...

Page 244: ...ed Print Dots Black Select this option to print all dots in a color dot plot in black irrespective of their colors If it is clear dots are printed in various shades of gray or if using a color Printer the best matched colors available This option does not affect the printing of FlowPAGEs Log Scale Density Plots Selecting this option displays a density plot with log scaling of the density levels If...

Page 245: ...ata is automatically displayed with Baseline Offset switched on If it is OFF then data is displayed with no Baseline Offset On This reads a file and modifies the displayed data only by adding a randomized Gaussian offset to the low level signals Data on disk is not modified and is left as it was when acquired from the Cytometer Off Reads a file exactly as it is with no Baseline Offset This setting...

Page 246: ...o a plot assign the region as a gate Automatic Gate Maintenance Enabling this option ensures that when the gating of a plot changes the associated gate of any region drawn onto this plot also changes to reflect the new gating state Automatic Color Precedence As a new region is drawn the color for that gate is placed at the top of the list in the color precedence dialog box If this option is disabl...

Page 247: ...8x128 Level 5 is 1 1 processed peak at a resolution of 256x256 Contour Travel Input a maximum value the contour AutoGate region travels from the mean The Minimum value is 25 Maximum is 250 channels Use this option to slightly adjust the AutoGate from tube to tube if slight changes in lysis cause the target population to move slightly This option is not available for elliptical AutoGates AutoGating...

Page 248: ... Show Warnings Do not display Live Gate warning messages Workspace Preferences Publish See also Workspace Preferences Workspace Preferences LMD File Name Workspace Preferences Acquisition Options Workspace Preferences User Info Workspace Preferences Plot Display Workspace Preferences Gating Publish Data to Text File Export Data Format File References in Data Publish Data to MS Excel Export Bitmap ...

Page 249: ...as xlsx and MS Excel 2007 file open dialogs will have both xls and xlsx filter strings Export Data Format Select the Export Data Format Columns to export the data from all files to a single worksheet Experiment Table to export the data in experiment table format for inclusion in a pivot table File References in Data Choose to reference the file name by Full Path and Name or by Name Only Export Bit...

Page 250: ...se order with each Undo request NOTE Undo does not undo such operations as Save and Acquisition of data The Edit Undo list is cleared after each change of plot focus The Edit Undo function is applicable to the Window Menu Regions FlowPAGE and fonts Redo Edit Redo reverses the last Undo operation If a new operation is performed after a series of Edit Redo operations the Edit Redo list is cleared an...

Page 251: ...cations such as MS PowerPoint Word Excel and so on The exact nature of what can be pasted depends upon the target application and can be controlled or modified using the target applications Edit Paste Special command See also Cut Paste Paste Special Paste After copying into memory Navios software allows the pasting of a number of different items The default paste result depends upon what you are t...

Page 252: ...ot with the region of interest to be copied 2 Drag the cursor to the destination Plot 3 Release the mouse button to paste the Regions onto the Plot NOTE If the copied region is required as a gate use Ctrl to Drag and Drop the region See also Cut Paste Paste Special Paste Special Allows which form of a copied object is pasted Bitmaps Text or Region may be pasted depending on the copy source and the...

Page 253: ...lowing menu choice is available Select the appropriate option to Customize Worklist Columns allowing you to add remove or rename the columns or print the Worklist when a Print dialog box is displayed See also Acquisition Manager Toolbar Worklist Columns Available Acquisition Manager Docking Options The Acquisition manager may be docked to the application window or floated in the main application w...

Page 254: ...ol Always verify the worklist before starting acquisition whenever panels and worklists are modified See Verifying A Worklist CAUTION Risk of erroneous quality control statistics Panels containing QC regions must be constructed from individual unique protocols Do not use a panel constructed from one protocol with different parameter names for QC database purposes Panels 1 Open the Panel to be modi...

Page 255: ...es to the Worklist use Drag and Drop from the Resource Explorer This starts a new panel or protocol that is automatically added to the end of the Worklist 3 To remove tests delete the entire row from the Worklist 4 Save the Worklist using the Save Worklist button on the Acquisition Manager Toolbar See also Acquisition Manager Customize Worklist Columns Worklist Columns Available The following colu...

Page 256: ...ns Available Acquisition Manager Modifying Panels and Worklists Customize Worklist Columns Deleting a Worklist Row Adding a Panel Adding a single Test to the Worklist Acquisition Manager Protocol Acquisition Manager Plots Plots A two state toggle button displayed as icons This column is de selected by default The two available states are Panel Displays the name of the currently selected panel An a...

Page 257: ... be carried into a new protocol the source and target region must satisfy all the following criteria Regions must have the same name Regions must be of the same type Regions must be drawn on the same parameters All regions satisfying these criteria are passed from one protocol to another There are three options for the region source See also Worklist Columns Available Acquisition Manager Customize...

Page 258: ...ition Loads the instrument cytosettings from the protocol Passes the instrument cytosettings through from the previous acquisition NOTE When using the Instrument Settings column of the Aquisition Manager to pass settings between protocols within a panel you should ONLY pass settings between protocols where the parameter number and order are identical Retrieve the instrument cytosettings from an ex...

Page 259: ... is present on the sample tube and run on the Navios the bar code is read and the Tube ID field is updated with this information Acquisition Manager Carousel No and Location Carousel No and Location Allows you to to specify the Carousel number and the location of a tube in the carousel You can run a tube at multiple points in a worklist for example a set up or cleaning tube and random access to sa...

Page 260: ...isplay of the Absolute Count Calibration dialog box See Absolute Count Calibration for more details NOTE If the same CAL Factor is used for multiple panels in a worklist use Shift to autofill the entire worklist with the CAL Factor See also Acquisition Manager Customize Worklist Columns Acquisition Manager LMD File Name LMD File Name The File Name displayed in this column is only a provisional fil...

Page 261: ...file Selecting or deselecting P1 results in also selecting or deselecting P2 through P32 from being viewed as an Acquisition Manager column Resource Explorer The Resource Explorer occupies a definable area within the Workspace It allows you to browse files and can be used to Drag and Drop items into Navios software Protocols Panels and Worklists can be dragged from the Resource Explorer and droppe...

Page 262: ...lbar has been created and this is highlighted is available to allow the deletion of that Toolbar See also Toolbars Customize Commands Tab Toolbars Select which Toolbars you wish to be displayed Any customized Toolbars are listed Toolbar Name Allows you to modify the name of any customized Toolbar It is grayed out for the standard Toolbars Show ToolTips Show Fly over help when the mouse is pointed ...

Page 263: ...e default values Toolbars Customize Commands Tab This allows you to customize the Toolbars by dragging the button to the desired position within any Toolbar See also Toolbars Customize Toolbars Categories Displays the Toolbars that are currently available Buttons Shows the buttons that may be selected for any Toolbar Description Displays a description of the Icon button selected Categories Buttons...

Page 264: ...hin a group use Drag and Drop To move a group of columns use Ctrl Drag and Drop Groups are defined by thick black lines and items within the groups are separated by thin dotted lines Use the Customize Worklist Columns dialog box to add remove or edit Worklist Columns displayed Columns can also be renamed or reordered A column is included or removed by enabling or disabling the checkbox If the chec...

Page 265: ...nces when you insert additional plots or statistics into a FlowPAGE they become locked outside the boundary To remedy this print the FlowPAGE After printing the added plots or statistics are unlocked and can be moved into the boundary of the FlowPAGE To delete a Row within a Worklist highlight the appropriate Row or Rows by clicking the mouse in the Row Number column shown by the Use or Delete wit...

Page 266: ...trument serial number Software version Protocol Status There are three options Runtime Results displayed when the FlowPAGE is printed as part of the acquisition output options Listmode Replay Runtime Protocol displayed when the data is replayed through the same protocol it was acquired under The protocol content is used to determine whether this is the runtime protocol not the protocol filename If...

Page 267: ... crosses Use the open FlowPAGE option to open a FlowPAGE template from disk FlowPAGE uses the default file extension PGE The PGE extension is only a suggested extension any standard DOS characters can be used for the full file name 1 Insert Open FlowPAGE From File to view the Open FlowPAGE dialog box 2 the desired drive in the Drive List box 3 the desired directory in the Folders List box 4 the ty...

Page 268: ... Plot Insert currently displayed plots on the desktop into FlowPAGE 1 inside the plot to be inserted into FlowPAGE and hold down the left mouse button The No Drop cursor is displayed 2 Drag the cursor onto the FlowPAGE The Drop cursor is now shown Release the mouse button The plot is now inserted into FlowPAGE NOTE If you Drag and Drop the plot the plot and the statistics are inserted If you Ctrl ...

Page 269: ...ish to insert or press Esc to exit the dialog box without accepting the changes 3 The statistics for the selected plot are inserted into the FlowPAGE and can then be moved to the desired position Only one plot is permitted per statistics table FlowPAGE LMD Compensation Grid The LMD Compensation Grid shows the compensation settings used to generate the data seen on screen and in plots on the FlowPA...

Page 270: ...rity of the header and footer information any text boxes placed with in the FlowPAGE header or footer space will not persist 4 outside the text box to accept the changes 5 Click the right mouse button on the text box to edit properties enter text edit the font or change the alignment Other FlowPAGE Object Inserting a Rectangle 1 Insert Other FlowPAGE Object and the Rectangle option A cross hair cu...

Page 271: ...er FlowPAGE Object and the Line option A cross hair cursor is displayed 2 Drag the cursor to desired line size and release the mouse button The line is drawn and the cursor reverts back to the Chooser cursor See also Inserting a Picture Inserting a Text File Inserting a Picture FlowPAGE allows the import of a Windows Bitmap file extension bmp 1 Use MS Paint or other graphics editor to create a bit...

Page 272: ...of the bitmap file you want to insert NOTE Double click on the file name to close the dialog box and display the file 3 the FlowPage location where you want to place the picture See also Inserting a Line Inserting a Rectangle Inserting a Text File Inserting a Text File 1 Insert Other FlowPAGE Object and the Text File option NOTE Use MS Notepad or other text editor to create text txt files ...

Page 273: ... of type list box c the name of the text file you want to insert NOTE Double click on the file name to close the dialog box and display the file 3 The text box is placed in the upper left corner of the FlowPage a Use to move the text box to the desired location b ouside the text box to anchor it See also Inserting a Line Inserting a Picture Inserting a Rectangle ...

Page 274: ... created whereas user defined sizing is selected as soon as resizing occurs using the Splitter Bar To reinstate the Auto sizing hold down Ctrl while clicking the Sigma Cursor with the mouse Publish Results Now Open Excel Workbook Open PDF Open Text File AutoMATOR Listmode Playback AutoSetup Application Definition AutoSetup Scheduler Custom Dye Entries To open the Statistics Pane move the mouse ove...

Page 275: ...log will default to your User Results directory Once a file has been selected Adobe Reader is launched to display the selected file Open Text File Displays the Open TXT dialog which allows you to select a Text file from the Windows file system The dialog will default to your User Results directory Once a file has been selected WordPad is launched to display the selected file AutoMATOR Welcome to A...

Page 276: ... Add Blank Load Queue Save Queue Print Restore Analysis Files on Startup Show full pathname Output Options 2 or to select the required files 3 Navigate to the correct directory and locate the relevant files 4 Select the relevant files by highlighting with the mouse To select more than one file hold down Ctrl and click the relevant files with the mouse button to deselect click again while Ctrl is h...

Page 277: ...or running a batch of large listmode files it is recommended to use the AutoPause or Continuous Pause selections Status Icon Pause The Auto Pause function pauses the run of tests pauses and then carries on with the rest of the panel automatically after a 15 second wait The countdown shows on the AutoMATOR Status Bar When the tests are in the Auto Pause setting you can hold down Shift and click the...

Page 278: ...Moving the cursor outside the window scrolls the list The further the cursor is pushed to the top bottom the faster it scrolls Add Files Select this option to display the Open Listmode File dialog box You can then peruse other Files in various drive and directories and add them to the list Select the name of the listmode file s you want to add Remove Files When selected this option removes any hig...

Page 279: ...veral checkboxes found at the bottom of the AutoMATOR Setup dialog box Check the required output options to print or publish data at the completion of each sample If none of the output options are selected the Report icon is crossed out The options are Print plots as displayed Print statistics only Prints all FlowPAGEs If these are not selected the Page icon appears crossed out and a report is not...

Page 280: ... informs you that the processing is paused and can only continue if you restart the analysis manually by selecting the Run button again Listmode Playback The Listmode Playback option allows for listmode playback with runtime protocol panel or with a new protocol panel This option also allows listmode compensation of 20 bit data files in a fully automated manner replicating the procedure used durin...

Page 281: ...e current file being analyzed Optionally a new file may be saved containing newly compensated 10 bit data The original LMD file cannot be overwritten automatically Saved files have the suffix entered in the Options tab appended to each saved file List Comp Setup This dialog provides an Acquisition Manager style worklist for the selection of a compensation panel and associated protocols ppp files c...

Page 282: ...etting of default options for the Listmode Playback Print options publish functions file save naming options are set in this dialog box NOTE If you playback a listmode file through 2 different protocols and have Print to PDF selected the PDF file is saved after each playback with the same name If you have the capability to overwrite files the PDF file will only have the information from the last p...

Page 283: ...itions to be used in the Autosetup Scheduler The application definition captures the instrument setup lasers parameters fluorochromes target channels verification and alignment requirements of a particular application See Application Definition Wizard AutoSetup Scheduler Use the AutoSetup Scheduler to select the applications to be run on the instrument in a given day or shift AutoSetup Scheduler g...

Page 284: ...Definition Wizard Plots Menu Plots Introduction Navios software can display six Plot types including the FCS Information plot and the Legend for Color Gated Plots When a Plot is displayed click the right mouse button to display further menu options NOTE You cannot add or duplicate plots when running a locked protocol Color Dot Plot Histogram Plot Density Plot Prism Plot Duplicate Plot Color Dot Pl...

Page 285: ...t cell or particle The dot location gives the parameter values for each event Each parameter can have a channel number from 0 to 255 for 256 channel data or 0 to 1023 for 1024 channel data The colors of the dots reflect the Gate or combination of Gates used to create the plot To Create a Color Dot Plot 1 2 From the dialog box displayed select the required File then select desired Gates Parameters ...

Page 286: ...etails Copy Plot Data Copies the raw plot data into memory for pasting into other applications such as Microsoft Excel Format Plot Displays the Plot Properties dialog box for the current plot See Format Plot Dot Plot Data Source Choose the X and Y parameters for the current plot Gating equation and regions to be displayed can be selected File Gate X and Y Parameter Apply Gate to All Plots Apply on...

Page 287: ...t Displays the of events in the regions on this plot only Dot Plot Events Use this to specify the percentage of events to view This option significantly increases the speed at which dot plots refresh if large data files are being analyzed For an event interval less than 100 data is displayed uniformly from within the whole of the data file that is if 10 of events are selected then event numbers 1 ...

Page 288: ...the Plot NOTE You cannot make any changes on this screen when running a locked protocol Dot Plot Labeling The options here allow you to override the default plot display options for the current plot This is useful when capturing images for publication The available options allow for 64 128 256 and 512 channels to be displayed on the axis A higher resolution gives an improved graphic image whereas ...

Page 289: ...ternatively select Pick to select from File Name Stain name PnS or Parameter name PnN Font NOTE You cannot make any changes on this screen when running a locked protocol Show Plot Title on Output Show Axis Tick Marks Show Axis Labels X and Y Axis Labels NOTE You cannot make any changes on this screen when running a locked protocol Select the required Font Type Font Style and Point Size Other font ...

Page 290: ...istogram Plot 1 2 From the Data Source dialog box displayed select the required File then select desired Gates Parameter and Regions for display Histogram Plot Data Source Histogram Histogram Scaling Histogram Labeling Stop and Sav Font NOTE You cannot make any changes on this screen when running a locked protocol 3 When a Plot is displayed click the right mouse button to display further menu opti...

Page 291: ... is the same as the default color for the Gate that the plot is gated upon and the Color Select button is unavailable To change the color of the Histogram in the selected plot clear the Use Gate Color checkbox and click the Color Select button The colors returned are only those which the display is capable of rendering File Gate Selection Parameter Apply on plot to all plots Show on plot NOTE You ...

Page 292: ...me Using Manual Mode Single Tube Fixed Position mode gives the ability to Stop and enable the Freeze Frame checkboxes In order for Freeze Frame to work in Acquisition ensure that Plots is enabled as a column in the Acquisition Manager Selecting Pass Plots is effectively passing the protocol in a panel in Acquisition Manager If the panel consists of different protocols using Pass Plots will cause t...

Page 293: ... Check a Freeze Frame box to assign the current Histogram The top button creates a dotted overlay and the bottom button creates a dashed Histogram 5 The current Histogram is assigned to whichever overlay button is selected and its name appears in the edit box adjacent to the button this legend may be modified if desired 6 or press Enter to accept any changes 7 or press Esc to exit the dialog box w...

Page 294: ...display Histogram Scaling Clip Channels If AutomaticMaximumValue calculationis used thentoggling the Clip Channels on ensures that the bottom and top channels are excluded from the calculation of the plots full scale value for the purpose of scaling Automatic Maximum Value This option searches the histogram for the maximum value and then sets the value found to be the full scale for the histogram ...

Page 295: ... provides two parameter data display any combination of parameters can be selected Each colored area in a Density Plot represents an ISO count of the number of events cells or particles The color shows the number of events at any X and Y parameter value To create a Density Plot 1 2 From the Data Source dialog box displayed select the required File then select desired Gates Parameters and Regions f...

Page 296: ... acquisition only NOTE You cannot make any changes on this screen when running a locked protocol 3 When a Plot is displayed click the right mouse button to display further menu options Copy Plot Image Copy Plot Data Format Plot Density Plot Data Source Choose the X and Y parameters for the current plot Gating equation and regions to be displayed can be selected ...

Page 297: ...ach level 1 the Level 1 button to view the Color dialog box 2 Select the desired color that is to be allocated to Level 1 File Gate Selection X and Y Parameter Apply Gate to All Plots Apply on plot to all plots Show on plot NOTE You cannot make any changes on this screen when running a locked protocol Density Level Colors Automatic Maximum Threshold Maximum Density Level Logarithmic Threshold Calc...

Page 298: ...is cleared Logarithmic Threshold Calculation Density color thresholds may be calculated in one of two ways Linear threshold calculation option toggled off The maximum value is used to determine the threshold value for each color The actual threshold value is calculated as follows Value Level No x Maximum In Plot 5 1 Logarithmic threshold calculation option toggled on The maximum value is used to d...

Page 299: ...ntages of each subpopulation phenotype and the number of phenotypes depends on the number of color parameters being simultaneously analyzed Prism Plots can be customized for example Gate for Prism Scaling and so on To create a Prism plot The available options allow for 64 128 256 and 512 channels to be displayed on the axis A higher resolution gives an improved graphic image whereas a lower resolu...

Page 300: ...hat is Prism File Gate Selection Apply Gate to All Plots The Prism parameter is a method of summarizing multi parameter surface marker data as a one dimensional Prism plot representing all possible subpopulations or phenotypes The Prism plot is a simple bar graph The height of each bar represents the count of each phenotype The count as a percentage of all events or gated events is written adjacen...

Page 301: ...reated by setting one or more prism dividers There are three ways of setting prism dividers two of them involve graphical positioning single and dual prism dividers The third uses Analysis View Modify Prism that can set the divider numerically on any divider Any changes to the divider on one plot is replicated on any other plot using that parameter Each new parameter that has a prism divider set o...

Page 302: ...are combined to produce 2p regions Where p is the number of prism dividers set This table shows the number of phenotypes created for up to six Prism dividers set This Plot shows a 3 color Prism Plot 3 dividers set 8 phenotypes created The percentages printed on the prism plot from left to right match one to one with the phenotype nomenclature indicated on the axes Example Triple Positive phenotype...

Page 303: ...use over the divider to get the cursor 2 and drag the divider to the new position Removing Prism Dividers 1 the Prism divider you want to delete 2 Press Delete Navios Software Prism Compatibility The Navios software Prism plot can interpret the Prism parameter derived from RXP CXP data acquisition EXPO data acquisition EXPO 32 data acquisition Elite or ALTRA data acquisition or COULTER Elite versi...

Page 304: ...view the population colors and population names 1 Plots Legend Plot to create a legend plot When a Plot is displayed click the right mouse button within the plot to display further menu options 2 Every time the population names or colors are edited Navios software updates the Legend Window If Navios software is in Dot Plot Mode Color Blend mode Legend displays the names colors and associated stati...

Page 305: ...kboxes that may be enabled as appropriate See also Legend Data Source Legend Format Plot Show Phenotype Logic Columns Displays the logical combination of Color Gates for each population Available in Color Blend Mode only File Gate NOTE You cannot make any changes on this screen when running a locked protocol Show Phenotype Logic Columns Gated Total Number Absolute Count NOTE You cannot make any ch...

Page 306: ...egion Absolute Count This displays the absolute count cells ul of a population based on the calibration factor CAL Factor and the number of particles within a defined CAL region FCS Information Set up the Info plot to include instrument serial number and User ID information on statistical printouts Use the Info Plot FCStab to select the FCS Keywords for the information youwant on your statistical ...

Page 307: ...Events overrides the stop values set here in the event of an acquisition limit being reached before the Acquisition Stop value has been achieved Single Parameter Histograms can be selected for automatic saving in FCS Format NOTE An acquisition from lysed whole blood is to be stopped on 5 000 lymphocytes to allow the collection and storage of all event data Displays the name of the file that is the...

Page 308: ...o a large number for example 100 000 events Thus with a lymphopenic patient if the lymphocytes are less than 5 of the white cell count an acquisition would terminate on the total event count of 100 000 before a 5 000 cell lymphocyte count could be achieved NOTE If a Stop condition is reached while you are adjusting voltages and gains acquisition is not restarted and the data plots are not refreshe...

Page 309: ...s automatically performed if the Save Histogram checkbox is checked in Workspace Preferences Acquisition Options See also Color Dot Plot Histogram Plot Density Plot Format Plot Acquisition Stop and Save Use Stop Condition Check this checkbox if the stop counter is to be activated Maximum Events Set the maximum number of events you wish to be recorded Save Histogram Data in FCS Format Check this ch...

Page 310: ...meter Dot Plot Data Source Events Resolution Labeling Font Stop Save Density Plot Data Source Density Resolution Labeling Font Stop Save Special Types Legend Plot Data Source Options Font Prism Plot Data Source Font Info Plot Data Source FCS Font Create Modify Gates Modify Color Blend Modify Color Precedence Create Region Polygonal Region Rectangular Region Quadrant Region Elliptical AutoGate Cont...

Page 311: ...n this screen when running a locked protocol 2 Gate and Logical Expression Gate Color New Delete Operands 3 New Gate 4 is highlighted so you can modify the name if desired 4 Create new logical expressions See also Gate Selection Gate Color Boolean Gating Gate and Logical Expression Shows the Gate name and the logical combination of Gates New Allows you to create a new Gate with a new combination o...

Page 312: ...Gates have been created To apply a Gate to a plot 1 Click the right mouse button on the plot and 2 the Gate you wish to apply from the Gate drop down list box 3 or press Enter to accept the changes or press Esc to exit the dialog box without saving the changes Gate Color When a region is drawn on a plot the first region is automatically shown as red meaning events inside this gate are colored red ...

Page 313: ...color has been found you can click the Add to Custom Colors button for easy use at a later date or you can to add to a plot The same principles can also be applied to the Ungated Events Color option Boolean Gating Navios software implements Boolean gating Up to eight regions can be combined to form a gate A gate is used to select a specific subpopulation of data Navios software uses a combination ...

Page 314: ...llowing logical combinations of regions AND Events which are in both regions A AND region B This is written as A AND B OR Events that are in region A OR in region B This is written as A OR B XOR Events that are EXCLUSIVELY in region A OR in region B but NOT in both This is written as A XOR B ...

Page 315: ... This is written as NOT A OR B PARENTHESES These are used to define a precise logical statement An open parentheses must be placed after a NOT operator even if the operand is only a single value Example Lymphs AND NOT CD8 Color Blend Mode Introduction Navios software allows the use of combinations of Gates to determine the color of dots in a dot plot The key concept behind this process is similar ...

Page 316: ...mbinations of the gates may be used to define eight different subpopulations phenotypes of events as follows When in color blend mode ONLY color statistics from the blended colors are displayed in the Legend plot Use to view Region statistics See also Modify Color Blend Modify Color Blend To use Modify Color Blend 1 Analysis Modify Color Blend to view the Modify Color Blend dialog box 2 the Gate y...

Page 317: ... any changes on this screen when running a locked protocol 4 or press Enter to accept the changes or press Esc to exit the dialog box without saving the changes See also Create Modify Gates Workspace Preferences Gating Gate Names Allows the selection of a Gate that defines a population of interest Enable Enables the selection of one two or all three blend Gates ...

Page 318: ...s displayed showing the Gate Logic to be applied Press Yes to Create the Gate or No to cancel Modify Color Precedence When a subpopulation is very small and a larger blended color would swamp a smaller population Color Precedence can be used instead of Color Blending In Color Precedence Mode the subpopulation or color given the highest precedence overrules any color with lower precedence when the ...

Page 319: ...edence NOTE You cannot make any changes on this screen when running a locked protocol Advanced Precedence allows you to assign particular Gate colors to specific plots This is of particular interest if different plots are gated on completely different criteria and the color from one gate therefore has no relevance to another plot or file Toconfigurewhatcoloredeventswilldisplayonagiven plot 1 Highl...

Page 320: ...so assigned to a Gate This assignment can be accepted or edited later The automatic assignment of Regions to Gate canbe switched on oroff if desired using Gates Automatic Gate Creation Region Properties on a region to make it active and then click the right mouse button on it to display the Region Properties dialog box The Re Calculate AutoGate option allows a return to AutoGating after manual man...

Page 321: ...Statistics exported for Quality Control The region s results are exported to the Quality Control feature of the Report Generator NOTE Exporting region statistics and selecting the QC product for FlexQuad regions operates differently depending on whether the Region Properties dialog is opened via right click on the selected region in the plot and using the context menu or right click on the region ...

Page 322: ...n the AutoGate option is not selected Elliptical Toggle the AutoGate to an elliptical region Contour Toggle the AutoGate region to a contour region Sensitivity Eliptical AutoGate settings are 0 11 0 33 and 1 1 of processed peak Contour AutoGate settings are 1 2 3 4 and 5 Level 1 0 11 processed peak at a resolution of 64x64 Levels 2 3 and 4 0 11 0 33 and 1 1 at a resolution of 128x128 Level 5 1 1 p...

Page 323: ...agging the region are propagated to both regions The exception is when the region is an auto analysis region positives analysis Elliptical and Contour AutoGate Then the regions track the auto analysis region and the link is unidirectional If a region is linked to another positives analysis and autogating are disabled for that region Polygonal Region Format Tab Interactive Polygonal Region Editing ...

Page 324: ...allows resizing of previously created Regions Quadrant Region Insert aQuadrant Regioninto adualparameterplot Allquadrants comprisefoursetsofRectangular shaped polygonal Regions on a dual parameter plot The Quadrants are automatically assigned an alphabetical region name and a number for each quadrant Quadrant regions have flexquad capabilities allowing adjustment of the dividers between FlexQuad q...

Page 325: ...eted Gate is reset to Ungated Navios software allows you to reposition an already created Region Elliptical AutoGate Create an Elliptical AutoGate around the selected population on a plot See also Create AutoGate Contour AutoGate Create a Contour AutoGate around the selected population on a plot See also Create AutoGate Linear Region Insert a Linear Region See also Create Linear Regions Region Nam...

Page 326: ...e is unavailable Use this option to automatically set the region position for a negative control sample Interactive Linear Region Editing When a Region s position is changed any Gates that use the Region are automatically updated and each plot is redrawn to reflect the changes in the Gate When the Region is deleted any Gate which used the Region is also automatically deleted When a Gate has been d...

Page 327: ...ursor position That is before the first marker is set If the cursor is on channel 10 the integral shows the count value of the populations at channel 10 After first marker is set and as you move the mouse to either the left or right of this point the integral value continuously updates to reflect the summation of each channel between the Region starting position and the current mouse position Mult...

Page 328: ...and Moving a Region Name Moving a Region Resizing a Region Region Name Select the Region to view edit or delete from the Regions list box Highlight the Region Name and to delete the region s Double click the Region Name to rename the region Region Points This list box gives details of the Region bounds This is Upper Lower channel for single parameter histograms For rectangles the lower left and up...

Page 329: ...ouse over the Region to get the cursor 2 Hold the left mouse button down while moving the Region anywhere in the current window If the Region has been moved the statistics automatically recalculate The Region name moves to the same relative position alongside the Region s new position See also View Modify Regions Editing and Moving a Region Name To edit or move the Region name NOTE Quadrant FlexQu...

Page 330: ... hold and drag to move the region name 5 to fix the location of the region name Deleting Regions There are two methods used to delete regions From Within a Plot and Using the Delete Button in the View Modify Regions Dialog Box NOTE If a plot is deleted its regions are still retained From Within a Plot 1 the Region The Region is now active and handles appear 2 Press Delete The Region is now deleted...

Page 331: ...her than re calculating them individually Create Prism Divider Dual Prism Divider The Analysis Create Prism Divider Dual Prism Divider menu option allows you simultaneously set two Prism dividers in a quadrant fashion on a dual parameter plot Any displayed Prism Plot is automatically updated with the new Prism statistics If the number of Prism dividers is changed during the divider creation the co...

Page 332: ...set position Editing a Dual Prism Divider Editing an existing Dual Parameter plot with a set of dual Prism dividers displayed essentially consists of creating a new set of dual Prism dividers When the second set of dual Prism dividers is defined the first set is deleted 1 Highlight the required dual parameter plot 2 Mouse over the Prism divider to get the or cursor 3 hold to set the new Dual Prism...

Page 333: ...onding Prism plot also reflects this by changing its format according to the number of active Prism dividers For further explanation on Prism parameter see What is Prism NOTE Navios software only allows one Prism divider per parameter As a consequence modifying the Prism divider of any parameter on any plot automatically updates the divider of that parameter if it is displayed on any other plot Th...

Page 334: ...sociated Prism plot is updated with the new Prism statistics 4 To delete Prism divider on the divider to make it active and press Delete The Prism divider for the associated parameter is deleted altogether from this plot and from any other plot that has this divider set Any associated Prism plot changes its format and its statistics are updated to reflect a smaller number of Prism dividers View Mo...

Page 335: ...ivider displays also update them to reflect the modified number of prism parameters in use 4 the value that you wish to change and enter the required value within the range 0 to 1023 5 to accept all changes to abandon all changes Select Results Navios software gives the flexibility of generating many different statistics and these are produced using combinations of Regions and Gates A Gate is used...

Page 336: ...s of statistics that can be utilized Any number of these can be selected and the relevant statistic appears in the box beneath the plot NOTE If a statistic cannot be computed its corresponding cell displays Mean Calculation Method This exports the method of calculating the mean as part of a Published Excel spreadsheet FCS Information These options are either generated automatically by Navios softw...

Page 337: ...d to indicate the point on the scale of measures where the population is centered The median of a population is the point that divides the distribution of scores in half Numerically half of the scores in a population have values that are equal to or larger than the median and half have values that are equal to or smaller than the median HP CV HP X CV and HP Y CV The Half Peak Coefficient of Variat...

Page 338: ...ecimal places for Percent and maximum 5 digits for Mean Advanced Statistics Configuration Differences Between Log Log and Log Lin Statistical Calculations For most practical applications users may never notice the difference between the two In general Log Log mean appears to have its value skewed further to the right than a Log Lin mean calculation on the same data This skew is more pronounced whe...

Page 339: ...ute concentration of the cell type is then calculated automatically A listmode files replays with its runtime Cal Factor Use this screen to enter a different Cal Factor to calculate individual listmode absolute counts NOTE A CAL region MUST be set for the system to be able to calculate an absolute count See Setting a CAL Region Listmode replay uses the runtime protocol Cal Factor unless you select...

Page 340: ... Use the Delete button to remove a selected lot from the list only available on the Advanced screen Setting a CAL Region Create a Region around the absolute count calibration particles the region MUST be named CAL Set or select the calibration factor for the batch of beads in use from the Analysis Absolute Count Calibration menu item NOTE If the Cal Factor is set to 0 or there is no CAL Region pre...

Page 341: ...llowing conditions apply when using TrueView When toggling between the TrueView settings stats and region counts will differ slighly as each of the TrueView settings represents a different mathematical transformation TrueView should not be enabled while running the AutoSetup Wizard Quadrant Regions are lost on axis if TrueView is turned off and region was set in negative decades area When toggling...

Page 342: ...gative Decades to be displayed on compensated parameter plots The slider allows between 0 and 2 decades to be selected in 0 5 decade increments LMD QuickCOMP Enabling LMD QuickCOMP displays orange slider bars on all dual fluorescence plots These sliders are used to intuitively adjust the compensation coefficients and update the compensation values applied to the listmode file Clicking the arrows a...

Page 343: ...ew the LMD QuickCOMP Matrix The compensation matrix in the Cytometer Control dialog represents the compensation settings last used in that protocol and may not necessarily be the compensation settings used for any given Listmode file Show Analysis Algorithm Results Only available when running protocols from optional IVD locked applications Flowpage Menu FlowPAGE Introduction Editing FlowPAGEs Edit...

Page 344: ... always displays xxxxxx on the Navios Workspace Upon printing all automatic header fields are populated with the listmode file Keyword information on the printout ONLY FlowPAGEs are updated during Data Acquisition in live time if Do Not Show Plot Events has not been selected NOTE Occasionally when using a FlowPAGE one or more items cannot be deleted from a page If this occurs the items can be clea...

Page 345: ...cted items until you see the cursor and hold and drag the selected items to move them 5 Click the right mouse button on the selected items to edit them Deleting Objects in FlowPAGE 1 the object that is to be deleted Handles appear around the object 2 Press Delete Resizing Objects in FlowPAGE 1 the object that is to be resized Handles appear around the object 2 Drag a handle to the size required an...

Page 346: ...vios Software Flowpage Menu You can Cut Copy and Paste items that are selected You can change the order of items that are selected You can group and ungroup items that are selected You can edit and change the alignment of text ...

Page 347: ... 10 151 Using Navios Software Flowpage Menu 10 You can change how lines are displayed You can change the fill properties of items that are selected You can change the font properties of items that are selected ...

Page 348: ...t you wish to edit The edit handles appear 2 Right mouse click on the textbox and Properties 3 Type in the new text 4 Change Plot Use Change Plot to change which Plot is displayed from those available on the Navios desktop 1 On the FlowPAGE the Plot you want to replace The edit handles appear ...

Page 349: ...plot you want to use 4 Grow to Largest 1 Select the items to be changed See Select a Group of Items Within FlowPAGE 2 All items in the group grows to the size of the item which has the largest area Shrink to Smallest 1 Select the items to be changed See Select a Group of Items Within FlowPAGE ...

Page 350: ...left of the last selected grey handles item Align Right 1 Select the items you wish to align See Select a Group of Items Within FlowPAGE 2 All items are now aligned to the right of the last selected grey handles item Align Top 1 Select the items to be changed See Select a Group of Items Within FlowPAGE 2 All items are now aligned to the top of the last selected grey handles item Align Bottom 1 Sel...

Page 351: ...e changed See Select a Group of Items Within FlowPAGE 2 All items are now horizontally spaced equally Space Evenly Down 1 Select the items you wish to change See Select a Group of Items Within FlowPAGE 2 All items are now vertically spaced equally Save FlowPAGE As To save an existing FlowPAGE as a FlowPAGE template 1 FlowPAGE Save FlowPAGE As to view the Save FlowPAGE dialog box ...

Page 352: ...ile searches Do Not Show Plot Events Toggles the FlowPAGE Hide Events mode When in Hide Events mode all dot density histogram and prism plots displayed on FlowPAGEs will not display event information Other plot information labels axes regions and prism dividers will continue to display and will be updated appropriately when changes are made to the protocol Other FlowPAGE components will not be aff...

Page 353: ...ained from a Protocol other than the current Protocol in memory The Get Cytosettings from LMD file option allows Cytometer Instrument Settings to be obtained from a listmode file The Controls for Acquisition are also found within the Cytometer menu See also Flow Rate Status Bar Cytometer Control The Cytometer Control button opens the Cytometer Control screen This screen is a show hide dialog box T...

Page 354: ...ording to the Laser to which the Detector relates If the Laser or PMT to which a Detector relates is not installed on the instrument then all fields on that row will be disabled Label These input fields allow the editing the Names assigned to the default manufacturer s detectors Changes are ONLY reflected in the names shown within the Discriminator box in the Acquisition Setup tab and the Compensa...

Page 355: ... Stops are disabled Printing is disabled and listmode files are not stored Setup Mode allows continuous acquisition of data from the Cytometer giving continuous real time feedback of instrument performance on the displayed plots Any Stop Save values set are ignored in this mode Display of data continues until Abort is selected to end data acquisition or the Setup Mode box is unchecked to begin nor...

Page 356: ...mpensation coefficients and update the compensation values in the Cytometer Control Compensation Tab Clicking the arrows adjusts the settings by 0 1 clickingeithersideoftheslideradjustsby 1 0 or drag the slider to place the cells in the required position When QuickCOMP is enabled QuickSET mode is not available NOTE Listmode Compensation must be performed using the runtime protocol or a protocol wi...

Page 357: ...lapsed Time If no Elapsed Time is specified then the Acquisition Time will be used Both Acquisition and Elapsed Times must be between 10 and 99 999 seconds Acquisition Time This field allows you to set Acquisition Time for the current Protocol Elapsed Time This field will allows you to set the Elapsed Stop Time which accounts for time in Pause mode for the current Protocol OK Pressing OK will vali...

Page 358: ... not automatically refresh the events The listmode file will include events that are a combination of the original and modified gate s used throughout the Live Gate acquisition CAUTION Improper use of the Live Gate region may generate erroneous but credible results if the Live Gate region is modified during acquisition If a Live Gate region is modified during acquisition the data set will be a com...

Page 359: ...er name for each detector You can arrange the order within the Selected Signals list box by highlighting the appropriate item s and Drag and Drop into your chosen order within the Selected Signals list box CAUTION Risk of erroneous results if you modify a protocol by removing or changing the order of selected parameters Verify that the protocol s plots regions and gate assignments are as desired b...

Page 360: ...Slide Bar to set the desired value Use the Up and Down arrows to make any fine adjustments to the value Clear All Button Selecting the Clear All button resets ALL the values within the Compensation Matrix to zero Status Page To view the cytosettings of an application display or print the Cytometer Status screen for the verification tube of the application Compensation allows for the subtraction of...

Page 361: ...s the Cytometer settings currently in use and allows you to print these if required Selecting the Print button displays the standard Windows Print dialog box Printed status pages also contain the protocol filename date time and cytometer serial number The Get Cytosettings From Protocol option allows Cytometer Instrument Settings to be obtained from a Protocol other than the current Protocol in mem...

Page 362: ...ormed Pause The Pause button pauses data acquisition as does clicking To continue Acquisition select To restart acquisition from zero events select Abort Selecting the Abort button displays the Abort screen This function is only available if Acquisition is running NOTE No Files are saved if a tube is Aborted Select the option required and The Get Cytosettings From LMD File option allows Cytometer ...

Page 363: ...t panel Abort the MCL worklist Ejects the current carousel and leaves the remainder of the Worklist unread allowing resumption from the current tube Repeat the Tube Allows the current tube to be resampled Repeat the Panel Allows the current panel to be resampled The MCL returns to the first tube of the current panel Restart If a sample is already being acquired the Restart button restarts the Acqu...

Page 364: ...e state the Elapsed Time setting limit is ignored Idle Mode The Idle Mode button places the Cytometer in Idle mode so that various cleaning and replacing procedures can be performed Prime The Prime button allows you to declog or remove bubbles or blockages from the sample line with sheath solution Cleanse The Cleanse button allows you to initiate a cycle to flush the instrument sample lines with c...

Page 365: ... When not acquiring it displays Not acquiring This refers to the Processed DataRate that is the number of events which have exceeded the discriminator subsequently processed and saved in memory Acquisition Time Elapsed Time Displays the acquisition time and elapsed time in seconds You control the On Standby state of the Red and Violet lasers by clicking on the appropriate icon Additionally if the ...

Page 366: ...continue to display data without reaching a set stop condition Cytometer Error Warning Messages Error Warning messages generated by the Cytometer The software translates any received error codes and displays the appropriate text in the status bar When there are no messages coming from the instrument this field defaults to No messages Received Double clicking this field brings up the Cytometer Stat...

Page 367: ...re logarithmic and uncalibrated the values vary between 0 1024 1024 and span four decades For most other manufacturers the data varies between 1 10 000 spanning four decades Window Menu Cascade Use Cascade to display the window so that the plots overlay Window Cascade Tile Arranges each plot so every window display is visible The pattern depends on the number of open Windows Window Tile Tile Speci...

Page 368: ...rt of each row the Plot Type Icon is displayed 1 Window Tile Special to display the Tile Special dialog box 2 By clicking the mouse on the File Gate or Parameter column heading the plots are displayed across the screen in alphabetical order Clicking the appropriate column heading again displays the plots in reverse order 3 The order is shown in the Tile Special dialog box to apply the change You c...

Page 369: ...een shown above the resulting plot display is shown to the right Arrange Icons This option is used to arrange minimized plot windows Plot windows can be minimized and placed anywhere on screen Window Arrange Icons to place all icons along the bottom of the screen NOTE This option is very useful when minimized plots have been lost on the desktop Choosing Window Arrange Icons places all the icons al...

Page 370: ...y displayed protocol is a Runtime Protocol or New Protocol when listmode file is replayed or Locked Protocols System Options The System Options screen will display details of the current instrument hardware together with any installed software modules If you are asking for technical support by telephone fax or email please quote the Navios software build number which is accessible from menu Help S...

Page 371: ...eld displays the version number reported by the instrument firmware If no instrument is currently connected the field will display Working Offline Hardware group Lasers The emission wavelengths for all installed Lasers is displayed If a Laser is not present the Laser information reads Not Installed Hardware group PMTs The installed PMTs are detailed broken down by the appropriate Laser Each PMT gr...

Page 372: ...access the Beckman Coulter Web Site through your Web Browser program You can then access the latest information concerning the up to date software releases and other items of interest Quality Control Report The Quality Control Report consists of Levey Jennings plots based on information selected in the QC Template and data stored in the QC tables in the Report Generator database The information se...

Page 373: ...e the instrument that you want to view QC data from Application and choose an AutoSetup II application that is associated with a template NOTE To view QC results that were run without being associated with an application for example Flow Check Pro QC results not scheduled when run leave this option unchecked Data Table Displays the information from the Levey Jennings plots in tabular format See al...

Page 374: ...checkbox Removed data points are displayed green and are excluded when calculating the mean and SD on the Levey Jennings plot To remove a range of data points and on the first data point to remove Right mouse click on the last data point to remove and Reference Points To assign a data point as a Reference on a data point and Reference ...

Page 375: ...ayed orange and when assigned the Mean and SD of the Levey Jennings plot can be calculated from the Reference points To assign a range of data points as reference 1 and on the first data point 2 Right mouse click on the last data point and Delete Plot 1 to the right of the plot title Multiple data plots can be selected 2 and New Plot Add a new plot ...

Page 376: ...nitions of the Levey Jennings screen can be saved as a QC template Clear Template Clear the current template Select Template Select a saved template Save Template Save the current template Save Template As Save a template as a different name Associate Default Template Files To Your Instrument DefaultQC templates areinstalled withthe software You need to save the default template fileswith your ins...

Page 377: ...vios Software Quality Control Report 10 1 On the QC Levey Jennings screen Default in the Instrument field 2 Template Select Template 3 Highlight the desired template and 4 Template Save Template As enter the template name and ...

Page 378: ...edit IQAP templates Use the IQAP templates to submit control data to the IQAP Program Refer to the IQAP manual PN 4206384 or www beckmancoulter com for additional information Select Parameter 1 on the title bar of a plot 2 Use to choose the appropriate a User Label b Protocol c Product d Lot e Apply Lot to all plots 3 one of the choices a Parameter and choose the parameter or compensation setting ...

Page 379: ...773232AH 10 183 Using Navios Software Quality Control Report 10 b Region and choose the Region X or Y the Statistic 4 Select Mean 1 Mean 2 one of the choices Computed Mean Manual Mean and enter value 3 ...

Page 380: ...d enter a number Mean Mmean and enter percent Mean Value and enter value 3 QC Data Table The QC Data Table displays the information from the Levey Jennings plots in tabular format Each column of the table displays the data from one Levey Jennings plot The statistics for each column are displayed at the bottom of the table ...

Page 381: ...oll bar to scroll a data table individually File Menu Create Spreadsheet File Creates a text file txt that contains the data table information You can import the file into a spreadsheet program for analysis Print Print the QC data table Print Preview Preview the QC data table printout Page Setup Set page orientation and margins Close Close the QC Data Table screen ...

Page 382: ...t the limits and save the template before first time use Risk of misleading results if you do not specify the correct cell population Specify the correct cell population even if you do not want to print the line since other lines may refer to this line Overview Results are exported to the database when they are generated from panels that are export panels This means that when you run a sample in a...

Page 383: ...Panel Reports may not contain all of the FCS information from the protocols in a panel If a Panel Report is constructed from multiple protocols the FCS keywords from one protocol may not match the FCS keywords in another protocol in the Panel causing some FCS information to be omitted from the Panel Report Creating And Importing Panel Report Templates In order to print patient panel reports you ne...

Page 384: ...AH 10 188 Using Navios Software Creating And Importing Panel Report Templates 2 Right click on the panel in Acquisistion Manager and 3 Type a name for the panel Export Results of panel to Report Generator and ...

Page 385: ...nformation you want on the patient report 4 File Save to save the template See Verifying A Panel Report Template NOTE When you save an export panel using the Save As Panel option you must clear the worklist and re select the panel before running the export panel Importing a Panel Report Template The Template Import dialog allows you to select an existing template and attach to panel Only templates...

Page 386: ...emplate file This field allows a maximum of 199 characters All printable characters are allowed Panel Name Enter the name of the template without file extension This field allows a maximum of 48 characters All printable characters are allowed Cytometer Serial Number Enter the serial number for the cytometer This field allows a maximum of 10 characters All printable characters are allowed ...

Page 387: ...e Run a test panel on a normal sample and verify each result printed on the panel report If there is an inconsistency verify the report template again for proper formulas and references then verify again Global Tab Settings 1 Allows you to define a global report comment that prints on every panel report generated from this template NOTE You can edit the comment on individual reports if necessary S...

Page 388: ...aracters for the Description field the Description may appear truncated on the printout or in the PDF and Excel files 5 Allows you to select the number of decimal places used Decimal places are just for results and considered in flagging Select only combo box The options are 0 1 2 3 4 6 Allows you to enable auto printing so that the panel reports automatically print at the end of acquisition 7 All...

Page 389: ... Y Mean X Mode Y Mode X Median Y Median X CV Y CV X HPCV Y HPCV Only statistics that were selected in the protocol during acquisition are available as options Optional statistics cannot be selected when Equation is selected 5 Use one of the following methods to define a custom equation Type an equation using the operators Result Rows are designated in the equation as R001 to R999 The Row number ca...

Page 390: ...respectively Ranges are is 99999999 to 99999999 for both low and high The index of the protocol The index is 0 if equation was used and 1 for a blank line 13 Indicates if item prints on the report N not printed used for calculations do not enter ranges for these items Y printed B blank 14 Displays the optional statistics for the result that was selected in the Region field in the Protocol area of ...

Page 391: ...ave the updated template the following message appears Procedure for Editing Saving Panel Report Templates Do this procedure to edit and save any export panel report template to select deselect SI units 1 Allows you to select up to 16 data plots to include in the report 2 Displays the protocol name and index number The index number represents the protocol order in the panel 3 Displays the data plo...

Page 392: ...eport comment which is printed on every report generated from the affected template edit flagging limit ranges add or delete plots NOTE When you create or edit an export panel and then save it using the Save As Panel option you must clear the worklist and re select the panel before running the export panel 1 2 View the templates with cpf extension a File Open b Navigate to the desired panel folder...

Page 393: ...editing a global report comment only future reports will be printed with the updated text reports generated prior to the change will not contain the updated comment 5 To edit flagging limits Local 6 Enter edit the information as needed NOTE The Description Protocol Region and Print Status fields must include entries in order for the template row input to be fully implemented ...

Page 394: ...ort Templates 7 To select data plots for the report Data Plots 8 File Save to save the template with your changes See Verifying A Panel Report Template 9 File Print to print a copy of the template for your records 10 File Close to close the template screen ...

Page 395: ... database Below is an example of a patient panel report with data only Each area is defined for the purpose of helping you better understand the origin of the report information Your Facility Name 25 Harvard Street Boston MA 02110 67892345 b d f c e g 1 1 1 h i j 1 Comments Added by user 1 1 1 1 1 1 2 2 2 Navios Navios Navios BCI BCI ...

Page 396: ...matology information is added Cells μL are reflected as Cells μL HEM 12 Percent positive results obtained from Navios listmode file and expected range of percent entered at Local Tab in report template see Editing Panel Report Templates 13 Signature blank for your lab s use 14 Comments entered by user at the template or at individual report 15 Reported results measured or calculated 16 Indicates t...

Page 397: ...773232AH 10 201 Using Navios Software Panel Report 10 Below is an example of a panel report with data and plots Navios Navios Navios BCI BCI ...

Page 398: ...n a tube in an multi tube export panel is aborted no listmode file is created however the panel report is printed as INCOMPLETE REPORT and includes results for the aborted tube Upon completion of the export panel the panel report prints as INCOMPLETE REPORT and ERR for the aborted tube Navios Navios Navios BCI BCI ...

Page 399: ...edesiredreport s usingthefollowingsearchcriteria patientID lastname sample ID1 or analysis date a Enter the search criteria information b Search The last sample run appears at the top of the list by default You can sort the list by Sample ID Patient ID Last Name etc by simply clicking the desired column title NOTE To do a global search and locate every sample report in the database leave all searc...

Page 400: ...e Panel Report 4 Once you have selected the desired report s the Reports View Print screen appears 5 Patient tab 6 Using review the reports as needed displays first report displays previous report displays next report displays last report ...

Page 401: ... or an XLS file 1 saves the selected report to XLS file 2 saves the selected report as a PDF file 3 saves all reports in this set as XLS files 4 saves all reports in this set as PDF files For a better understanding of the printed report see Panel Report 9 Exit when finished Tips for Selecting Reports To select only one report highlight the desired row and Select To select all reports Select All ...

Page 402: ...hile you the far left column of each file 2 The selected rows are highlighted 3 Release Ctrl after all desired files are highlighted 4 Select To deselect a report press and hold Ctrl while you the far left column of the highlighted file The deselected file is no longer highlighted Editing Report Comments If a comment was added to a template all reports generated from that template will print that ...

Page 403: ...ia patient ID last name sample ID1 or analysis date a Enter the search criteria information b Search NOTE To do a global search and locate every sample report in the database leave all search criteria fields empty and Search The last sample run appears at the top of the list 3 To select a report highlight the desired row ...

Page 404: ... if you edit Patient Demographics and some Specimen Information fields in Navios software while using Data Innovations Inc Instrument Manager software to transmit results to a host laboratory information system In order to prevent misidentification of sample results you must use Instrument Manager software to edit Patient Demographics not the database in the Navios software The Database Informatio...

Page 405: ...n to Navios by Sample ID1 Database Management 1 CAUTION Regarding hematology information if Flow Count was not used for a single platform absolute count the WBC and differential parameters may be entered prior to saving or replacing the listmode data files through a non Flow Count panel Absolute counts will then be determined as a dual platform with the manually entered hematology information and ...

Page 406: ...ory information system In order to prevent misidentification of sample results you must use Instrument Manager software to edit Patient Demographics not the database in the Navios software This figure shows fields of information downloaded from Instrument Manager to Navios To maintain continuity of patient information for the given sampleThese fields must not be edited on the Navios system 3 Highl...

Page 407: ...n as needed and Save to save the changes To enter information for a new patient 1 Clear 2 Enter the information 3 Save to save the input You must be assigned System Administrator rights in order to Archive Data or Restore an Archive Archive Data Data from the Report Generator and QC databasescan bearchived out ofthe live databaseforstorage offline To ensure sucessful Archive Restore of QC Records ...

Page 408: ...abase must be archived followed immediately by restoring the QC Record Archive 1 Log in as Admin a on Cytometer Startup Page 1 b Select your User ID from the pull down list c Enter your password d Enter the Admin Password e 2 3 Choose the archive location archive criteria and what data you want to archive Refer to the detailed description of the Archive Data Screen ...

Page 409: ...Records Make sure there are QC Records remaining in the QC Database In other words DO NOT ARCHIVE ALL QC RECORDS If all QC Records have been archived before restoring a QC Record archive the current QC Records in the database must be archived followed immediately by restoring the QC Record Archive 1 Log in as Admin a on Cytometer Startup Page 1 b Select your User ID from the pull down list c Enter...

Page 410: ... software until the Restoration is complete Report Generator Error Log The Report Generator writes error messages that occur during an automated activity to the Report Generator Error Log The name of the log file is RepGenError rgl and it is created in the current user folder The software will display the Report Generator Error Log at the completion of any automated activity during which errors we...

Page 411: ...g file If it has not been saved then the software displays a message prompting you to save the log file Selecting Yes closes the message and displays a save dialog leaving the Report Generator log dialog open Selecting No closes the message and the Report Generator error log dialog and deletes the log file RepGenError rgl Print Print the Error Log details The page format defaults to Landscape to e...

Page 412: ...773232AH 10 216 Using Navios Software Report Generator Error Log ...

Page 413: ...luid Container Clean The Cleaning Agent Container Clean The Vacuum Trap Other general procedures in this chapter are Put The Cytometer In The Idle Mode Remove The Reagent Containers Replace The Reagent Containers Power The Cytometer Only On off Cleaning Schedule See Maintenance Log for the cleaning schedule Clean The Air Filters Clean the air filters per Maintenance Log It is easiest to clean the ...

Page 414: ...s Prepare to Clean the Air Filters 1 Power the Cytometer OFF 2 Unplug the Supply Cart power cord from the wall outlet 3 Remove the Cytometer filters from the left side of the Cytometer The instrument has four air filters located on the Cytometer Left Side 2 Supply Cart rear panel ...

Page 415: ...ers from their frames NOTE eplace any torn filters 5 Remove the filter from the rear of the Supply Cart Replace any torn filters Rinse and Return the Air Filters 1 Rinse the filters in water 1 and then shake them out 2 2 Set the filters aside and let them dry out for about 30 minutes b c ...

Page 416: ... to check that the filters are completely dry 3 Return the Cytometer filters to their frames 4 Slide the Cytometer filters back into their respective locations on the left side of the Cytometer 5 Return the Supply Cart filter to it s location on the rear of the Supply Cart ...

Page 417: ...d on the electronic Maintenance Log 9 Perform the Daily Startup procedure before running samples Put The Cytometer In The Idle Mode To clean replace or fill the reagent containers you need to put the Cytometer in the Idle mode 1 To put the Cytometer in the Idle mode 2 Wait about 10 seconds for the Cytometer to depressurize The message Press Idle Mode button to initialize appears at the bottom of t...

Page 418: ...ep 2 If no Put The Cytometer In The Idle Mode 2 Open the Front Cover 3 Pull out a reagent container just far enough to access the connectors 1 Reagent container connectors 2 Cleaning agent container CAROU SEL CLEANI NG PREPAR E A SOLUTI ON OF 1 PART HOUSH OLD BLEACH 5 SOLUTI ONOF SODIUM HYPOC HLORIT E AND 9 PARTS WATER RINSE CAROU SEL WITH SOLUTI ON LIGHTLY RUB IF NECESS ARY IMMEDI ATELY RINSE WIT...

Page 419: ...32AH 11 7 Cleaning Procedures Remove The Reagent Containers 11 3 Sheath fluid container 4 Disconnect the tubing on the top of each reagent container by pushing in on the metal clips on the connectors d c b ...

Page 420: ...ath fluid container Be careful not to contaminate the sheath fluid container Do not let your fingers paper towels or other objects touch the inside of the container or the inside of its cap Remove and clean the internal sheath fluid container according to Maintenance Log Clean a new sheath fluid container before placing it into the reagent drawer 1 See Remove The Reagent Containers to remove the s...

Page 421: ...d Container 11 2 Empty the container as completely as possible 3 Position a funnel into the sheath fluid container Pour about 50 to 100 mL of fresh IsoFlow sheath fluid or equivalent into the sheath fluid container 4 Screw the cap back on the sheath fluid container ...

Page 422: ...id in the sheath fluid container rinsing all surfaces 6 Empty the container as completely as possible 7 Fill The Internal Sheath Fluid Container 8 Record that the sheath container was cleaned on the electronic Maintenance Log 9 See Replace The Reagent Containers to replace the sheath fluid container ...

Page 423: ...Maintenance Log Clean a new cleaning agent container before placing it into the reagent drawer 1 See Remove The Reagent Containers to remove the cleaning agent container 2 Empty the container as completely as possible 3 Position a funnel into the cleaning agent container Pour about 50 to 100 mL of fresh IsoFlow sheath fluid or equivalent into the cleaning agent container ...

Page 424: ...ing Agent Container 4 Screw the cap back on the cleaning agent container 5 Swirl the sheath fluid in the cleaning agent container rinsing all surfaces 6 Empty the container as completely as possible 7 Position a funnel into the cleaning agent container ...

Page 425: ...13 Cleaning Procedures Clean The Cleaning Agent Container 11 Pour about 50 to 100 mL of fresh FlowClean cleaning agent or equivalent into the cleaning agent container 8 Empty the container as completely as possible ...

Page 426: ...pprox 1L filling it just to the bottom of its neck 1 10 Record that the cleaning agent container was cleaned on the electronic Maintenance Log 11 See Replace The Reagent Containers to replace the cleaning agent container Replace The Reagent Containers Use this procedure to return a cleaned reagent container into the reagent drawer b ...

Page 427: ... part way Keep the neck of the reagent container out 2 Reconnect the tubing assembly by pushing down on the tubing inserts so that the tubing snaps into the connector 3 Fill each reagent container as instructed in these procedures Fill The Internal Sheath Fluid Container or Fill The Cleaning Agent Container ...

Page 428: ... SEL CLEANI NG PREPAR E A SOLUTI ON OF 1 PART HOUSH OLD BLEACH 5 SOLUTI ONOF SODIUM HYPOC HLORIT E AND 9 PARTS WATER RINSE CAROU SEL WITH SOLUTI ON LIGHTLY RUB IF NECESS ARY IMMEDI ATELY RINSE WITH CLEAR WATER CAROU SEL CLEANI NG PREPAR E A SOLUTI ON OF 1 PART HOUSH OLD BLEACH 5 SOLUTI ONOF SODIUM HYPOC HLORIT E AND 9 PARTS WATER RINSE CAROU SEL WITH SOLUTI ON LIGHTLY RUB IF NECESS ARY IMMEDI ATEL...

Page 429: ...italstainsarebeingused on the same instrument When you observe a significant increase in debris or background counts Clean The MCL Sample Head And The Sample Probe To remove any crystal or debris buildup perform this procedure as often as needed See also When to Clean the Sampling System 1 Power the Cytometer OFF 2 Lift up the MCL cover NOTE If a carousel is present remove it CARO USEL CLEA NING P...

Page 430: ...I NG PREPAR E A SOLUTI ON OF 1 PART HOUSH OLD BLEACH 5 SOLUTI ONOF SODIUM HYPOC HLORIT E AND 9 PARTS WATER RINSE CAROU SEL WITH SOLUTI ON LIGHTLY RUB IF NECESS ARY IMMEDI ATELY RINSE WITH CLEAR WATER CAROU SEL CLEANI NG PREPAR E A SOLUTI ON OF 1 PART HOUSH OLD BLEACH 5 SOLUTI ONOF SODIUM HYPOC HLORIT E AND 9 PARTS WATER RINSE CAROU SEL WITH SOLUTI ON LIGHTLY RUB IF NECESS ARY IMMEDI ATELY RINSE WI...

Page 431: ...uitable laboratory protective gloves apply the 10 bleach solution 1 to a gauze pad CARO USEL CLEA NING PREP ARE A SOLU TION OF 1 PART HOUS HOLD BLEA CH 5 SOLU TIONO F SODI UM HYPO CHLO RITE AND 9 PART S WATE R RINSE CARO USEL WITH SOLU TION LIGHT LY RUB IF NECE SSAR Y IMME DIATE LY RINSE WITH CLEA R WATE R CARO USEL CLEA NING PREP ARE A SOLU TION OF 1 PART HOUS HOLD BLEA CH 5 SOLU TIONO F SODI UM ...

Page 432: ... sample head 1 and scrub away any debris inside and around the sample probe 8 Continue scrubbing the sample head and probe by pushing the head up and down 10 times during a 60 second period Replace moistened gauze as needed 9 Rinse the MCL sample head and probe with gauze moistened with water 10 Moisten a Q tip with distilled water b ...

Page 433: ...t out on the frame CARO USEL CLEA NING PREP ARE A SOLU TION OF 1 PART HOUS HOLD BLEA CH 5 SOLU TIONO F SODI UM HYPO CHLO RITE AND 9 PART S WATE R RINSE CARO USEL WITH SOLU TION LIGHT LY RUB IF NECE SSAR Y IMME DIATE LY RINSE WITH CLEA R WATE R CARO USEL CLEA NING PREP ARE A SOLU TION OF 1 PART HOUS HOLD BLEA CH 5 SOLU TIONO F SODI UM HYPO CHLO RITE AND 9 PART S WATE R RINSE CARO USEL WITH SOLU TIO...

Page 434: ...LUTI ON OF 1 PART HOUSH OLD BLEACH 5 SOLUTI ONOF SODIUM HYPOC HLORIT E AND 9 PARTS WATER RINSE CAROU SEL WITH SOLUTI ON LIGHTLY RUB IF NECESS ARY IMMEDI ATELY RINSE WITH CLEAR WATER CAROU SEL CLEANI NG PREPAR E A SOLUTI ON OF 1 PART HOUSH OLD BLEACH 5 SOLUTI ONOF SODIUM HYPOC HLORIT E AND 9 PARTS WATER RINSE CAROU SEL WITH SOLUTI ON LIGHTLY RUB IF NECESS ARY IMMEDI ATELY RINSE WITH CLEAR WATER ...

Page 435: ...are ON CARO USEL CLEA NING PREP ARE A SOLU TION OF 1 PART HOUS HOLD BLEA CH 5 SOLU TIONO F SODI UM HYPO CHLO RITE AND 9 PART S WATE R RINSE CARO USEL WITH SOLU TION LIGHT LY RUB IF NECE SSAR Y IMME DIATE LY RINSE WITH CLEA R WATE R CARO USEL CLEA NING PREP ARE A SOLU TION OF 1 PART HOUS HOLD BLEA CH 5 SOLU TIONO F SODI UM HYPO CHLO RITE AND 9 PART S WATE R RINSE CARO USEL WITH SOLU TION LIGHT LY R...

Page 436: ...or details about chemical exposure before using the chemical CAUTION A cleaning solution that is not fresh can leave residual stain in the system and misleading results could occur when you change laboratory applications Be sure to prepare a fresh cleaning solution before performing the cleaning procedure and use it within the same day 1 Prepare a cleaning solution of 1 part high quality fragrance...

Page 437: ...tube of bleach solution into carousel position 1 2 Put three freshly prepared tubes each containing about 2 mL of distilled water or IsoFlow sheath fluid into positions 2 3 and 4 of the carousel 4 Select the cleaning panel if it is not currently selected Select Cleanse PNL from the list of panels b c ...

Page 438: ... NING PREP ARE A SOLU TION OF 1 PART HOUS HOLD BLEA CH 5 SOLU TIONO F SODI UM HYPO CHLO RITE AND 9 PART S WATE R RINSE CARO USEL WITH SOLU TION LIGHT LY RUB IF NECE SSAR Y IMME DIATE LY RINSE WITH CLEA R WATE R CARO USEL CLEA NING PREP ARE A SOLU TION OF 1 PART HOUS HOLD BLEA CH 5 SOLU TIONO F SODI UM HYPO CHLO RITE AND 9 PART S WATE R RINSE CARO USEL WITH SOLU TION LIGHT LY RUB IF NECE SSAR Y IMM...

Page 439: ...escein diacetate you may want to test for residual stain after performing the routine cleaning procedure and before proceeding to your next application To test for residual stain run unstained Immuno Trol cells or CYTO TROL control cells for your application to ensure that the autofluorescent population is where you normally expect it If it is not repeat the routine cleaning procedure CARO USEL CL...

Page 440: ...ty it and rinse with tap water To clean the Vacuum Trap perform these procedures Prepare to Clean the Vacuum Trap Find and Pull Out the Vacuum Trap Rinse and Return the Vacuum Trap to Its Bracket Prepare to Clean the Vacuum Trap 1 Power the Cytometer OFFand unplug the Supply Cart power cord from the wall outlet 2 Open the Supply Cart front door and locate the vacuum trap ...

Page 441: ...acuum trap assembly out of its bracket so that you can grasp the top of the assembly 2 While using one hand to hold the top of the vacuum trap assembly use the other hand to unscrew the vacuum trap Then empty the vacuum trap according to your local environmental regulations and your laboratory s procedures ...

Page 442: ...Trap to Its Bracket 1 Rinse the vacuum trap with water and then shake out the excess water 2 Insert the white center post pointed end up into the vacuum trap assembly If the white center post in the vacuum trap assembly is stuck in the up position 1 pull it into the down position 2 b c ...

Page 443: ...cuum trap jar with the threads on the vacuum trap assembly and screw the vacuum trap back into place 4 Return the vacuum trap assembly to its bracket 5 Wipe up any spills 6 Plug the Supply Cart power cord into the wall outlet 7 Power the Cytometer Only ON or Power the Cytometer and Navios Software ON ...

Page 444: ...rocedures below if the instrument has not been fully shut down Otherwise use these more detailed procedures Use the Power the Computer and Cytometer ON procedure if you need to start up the instrument and computer from a fully shut down condition Use the Power the Computer and Cytometer OFF procedure if you need to fully shut down the instrument and the computer Power the Cytometer Only ON Use thi...

Page 445: ...773232AH 11 33 Cleaning Procedures Power The Cytometer Only On off 11 On the Windows desktop to turn off ONLY the Cytometer ...

Page 446: ...773232AH 11 34 Cleaning Procedures Power The Cytometer Only On off ...

Page 447: ...place The 10 L External Sheath Fluid Container Fill The Internal Sheath Fluid Container Fill The Cleaning Agent Container Empty The 20L Waste Container Replace The Sheath Fluid Filter Replace The Sample Probe And Sample Pickup Tubing Replace The Mcl Sample Head Adjust The System Pressure Replace An Optical Filter Replacement adjustment Schedule See the Replacement Schedule in the Troubleshooting C...

Page 448: ...ing the cleaning agent container after Cleanse Level Warning or Cleanse Level Error appears When you fill a completely empty cleaning agent container after cleaning or replacement you need about 1 L of cleaning agent due to pressurization and level sensing requirements NOTE bottle of FlowClean cleaning agent holds 500 mL Replace The 10 L External Sheath Fluid Container Perform this procedure whene...

Page 449: ... 1 Check if the instrument is currently in the Idle mode If yes Press Idle Mode button to initialize appears go to step 2 If no Put The Cytometer In The Idle Mode 2 Remove the support collar from the empty sheath fluid container 3 Remove any cardboard cutouts from the new sheath fluid container FLOW CLEANSE WASTE SHEATH STATUS ...

Page 450: ...ce The 10 L External Sheath Fluid Container Remove the cap and seal from the new sheath fluid container Be sure to completely remove the foil seal 4 Unscrew the plastic cap that secures the pickup tube assembly into the old sheath fluid container ...

Page 451: ... The 10 L External Sheath Fluid Container 12 5 Lift the pickup tube assembly straight up and out 6 Inspect the pickup tube assembly and replace it if necessary 7 Carefully insert the pickup tube assembly straight into the new sheath fluid container ...

Page 452: ...lastic support collar that secures the pickup tube assembly 9 Place the 10 L external sheath fluid container in a location that is lower than the internal sheath fluid container This prevents siphoning of the sheath fluid 10 Put the cap from the new container onto the old container and dispose of the container properly ...

Page 453: ...urrently in the Idle mode If yes Press Idle Mode button to initialize appears go to step 2 If no Put The Cytometer In The Idle Mode 2 Open the Front Cover CAROU SEL CLEANI NG PREPAR E A SOLUTI ON OF 1 PART HOUSH OLD BLEACH 5 SOLUTI ONOF SODIUM HYPOC HLORIT E AND 9 PARTS WATER RINSE CAROU SEL WITH SOLUTI ON LIGHTLY RUB IF NECESS ARY IMMEDI ATELY RINSE WITH CLEAR WATER CAROU SEL CLEANI NG PREPAR E A...

Page 454: ... Internal Sheath Fluid Container 3 Pull out the sheath fluid container far enough to access the cap 4 Remove the cap 1 Unscrew the cap on the sheath fluid container 2 To avoid contaminating the sheath fluid lay the cap upside down on the counter C B ...

Page 455: ...dures Fill The Internal Sheath Fluid Container 12 5 Position a funnel into the sheath fluid container 6 Carefully pour sheath fluid into the sheath fluid container filling it just to the bottom of its neck 7 Carefully wipe up any spills ...

Page 456: ...773232AH 12 10 Replace Adjust Procedures Fill The Internal Sheath Fluid Container 8 Screw the cap back on 9 Slide the sheath fluid container back into place ...

Page 457: ... RINSE CAROU SEL WITH SOLUTI ON LIGHTLY RUB IF NECESS ARY IMMEDI ATELY RINSE WITH CLEAR WATER CAROU SEL CLEANI NG PREPAR E A SOLUTI ON OF 1 PART HOUSH OLD BLEACH 5 SOLUTI ONOF SODIUM HYPOC HLORIT E AND 9 PARTS WATER RINSE CAROU SEL WITH SOLUTI ON LIGHTLY RUB IF NECESS ARY IMMEDI ATELY RINSE WITH CLEAR WATER CAROU SEL CLEANI NG PREPAR E A SOLUTI ON OF 1 PART HOUSH OLD BLEACH 5 SOLUTI ONOF SODIUM HY...

Page 458: ...t Procedures Fill The Cleaning Agent Container 3 Pull out the cleaning agent 1 container 4 Unscrew the cap on the cleaning agent container 1 To avoid contaminating the cleaning agent lay the cap upside down on the counter 2 B C B ...

Page 459: ...e Cleaning Agent Container 12 5 Carefully pour cleaning agent into the cleaning agent container filling it just to the bottom of its neck 1 6 Carefully wipe up any spills 7 Screw the cap back on 8 Slide the cleaning agent container back into place b ...

Page 460: ... PARTS WATER RINSE CAROU SEL WITH SOLUTI ON LIGHTLY RUB IF NECESS ARY IMMEDI ATELY RINSE WITH CLEAR WATER CAROU SEL CLEANI NG PREPAR E A SOLUTI ON OF 1 PART HOUSH OLD BLEACH 5 SOLUTI ONOF SODIUM HYPOC HLORIT E AND 9 PARTS WATER RINSE CAROU SEL WITH SOLUTI ON LIGHTLY RUB IF NECESS ARY IMMEDI ATELY RINSE WITH CLEAR WATER Empty the 20 L waste container when You perform your daily startup The Waste Fu...

Page 461: ...er and swirl it before removing the cap 3 Unscrew the cap and lay it on a leakproof disposable container such as a glove or beaker 4 Empty the waste container according to your laboratory s procedures NOTE Take proper precautions to avoid spills if you are emptying the waste container into a sink drain or larger container When moving the waste container to dispose of its contents be sure the cap i...

Page 462: ...r protection including protective eyeware gloves and suitable laboratory attire Refer to the Safety Data Sheet for details about chemical exposure before using the chemical 5 Put about 2 L of high quality fragrance free gel free bleach 1 5 to 6 solution of sodium hypochlorite available chlorine into the waste container to cover the bottom of the container b ...

Page 463: ...iner used in step 3 after you screw the cap back on the waste container 7 The system automatically performs an initialization cycle if you emptied the waste container after the Waste Full indicator appeared NOTE If you emptied the waste container before the Waste Full indicator appeared to initialize the system Replace The Sheath Fluid Filter Replace the 0 2 μm sheath fluid filter Every 6 months ...

Page 464: ...ars go to step 2 If no Put The Cytometer In The Idle Mode 2 Open the Front Cover CAROU SEL CLEANI NG PREPAR E A SOLUTI ON OF 1 PART HOUSH OLD BLEACH 5 SOLUTI ONOF SODIUM HYPOC HLORIT E AND 9 PARTS WATER RINSE CAROU SEL WITH SOLUTI ON LIGHTLY RUB IF NECESS ARY IMMEDI ATELY RINSE WITH CLEAR WATER CAROU SEL CLEANI NG PREPAR E A SOLUTI ON OF 1 PART HOUSH OLD BLEACH 5 SOLUTI ONOF SODIUM HYPOC HLORIT E ...

Page 465: ...on the old filter NOTE In the next step immediately install the new filter to avoid spills 6 Disconnect and reconnect each tube to the new filter one at a time in this order 1 2 and 3 Tubes 1 2 are disconnected by pushing in on the metal clip on the connector 4 When reconnected the connectors snap into place 7 Discard the old sheath fluid filter 8 Wipe up any spills and then put the filter in the ...

Page 466: ...ple probe leaks There is erratic sample flow or no sample flow from the sample probe 1 Power the Cytometer OFF CAROU SEL CLEANI NG PREPAR E A SOLUTI ON OF 1 PART HOUSH OLD BLEACH 5 SOLUTI ONOF SODIUM HYPOC HLORIT E AND 9 PARTS WATER RINSE CAROU SEL WITH SOLUTI ON LIGHTLY RUB IF NECESS ARY IMMEDI ATELY RINSE WITH CLEAR WATER CAROU SEL CLEANI NG PREPAR E A SOLUTI ON OF 1 PART HOUSH OLD BLEACH 5 SOLU...

Page 467: ...EL CLEA NING PREP ARE A SOLU TION OF 1 PART HOUS HOLD BLEA CH 5 SOLU TIONO F SODI UM HYPO CHLO RITE AND 9 PART S WATE R RINSE CARO USEL WITH SOLU TION LIGHT LY RUB IF NECE SSAR Y IMME DIATE LY RINSE WITH CLEA R WATE R CAROU SEL CLEANI NG PREPAR E A SOLUTI ON OF 1 PART HOUSH OLD BLEACH 5 SOLUTI ONOF SODIUM HYPOC HLORIT E AND 9 PARTS WATER RINSE CAROU SEL WITH SOLUTI ON LIGHTLY RUB IF NECESS ARY IMM...

Page 468: ...nstrument CARO USEL CLEA NING PREP ARE A SOLU TION OF 1 PART HOUS HOLD BLEA CH 5 SOLU TIONO F SODI UM HYPO CHLO RITE AND 9 PART S WATE R RINSE CARO USEL WITH SOLU TION LIGHT LY RUB IF NECE SSAR Y IMME DIATE LY RINSE WITH CLEA R WATE R CARO USEL CLEA NING PREP ARE A SOLU TION OF 1 PART HOUS HOLD BLEA CH 5 SOLU TIONO F SODI UM HYPO CHLO RITE AND 9 PART S WATE R RINSE CARO USEL WITH SOLU TION LIGHT L...

Page 469: ...ckup Tubing 12 5 Unscrew the sample pickup tubing connector from the bottom of the flow cell compartment 6 Pull the sample pickup tubing out through the left MCL side of the instrument 7 Remove the e ring from the sample probe using needle nose pliers or a hemostat Retain the clip ...

Page 470: ...ng 8 Lift the sample probe up and out of its holder 9 Discard the old sample pickup tubing and probe assembly in accordance with your local regulations and acceptable laboratory procedures 10 Ensure that the rubber washer 1 and O ring 2 are positioned correctly on the new sample probe b c ...

Page 471: ... Sample Pickup Tubing 12 11 Thread the sample pickup tubing through the instrument 12 Insert the new sample probe into the sample probe holder 13 Guide the sample probe tip into the MCL sample head 14 Insert the clip removed in step 7 into the groove on the sample probe ...

Page 472: ...just Procedures Replace The Sample Probe And Sample Pickup Tubing 15 Screw on the connector from the sample pickup tubing to the bottom of the flow cell compartment until it is finger tight 16 Replace the Front Left Side Panel ...

Page 473: ...h the left side panel to the front frame CARO USEL CLEA NING PREP ARE A SOLU TION OF 1 PART HOUS HOLD BLEA CH 5 SOLU TIONO F SODI UM HYPO CHLO RITE AND 9 PART S WATE R RINSE CARO USEL WITH SOLU TION LIGHT LY RUB IF NECE SSAR Y IMME DIATE LY RINSE WITH CLEA R WATE R CARO USEL CLEA NING PREP ARE A SOLU TION OF 1 PART HOUS HOLD BLEA CH 5 SOLU TIONO F SODI UM HYPO CHLO RITE AND 9 PART S WATE R RINSE C...

Page 474: ... NG PREPAR E A SOLUTI ON OF 1 PART HOUSH OLD BLEACH 5 SOLUTI ONOF SODIUM HYPOC HLORIT E AND 9 PARTS WATER RINSE CAROU SEL WITH SOLUTI ON LIGHTLY RUB IF NECESS ARY IMMEDI ATELY RINSE WITH CLEAR WATER CARO USEL CLEA NING PREP ARE A SOLU TION OF 1 PART HOUS HOLD BLEA CH 5 SOLU TIONO F SODI UM HYPO CHLO RITE AND 9 PART S WATE R RINSE CARO USEL WITH SOLU TION LIGHT LY RUB IF NECE SSAR Y IMME DIATE LY R...

Page 475: ...r messages occur 1 Power the Cytometer OFF 2 Open the MCL cover NOTE If a carousel is present remove it CARO USEL CLEA NING PREP ARE A SOLU TION OF 1 PART HOUS HOLD BLEA CH 5 SOLU TIONO F SODI UM HYPO CHLO RITE AND 9 PART S WATE R RINSE CARO USEL WITH SOLU TION LIGHT LY RUB IF NECE SSAR Y IMME DIATE LY RINSE WITH CLEA R WATE R CARO USEL CLEA NING PREP ARE A SOLU TION OF 1 PART HOUS HOLD BLEA CH 5 ...

Page 476: ...LEANI NG PREPAR E A SOLUTI ON OF 1 PART HOUSH OLD BLEACH 5 SOLUTI ONOF SODIUM HYPOC HLORIT E AND 9 PARTS WATER RINSE CAROU SEL WITH SOLUTI ON LIGHTLY RUB IF NECESS ARY IMMEDI ATELY RINSE WITH CLEAR WATER CAROU SEL CLEANI NG PREPAR E A SOLUTI ON OF 1 PART HOUSH OLD BLEACH 5 SOLUTI ONOF SODIUM HYPOC HLORIT E AND 9 PARTS WATER RINSE CAROU SEL WITH SOLUTI ON LIGHTLY RUB IF NECESS ARY IMMEDI ATELY RINS...

Page 477: ...head CARO USEL CLEA NING PREP ARE A SOLU TION OF 1 PART HOUS HOLD BLEA CH 5 SOLU TIONO F SODI UM HYPO CHLO RITE AND 9 PART S WATE R RINSE CARO USEL WITH SOLU TION LIGHT LY RUB IF NECE SSAR Y IMME DIATE LY RINSE WITH CLEA R WATE R CARO USEL CLEA NING PREP ARE A SOLU TION OF 1 PART HOUS HOLD BLEA CH 5 SOLU TIONO F SODI UM HYPO CHLO RITE AND 9 PART S WATE R RINSE CARO USEL WITH SOLU TION LIGHT LY RUB...

Page 478: ...ead 6 Pull off the sample head 7 Pull the sample head and tubing through the instrument behind the frame 8 Loosen the thumbscrew holding the left tubing manifold NOTE You might find it easier to unscrew the thumbscrew with a screwdriver 9 Pull off the tubing manifold ...

Page 479: ...mbly in accordance with your local regulations and acceptable laboratory procedures 11 Place the new tubing manifold into the bracket in the pneumatic drawer and tighten the thumbscrew NOTE You might find it easier to screw in the thumbscrew with a screwdriver 12 Route the sample head and tubing through the instrument ...

Page 480: ...el with the cut out on the frame and then push the panel back into place b c CARO USEL CLEA NING PREP ARE A SOLU TION OF 1 PART HOUS HOLD BLEA CH 5 SOLU TIONO F SODI UM HYPO CHLO RITE AND 9 PART S WATE R RINSE CARO USEL WITH SOLU TION LIGHT LY RUB IF NECE SSAR Y IMME DIATE LY RINSE WITH CLEA R WATE R CARO USEL CLEA NING PREP ARE A SOLU TION OF 1 PART HOUS HOLD BLEA CH 5 SOLU TIONO F SODI UM HYPO C...

Page 481: ... A SOLUTI ON OF 1 PART HOUSH OLD BLEACH 5 SOLUTI ONOF SODIUM HYPOC HLORIT E AND 9 PARTS WATER RINSE CAROU SEL WITH SOLUTI ON LIGHTLY RUB IF NECESS ARY IMMEDI ATELY RINSE WITH CLEAR WATER CAROU SEL CLEANI NG PREPAR E A SOLUTI ON OF 1 PART HOUSH OLD BLEACH 5 SOLUTI ONOF SODIUM HYPOC HLORIT E AND 9 PARTS WATER RINSE CAROU SEL WITH SOLUTI ON LIGHTLY RUB IF NECESS ARY IMMEDI ATELY RINSE WITH CLEAR WATE...

Page 482: ...ding 30 2 psi CARO USEL CLEA NING PREP ARE A SOLU TION OF 1 PART HOUS HOLD BLEA CH 5 SOLU TIONO F SODI UM HYPO CHLO RITE AND 9 PART S WATE R RINSE CARO USEL WITH SOLU TION LIGHT LY RUB IF NECE SSAR Y IMME DIATE LY RINSE WITH CLEA R WATE R CARO USEL CLEA NING PREP ARE A SOLU TION OF 1 PART HOUS HOLD BLEA CH 5 SOLU TIONO F SODI UM HYPO CHLO RITE AND 9 PART S WATE R RINSE CARO USEL WITH SOLU TION LIG...

Page 483: ... The System Pressure 12 1 Open the Supply Cart front door and locate the Pressure Adjustment knob 1 2 Pull the collar around the Pressure Adjust knob out toward you 3 Adjust the pressure to 30 2 psi 1 To decrease turn to the left b P U LLTOADJ U S T ...

Page 484: ...e is a loss of signal power replace the old filter with a new filter of the same type When you are running a different application and need a different filter in that filter holder NOTE If you replaced a damaged filter with the same type of filter check that you retrieve similar autostandardization mean intensity values with the new filter P U LLTOADJ U S T b c 30 2 PSI 50 0 20 10 40 60 30 P U LLT...

Page 485: ...ft thumbscrew with a screwdriver CAROU SEL CLEANI NG PREPAR E A SOLUTI ON OF 1 PART HOUSH OLD BLEACH 5 SOLUTI ONOF SODIUM HYPOC HLORIT E AND 9 PARTS WATER RINSE CAROU SEL WITH SOLUTI ON LIGHTLY RUB IF NECESS ARY IMMEDI ATELY RINSE WITH CLEAR WATER CAROU SEL CLEANI NG PREPAR E A SOLUTI ON OF 1 PART HOUSH OLD BLEACH 5 SOLUTI ONOF SODIUM HYPOC HLORIT E AND 9 PARTS WATER RINSE CAROU SEL WITH SOLUTI ON...

Page 486: ... the filter holder containing the filter you want to replace NOTE There are two types of filter holders See Replace Dichroic Filter or Replace Bandpass Filter Use the appropriate instructions for the type of filter holder used on the filter you are going to replace 1 3 5 6 8 9 ...

Page 487: ... it easier to finish loosening the metal ring by turning it with your gloved fingers 2 Insert the tool into the metal ring s two slots and turn to the left 3 Remove the metal ring and the filter 4 Orient the new filter correctly and insert the filter into the filter holder For BCI filters Position the filter into the filter holder so the arrow points into the counterbore For non BCI filters ...

Page 488: ...o determine correct orientation 5 Place the metal ring over the filter in the filter holder 6 For the metal ring fastener insert the special tool into the metal ring s two slots and turn to the right to tighten NOTE You might find it easier to begin tightening the metal ring by turning it with your gloved fingers ...

Page 489: ...rew 1 and remove the filter 2 2 Orient the new filter correctly and insert the filter into the filter holder For BCI filters Position the filter into the filter holder so the arrow points away from the counterbore For non BCI filters See Identify Coated Side Of Dichroic Filter to determine correct orientation B C ...

Page 490: ...s the coated side 1 of a non BCI filter a Take the eraser end of a pencil and hold it close to the filter near its edge b Look at the two reflections dark and light colored of the pencil c Turn the filter over and repeat steps a and b d The side where the pencil touches the dark colored reflection is the coated side 1 The uncoated side 2 shows the pencil touching the light colored reflection B C ...

Page 491: ... Procedures Replace An Optical Filter 12 a The coated side 1 should face the metal ring when you insert it Replace Filter Holder 1 Place the filter holder containing the filter you replaced back in the filter array b c 1 3 5 6 8 9 ...

Page 492: ...CLEANI NG PREPAR E A SOLUTI ON OF 1 PART HOUSH OLD BLEACH 5 SOLUTI ONOF SODIUM HYPOC HLORIT E AND 9 PARTS WATER RINSE CAROU SEL WITH SOLUTI ON LIGHTLY RUB IF NECESS ARY IMMEDI ATELY RINSE WITH CLEAR WATER CAROU SEL CLEANI NG PREPAR E A SOLUTI ON OF 1 PART HOUSH OLD BLEACH 5 SOLUTI ONOF SODIUM HYPOC HLORIT E AND 9 PARTS WATER RINSE CAROU SEL WITH SOLUTI ON LIGHTLY RUB IF NECESS ARY IMMEDI ATELY RIN...

Page 493: ...gers of laser use Use the instrument according to the information in the manuals Use of controls or adjustments or performance of procedures other than those specified herein might result in hazardous radiation exposure To ensure your safety the Cytometerlasers are covered with protective shields Do not remove these shields No user serviceable assemblies are accessible Do not attempt to remove the...

Page 494: ...ser Label on the Cytometer Back Panel See Figure 13 6 for the MCL bar code reader warning labels Figure 13 1 Laser Labels on the Sensing Compartment Cover LASER RADIATION AVOID EXPOSURE TO BEAM CLASS 3B LASER PRODUCT VISIBLE AND OR INVISIBLE LASER RADIATION WHEN OPEN AND INTERLOCK DEFEATED DANGER AVOID EYE OR SKIN EXPOSURE TO DIRECT OR SCATTERED RADIATION CLASS 1 LASER PRODUCT LASER RADIATION AVOI...

Page 495: ... Precautions Hazards 13 Figure 13 2 Laser Labels in the Sensing Compartment Cover Removed Laser radiation when open and interlock defeated DO NOT STARE INTO BEAM CAUTION LASER RADIATION AVOID EXPOSURE TO BEAM CLASS 3B LASER PRODUCT ...

Page 496: ... AVOID EXPOSURE TO BEAM CLASS NIb LASER PRODUCT CDRH CLASS 3B LASER PRODUCT EN60825 1 500mW DIODE LASER 400 410nm 56CRH S2746 SERIAL NO 00058620 MFG DATE 09 Aug 07 56CRH S2746 00058620 Longmont CO 80503 LASER APERTURE CLOSE OPEN SHUTTER LASER RADIATION AVOID EXPOSURE TO BEAM CLASS NIb LASER PRODUCT CDRH CLASS 3B LASER PRODUCT EN60825 1 500mW DIODE LASER 633 643nm MODEL 85 BCB 020 046 CARLSBAD CA 9...

Page 497: ...ilter Array Cover Removed 529 BP 28 25 620 BP 30 775 BP 50 660 BP 20 775 BP 50 450 BP 40 550 DC SP 655 DC SP 710 DC SP 480 DC SP Laser radiation when open and interlock defeated DO NOT STARE INTO BEAM CAUTION Laser radiation when open and interlock defeated DO NOT STARE INTO BEAM CAUTION ...

Page 498: ...k Panel SEPTEMBER 2009 BECKMAN COULTER INC 250 S Kraemer Blvd Brea CA 92821 USA Beckman Coulter Ireland Inc Lismeehan O Callaghan s Mills Co Clare Ireland B28656 THIS LASER PRODUCT CONFORMS TO THE PROVISIONS OFTHE 21 CFR SUBCHAPTER J SECTIONS 1040 10 AND 1040 11 MADE IN USA Manufactured DATE BY ...

Page 499: ...STARE INTO BEAM 670 nm LASER DIODE 1 0 MILLIWATT MAX CLASS II LASER PRODUCT A V O I D E X P O S U R E L A S E R L I G H T I S E M I T T E D F R O M T H I S A P E R T U R E C A U T I O N L A S E R L I G H T W H E N O P E N D O N O T S T A R E I N T O B E A M P R O D U C T C O N F O R M S T O U S A D H H S 2 1 C F R S U B C H A P T E R J C A U T I O N V O R S I C H T SERIAL NUMBER MODEL NUMBER MANUF...

Page 500: ...neumatic Supply instructs you to refer to product documentation before powering up the instrument Figure 13 7 International Warning Symbol Locations SYSTEM POWER MCL POWER WATER TRAP VAC TRAP AIR FILTER VAC FILTER SYS VAC SYS PRESS 30 PSI PRESS ADJ WATER TRAP VAC TRAP AIR FILTER VAC FILTER SYS VAC SYS PRESS 30 PSI PRESS ADJ ...

Page 501: ...pean Union For products under the requirement of WEEE directive please contact your dealer or local Beckman Coulter office for the proper decontamination information and take back program which will facilitate the proper collection treatment recovery recycling and safe disposal of device A28219 AA This label indicates that this electronic information product contains certain toxic or hazardous sub...

Page 502: ...omplies with the emission and immunity requirements described in IEC 61326 2 6 CAUTION This equipment has been designed and tested to CISPR 11 Class A In a domestic environment it could cause radio interference in which case you may need to take measures to mitigate the interference It is advised that prior to operation of the device the electromagnetic environment should be evaluated Do not use t...

Page 503: ...last one posted appears here All of the messages posted appear in the Cytometer Status Messages screen and the cytometer log file Figure 13 8 Error Message on Navios Software Screen Example Cytometer Status Messages Screen In the Cytometer Status Messages screen the last message and all uncleared messages appear See Figure 13 9 To access the Cytometer Status Messages screen double click the messag...

Page 504: ...reason as ERROR When acquisition is terminated and the listmode file is not saved any manual printouts will show the acquisition stop reason as UNKNOWN Footera N A No Panel Report is generated Software Error displayed in the center of the workspace N A No results generated N A No results generated N A No results generated Loss of Communication Error displayed in the center of the workspace Headera...

Page 505: ... The Cytometer messages are located in the cytometer log file NOTE Messages over 30 days old are automatically removed from the cytometer log file and placed into the cytometerarchive log file How to Access the Cytometer log File From Navios Software Press Ctrl L See Figure 13 10 OR Cytometer Cytometer Log View Log See Figure 13 10 ...

Page 506: ... number for Service use only Message text See Table 13 2 for a list of messages and operator actions How to Search the Cytometer log File To search for a specific word or phrase listed anywhere in the cytometer log file 1 Edit Find 2 Type in the word or phrase you want to find Example Waste 3 The direction of the search Up or Down 4 Find Next and the next occurrence of the word in the error log is...

Page 507: ...er Messages Message Probable Cause Recommended Action Acquisition Yield Warning The threshold events exceeds the processed and displayed events 1 Dilute the sample 2 Change the discriminator setting 3 Change the sample flow rate to medium or low 4 Restart the entire system If error persists contact your local Beckman Coulter Representative Ambient Sensor Error The ambient temperature sensor failed...

Page 508: ...t out of range and the acquisition was stopped Restart the entire system If error persists contact your local Beckman Coulter Representative Blue Laser Power Warning The blue laser power is unstable If laser does not stabilize within a reasonable time or frequently goes unstable then restart the entire system If problem persists then contact your local Beckman Coulter Representative CAN Master Boa...

Page 509: ...ll The Cleaning Agent Container Cleanse sensor failed if the cleaning agent container is full but this error message displayed contact your local Beckman Coulter Representative Control Socket Error A control communication error has occurred between the workstation and the instrument Check the Ethernet cable between the workstation and the cytometer Restart the entire system If error persists conta...

Page 510: ...Stop the acquisition in a controlled way To avoid the message in the future change the sample concentration or protocol stop condition to reduce the acquisition time to 18 minutes or less If the recommended action has been taken and the warning persists see Drip Chamber Level Error Drip Or Waste Overfill Error The drip or waste chamber has overflowed and the acquisition has been stopped contact yo...

Page 511: ...l Beckman Coulter Representative Incorrect Laser Type Red The type of the red laser does not agree with the type in the instrument configuration Restart the entire system If error persists contact your local Beckman Coulter Representative Incorrect Laser Type Violet The type of the violet laser does not agree with the type in the instrument configuration Restart the entire system If error persists...

Page 512: ...oolbar Pressures Not Calibrated Pressures can not be calibrated because pressure control board can not be detected or calibration coefficients corrupted Restart the entire system If error persists contact your local Beckman Coulter Representative Probe Up Down Error The probe failed to move up or down correctly after several attempts Restart the entire system If error persists contact your local B...

Page 513: ...is placed in the location identified in Acquisition Manager and select Run Sample Tube Pressure Error After several attempts the sample tube could not be pressurized There may be a leak caused by a bad sample tube or a bad sample head Inspect sample tube and sample head for damage Change as required See Replace The Mcl Sample Head Sample Tube Pressure Warning The first attempt to pressurize the tu...

Page 514: ... Fluid Filter 3 If problems continues contact your local Beckman Coulter Representative Sheath Pressure Warning The sheath fluid pressure is outside the system s operating range If warning persists see Sheath Pressure Error Start of Data Decode Error The header at the beginning of the data that is passed from the instrument to the workstation could not be decoded Restart the entire system If error...

Page 515: ...er Representative Tube Up Down Warning The first attempt to load or unload the sample tube from the MCL sampling position failed If warning persists see Tube Up Down Error Violet Laser Comms Warning Unable to communicate with the violet laser Restart the entire system If warning persists contact your local Beckman Coulter Representative Violet Laser Fault A fault occurred on the violet laser durin...

Page 516: ... the internal waste chamber is too high and acquisition has been stopped 1 Empty the 20 L waste container See Empty The 20L Waste Container 2 Check the waste vent filter for the presence of liquid and a proper connection 3 Restart the entire system If error persists contact your local Beckman Coulter Representative Waste Chamber Level Warning The liquid level in the internal waste chamber is too h...

Page 517: ...stmode file from backup or archive Baseline Offset not available On starting software the 3mv binary file is not found Reboot the computer if problem persists contact your local Beckman Coulter representative Multiplexor Address of new labels doesnotmatchexistingparameters Continue Parameter label does not match asks you to continue Reboot the computer if problem persists contact your local Beckma...

Page 518: ... in the following regions having their status as linked regions removed comma separated list of region names User has made changes that have broken the links between regions Re establish the desired links The QC Product file could not be opened The QC product file could not be opened due to the file not being present in the specified location or the file is invalid Contact your local Beckman Coult...

Page 519: ... file The selected file is not a valid file type and cannot be inserted User selected an image file of an unsupported format for FlowPage Image type must be bmp or dib Error opening a connection to the database Database information connection to database failed Restart software if problem persists contact a representative of Beckman Coulter Could not save this record specimen_id sample ID Database...

Page 520: ...rs Cytometer Control Window Cannot Be Viewed If the Cytometer Control window cannot be viewed it is hidden behind the Windows Taskbar at the bottom of the screen the Auto hide feature is currently selected Change the Windows settings to deselect the Auto hide feature and keep the Cytometer Control window in view To deselect the Auto hide feature 1 Start Control Panel Taskbar Start Menu 2 On the Ta...

Page 521: ...773232AH 13 29 Troubleshooting Cytometer Control Window Cannot Be Viewed 13 4 Drag the Cytometer Control window into full view ...

Page 522: ...773232AH 13 30 Troubleshooting Cytometer Control Window Cannot Be Viewed ...

Page 523: ... Codabar Interleaved 2 of 5 The bar code reader senses the difference between enabled bar code symbologies in a run A misread label can cause one sample ID to be read as another sample ID The laboratory s process for printing placing and meeting all bar code specifications is important to achieve highly accurate reading Follow the bar code specifications to avoid inaccurate reading of the bar code...

Page 524: ...ones must be visible through the slot and above the bottom of the carousel Note The Navios Flow Cytometry System rotates the tube as needed so the bar code label can be read Bar code Label Specifications A misread label can cause one sample ID to be read as another sample ID The laboratory s process for printing placing and meeting all bar code specifications is important to achieve highly accurat...

Page 525: ...e symbols must agree with the American Identification Manufacturer s AIM Uniform Symbology Specification 11 All bar code symbols must be printed at print quality class B or better as defined by the American National Standards Institute ANSI 22 Several factors affect print quality Labels must be clean not yellowed and used before the expiration date Printthebar code symbolonmaterialthatis reflectiv...

Page 526: ...fect on the accuracy of the bar code reading system In general Code 128 and Code 39 are more accurate and have lower error rates than Codabar or Interleaved 2 of 5 CLSI recommends Code 128 because of its accuracy compact form and self checking capabilities 33 A checksum greatly increases accuracy Use a checksum with Interleaved 2 of 5 and Codabar because they are less accurate symbologies Select t...

Page 527: ...ers Minimum 3 numeric characters The use of 15 numeric characters is invalid Code 39 also known as 3 of 9 and USD 3 Variable length Includes 43 data characters 26 letters uppercase A Z 10 digits 0 9 six symbols and a space Strong self checking properties Checksum Discrete code white spaces are not part of this code Maximum 7 characters 6 data characters 1 checksum character Interleaved 2 of 5 also...

Page 528: ...or voids no ink smearing Edge roughness is included in the bar and space tolerances Mcl Bar code Reader The MCL uses a visible laser type reader containing a Class II laser operating at 670 nm with a maximum power output of 1 mW Bar code Decoder The MCL sends a GS ASCII character hexadecimal 1D to the decoder to start operation Table A 2 Code Related Specifications Code Interleaved 2 of 5 Codabar ...

Page 529: ...mmends the use of bar code checksums to provide automatic checks for read accuracy Use of bar codes is an extremely accurate and effective method of positive patient identification Certain features such as checksum digits maximize accuracy in reading Codabar Code 39 and Interleaved 2 of 5 labels In one study the use of checksum digits detected 97 of misread errors Use checksums to provide protecti...

Page 530: ...773232AH A 8 Bar code Specifications Checksum Algorithm ...

Page 531: ... maintenance and service activities Use the Maintenance Log to record daily and periodic maintenance Use the Service Log to record service conditions noted and actions taken Maintenance Log The Maintenance Log lists actions that need to be performed and how often they are needed NOTE The tasks listed under Daily Startup are optional ...

Page 532: ... items are available File Menu Print Prints the Maintenance Log of the current month performs the same function The instrument serial number and facility name are displayed at the top The boxes corresponding to the current day s date are highlighted These are the only ones that may be selected by a user Arrow buttons on the bottom line can be used to show other months The dates are shown across th...

Page 533: ...ce Log The system automatically assigns letter A to the Administrator and assigns a unique color and letter to all other users The color assignment is used for visual display and the letter assignment is used for printing The letter legend is printed with the log The pre assigned letter A for Administrator is used for both the visual display and the printout User Entry Double click on a box for th...

Page 534: ...ment on the Maintenance Log indicates there is a comment associated with this entry on a printout indicates there is a comment associated with this entry Comments print on separate pages along with a legend shown below which identifies the users by an automatically assigned two character symbol rather than color You can view the legend on the screen and print if desired Administrator Entry To log ...

Page 535: ...es the comment however the original user color designation remains in the box The Administrator can add a task to the bottom of the fixed list by clicking on one of the empty rows The task is added to the section starting with the current month A total number of 5 additional task rows are available The Administrator can edit or delete any task that was added Default system defined tasks may not be...

Page 536: ...d facility name are displayed at the top 4 Enter text up to 255 characters to describe the condition noted 5 The second Date applies to the Action Taken entry and tracks the date of the action 6 Applies to the User who made the Action Taken entry This field is non editable and it is filled in automatically by the system when the Date is entered 7 Enter text up to 255 characters to describe the act...

Page 537: ...2013 will disappear This can result in potentially incomplete Maintenance Log entries No other Report Generator functions or patient results are affected The action to be taken for this is as follows Always print or save the December Maintenance Log prior to entering any subsequent month s log records If a print out or saving of the December Maintenance Log is required after entering log records f...

Page 538: ...le click the Date column and select the date on the calendar corresponding to the action taken 2 Double click the Action Taken field and type the text describing the action taken 3 to save the Service Log Start Date and End Date Use these fields to display the entries between Start Date and the End Date The log displays the time period selected The dates are based on Condition Noted dates only ...

Page 539: ...nal Symbology Specifications Code 128 ANSI AIM BC1 BC2 BC3 BC4 1995 http www aimusa org 2 American National Standards Institute ANSI Bar Code Print Quality Guidelines X3 182 1990 R2000 http www ansi org 3 Clinical and Laboratory Standards Institute CLSI Laboratory Automation Bar Codes for Specimen Container Identification Approved Standard AUTO2 A http www clsi org ...

Page 540: ...773232AH References 2 References ...

Page 541: ...lter A band pass optical filter that passes a band of wavelengths and blocks others Button The Workstation screens have pictures icons for example that you select with the mouse to tell the software what to do They are arranged on Toolbars for related functions CAL Factor A number used in conjunction with a known number of particles identified by a CAL region that adjusts the region counts obtaine...

Page 542: ...ed Acquisition Time acquisition maximum events gating settings disciminators voltages gains baseline offset and compensation settings Same as Instrument Settings in Acquisition Manager db Abbreviation for decibels dc Abbreviation for direct current Defaults Original settings for the instrument You can change them to customize the settings for your laboratory Digit See checksum DiOC5 3 Abbreviation...

Page 543: ... PMTs Collect the fluorescent light and generate voltage pulse signals The 1 refers to the first fluorescence sensor 2 the second and so forth Forward scatter FS The laser light scattered at narrow angles to the axis of the laser beam The amount of forward scatter is proportional to the size of the cell that scattered the laser light Forward scatter FS sensor Collects the forward scatter and gener...

Page 544: ...mally be achieved in order to stop acquisition Used to ensure collection of rare events Mouse A pointing device The cursor on the Workstation screen moves as you slide the mouse on your desk or other flat surface Multi tube Carousel Loader MCL An automated sample loader for the instrument Neutral density ND1 filter An optical filter that can be used with the forward scatter sensor to reduce the in...

Page 545: ...ls the Cytometer what and how to acquire data and replay listmode data Quality control QC A comprehensive set of procedures a laboratory sets up to ensure that an instrument is working accurately and precisely QuickCOMP Direct histogram manipulation to adjust Cytometer color compensation QuickSET Direct histogram manipulation to adjust Cytometer voltages and gain Quiet zone An area at each end of ...

Page 546: ...of precision Standard Panel A panel that does not export results to the Report Generator Start and Stop characters The characters that start and end the bar code symbol and show the scan direction Symbology A set of rules for encoding and decoding information contained in a bar code symbol Examples of symbologies include Code 39 Code 128 Interleaved 2 of 5 and Codabar TrueView TrueView is a patent...

Page 547: ...or key value 4 12 ELAPSEDTIME key value 4 12 FILEGUID key value 4 12 LOCATION key value 4 12 PANEL key value 4 12 PnADDRESS key value 4 12 PnC key value 4 12 PnGAIN key value 4 13 PnQ key value 4 13 PnU key value 4 13 PnX key value 4 13 PnZ key value 4 13 RATIO_DENOMINATOR key value 4 13 RATIO_NUMERATOR key value 4 13 RATIODENOMINATORMUX key value 4 13 RATIONUMERATORMUX key value 4 13 REDLASERPOWE...

Page 548: ...e 4 11 INST key value 4 11 INSTADDRESS key value 4 11 MODE key value 4 11 NEXTDATA key value 4 11 OP key value 4 11 PAR key value 4 11 PnB key value 4 11 PnE key value 4 11 PnG key value 4 11 PnN key value 4 11 PnR key value 4 11 PnS key value 4 11 PnV key value 4 12 PROJ key value 4 12 RUNNUMBER key value 4 12 SMNO key value 4 12 SRC key value 4 12 SYS key value 4 12 TOT key value 4 12 Numerics 3...

Page 549: ...0 64 carousel number 10 63 carousel overflow 10 69 customize worklist columns 10 68 cytosettings 10 62 delete worklist row 10 69 docking options 10 57 drag and drop functions 5 14 enter the carousel ID number 8 5 8 9 introduction 10 57 LMD filename 10 64 modifying panels 10 58 modifying worklists 10 59 P1 P32 10 65 panel 10 60 parameter names 10 62 plots 10 60 protocol 10 60 region sources 10 61 r...

Page 550: ...ications 4 3 high voltages specifications 4 3 linear specifications 4 3 analysis menu 10 114 protocol 10 27 analytical characteristics carryover 4 33 laser characteristics 4 34 precision for surface markers 4 33 resolution 4 34 analytical characteristics and specifications See also specifications APC definition Glossary 1 append PDF file name PDF file name extension LMD file name 10 43 appending a...

Page 551: ...inition Wizard 10 87 compensation tubes 7 4 default panels and protocols 4 8 4 9 initial protocol 4 9 panels 4 8 4 9 controls used 7 3 prepare for 7 3 protocols 4 8 4 9 running a negative control 7 9 Scheduler 10 87 target region 10 130 verification tubes 7 4 wizard running 7 7 Wizard definition Glossary 1 autosetup scheduler 7 4 wizard AutoSetupII save settings 7 12 autostandardization See AutoSe...

Page 552: ... 19 used in shutdown cleaning 6 8 blood run as a control 7 3 blue laser ON indicator 5 4 Blue Laser Power Error 13 16 Blue Laser Power Warning 13 16 boolean gating 10 117 gate logic 10 118 bottle waste See waste container BP filters definition Glossary 1 browsing buttons 10 16 Btus required for operating system 2 3 buttons definition Glossary 1 Taskbar 5 6 See also icons Start button See also tool...

Page 553: ...aning 11 11 filling 12 11 location 12 12 cleaning panel how to select 11 25 cleaning procedures 11 1 air filters 11 1 bleaching 11 24 cleaning agent container 11 11 MCL sample head 11 17 routine 11 24 sample probe 11 17 sampling system when to clean 11 17 sheath fluid 11 8 surface areas during shutdown 6 8 vacuum trap 11 28 cleaning solution how to prepare 11 24 routine how to load into the carous...

Page 554: ...es 7 11 compensation protocols 4 9 compensation tubes AutoSetup 7 4 prepare 7 4 process 7 10 used to calculate compensation coefficients 7 10 components See system components computer electrical input requirements 2 2 front view 5 5 power off 11 32 power on 11 32 specifications 4 4 configuration density plot 10 101 automatic maximum threshold 10 102 density level color 10 101 logarithmic threshold...

Page 555: ...autogating regions 10 129 color dot plot 10 89 density plot 10 99 FlowPAGE 5 25 gates 10 115 advanced precedence 10 123 blend color 10 120 boolean gating 10 117 color blend mode 10 119 gate and logical expression 10 115 gate color 10 116 gate logic 10 118 gate name 10 120 modify color blend 10 120 modify color precedence 10 122 operands 10 116 histogram freeze frame 10 97 histogram plot 10 94 lege...

Page 556: ...nts 10 162 setup mode 10 159 button 10 157 compensation 10 164 clear all 10 164 matrix 10 164 detectors gain 10 159 names 10 158 volts 10 159 drag and drop functions 5 14 parameter setup 10 163 QuickCOMP 10 160 QuickSET 10 160 cytometer messages cytometer log description 13 13 description 13 10 list of 13 15 table 13 15 where displayed 13 11 cytometer status messages Cytometer Status Window 13 11 ...

Page 557: ...default of events on dot plot 10 48 AutoSetup protocols and panels 4 8 4 9 definition Glossary 2 plot size 10 49 definitions Glossary 1 delete FlowPAGE objects 10 149 histogram freeze frame overlay 10 97 prism plot dividers 10 107 regions 10 134 user add user modify user 10 5 workgroup 10 7 worklist row 10 69 delivery inspection instrument 2 1 density density plot automatic maximum threshold 10 10...

Page 558: ...ts 10 92 no of events to show 10 92 font 10 93 labeling 10 92 show axis labels 10 93 show axis tick marks 10 93 show plot title on output 10 93 x and y axis labels 10 93 drag and drop acquisition manager functions available 5 14 AutoMATOR Setup functions available 5 14 Cytometer Control functions available 5 14 description 5 13 Modify Color Precedence functions available 5 14 plots functions avail...

Page 559: ... event rate status bar 10 169 events color dot plot 10 91 definition Glossary 2 Events Sec counter use to monitor acquisition 8 5 8 10 8 13 EWL external worklist extension 4 8 Exit 10 54 experiment user info 10 47 export billing information user administration 10 7 export data QC data 7 5 export file bitmap size 10 53 data format 10 53 definition Glossary 2 export logs billing how to create 10 7 h...

Page 560: ... code length definition Glossary 3 FL See fluorescent light FL float acquisition manager 10 57 flow cell definition Glossary 3 how to avoid clogging 8 3 8 7 8 11 hydrodynamic focusing 3 2 illustration 3 2 sensing area 4 2 specifications 4 2 flow cytometry definition Glossary 3 flow cytometry standard definition Glossary 3 flow rate related to pressure 4 2 specifications 4 2 status bar 10 170 Flow ...

Page 561: ...3 4 definition Glossary 3 indicators 5 4 sensor definition Glossary 3 when to use example 3 3 fluorochrome prepare compensation tube for each 7 4 fluorospheres prepare for AutoSetup 7 3 prepare per package inserts 7 3 7 7 7 13 protocols 4 9 running AutoSetup 7 7 running Flow Check Pro 7 3 usage chart 7 3 focusing hydrodynamic description 3 1 font color dot plot 10 93 force square Windows 10 173 fo...

Page 562: ...s description 3 10 graphics for illustration only xxxvii ground user if static charge exists 6 1 ground path requirement 2 2 group See workgroups guidelines for setting region widths for Flow Set Pro 4 9 H hardware options 1 3 Hardware Made Safe 13 19 hazards radiation exposure 13 1 heat dissipation 2 3 help about 10 174 about select 10 174 accessing 5 32 how to use 5 32 illustration of layout 5 3...

Page 563: ... transfer instrument settings 7 12 Incorrect Laser Type Blue 13 19 Incorrect Laser Type Violet 13 19 Index Tab how to find information in online help system xxxv indicator panels Cytometer 5 3 indicators Cytometer ready 5 4 definition Glossary 3 laser on 5 4 level sense 5 5 13 27 sheath fluid low 12 2 sheath low 5 5 13 27 signal amplitude 5 4 waste full 5 5 12 14 13 28 info plot data source 10 111...

Page 564: ...ut 10 93 x and y axis labels 10 93 density plot 10 103 histogram plot 10 99 labels bar code specifications A 5 CDRH required 13 1 13 2 disposal of electrical instrumentation warning 13 9 laser warning 13 4 laser warning 13 1 13 2 pneumatic supply warning 13 8 RoHS caution 13 9 RoHS environmental 13 9 See also bar code labels labels bar code See bar code labels laser bar code reader MCL A 6 beam sh...

Page 565: ... playback 10 84 list comp setup 10 85 options 10 86 QuickCOMP 10 146 QuickCOMP matrix 10 147 single file mode 10 84 single file mode 10 84 specifications 4 7 Listmode playback tool definition Glossary 4 LiveGate definition Glossary 4 do not show warnings 10 52 show warnings 10 52 LMD file name date 10 42 display in acquisition manager 10 64 file name extension 10 43 PDF file name extension 10 43 a...

Page 566: ...6 window 10 171 messages cytometer description 13 10 cytometer log 13 13 cytometer where displayed 13 11 error where displayed 13 11 minimum count 10 127 minimum event counter definition Glossary 4 mismatched IDs 8 5 8 10 8 13 mode automatic 8 2 cleanse use of cleaning agent 1 4 definition 3 15 idle 11 5 manual 8 6 single tube mode 8 11 modify advanced precedence 10 123 color blend 10 120 color pr...

Page 567: ...w acquisition protocol 10 26 panel 10 28 protocol 10 25 worklist 10 28 new panel 10 28 carry regions from previous protocol 5 29 use instrument settings 5 29 use instrument settings from external file 5 30 use instrument settings from previous test 5 29 use plots and gates from protocol 5 29 use regions from protocol 5 29 use regions from this protocol 5 29 new panel wizard See panel wizard next b...

Page 568: ...el 5 9 file extension 4 8 how to select 8 5 8 9 8 12 how to select cleaning panel 11 25 listmode compensation extension 4 8 modifying in acquisition manager 10 58 new 5 27 10 28 panel wizard 5 27 QC need unique protocols 7 19 special 3 10 what to do if there is a deleted protocol 8 5 8 9 8 12 See also covers See also new panel Parameter Mismatch when loading listmode files 10 30 parameters Cytomet...

Page 569: ...end plots 10 108 prism plot dividers 10 105 prism plot phenotypes 10 105 prism plots 10 103 single parameter prism dividers 10 105 10 137 data source color dot plot 10 90 density plot 10 100 histogram plot 10 95 info plot 10 111 legend plot 10 109 prism plot 10 104 deleting prism plot dividers 10 107 density plot configuration 10 101 display in acquisition manager 10 60 drag and drop function 5 14...

Page 570: ...ystem correct range 12 36 Pressures Not Calibrated 13 20 prime Cytometer 10 168 region 10 130 prime cycle included in startup cycle 6 5 when to request 8 2 Prime region definition Glossary 5 principles of operation 3 1 print 10 38 dots black plot display 10 48 FlowPAGE 10 39 plot frames plot display 10 48 plots 10 38 serial number 10 110 statistics 10 39 to PDF 10 39 User ID 10 110 Printer daily c...

Page 571: ...etup panels 3 11 verification 4 9 what to do if there is a deleted protocol in a panel 8 5 8 9 8 12 See also new protocol publish Auto close Excel Workbook 10 53 publish data to MS Excel 10 53 publish data to text file 10 53 results 10 78 switch to MS Excel on publish 10 53 workspace preferences 10 52 Publish Data to MS Excel use for Levey Jennings plots 3 11 pulse See signals Q QC Data Table 10 1...

Page 572: ...on creating 5 17 10 127 interactive information 10 128 properties 10 128 See also regions and quadrant region red laser shutter open indicator 5 4 redo edit menu 10 54 refresh 10 144 regions AutoGate 5 21 autogating 10 129 contour sensitivity 10 51 contour travel 10 51 elliptical sensitivity 10 51 autosetup target region 10 130 carry from previous protocol 5 29 carry from protocol 10 61 carry prev...

Page 573: ...absolute count 4 5 shown in US unit format xxxvii reproducibility precision definition Glossary 5 surface markers performance specifications 4 33 requirements installation instrument accessibility 2 1 space needed 2 1 requirements sample 4 1 8 1 residual stain from old cleaning solution 11 24 testing for 11 27 resolution color dot plot 10 92 density plot 10 103 performance specifications 4 34 reso...

Page 574: ...8 stop each tube so you can edit in single tube mode 8 11 sample pickup tubing how to replace 12 20 when to replace 12 20 Sample Pressure Error 13 21 sample probe bent 12 20 cleaning 11 17 clip location 12 23 how to avoid clogging 8 3 8 7 8 11 how to replace 12 20 leaking 12 20 no or erratic sample flow 12 20 O ring location 12 24 rubber washer location 12 24 when to clean 11 17 when to replace 12...

Page 575: ...ror 13 22 sheath fluid container cleaning 11 8 external container replace 12 2 flow indicator 5 4 in solution for routine cleaning 11 24 in solution for sample head probe cleaning 11 19 internal container filling 12 7 low indicator 5 5 12 2 13 27 use in routine cleaning 11 24 used to clean reagent containers 11 9 11 11 See also filters reagents and sheath fluid container sheath fluid container cle...

Page 576: ...g agent container 11 11 See also schedule skip positions between panels 5 9 not within a panel 5 9 Slider bars definition Glossary 6 smooth density plot configuration 10 102 histograms plot configuration 10 96 plot display 10 48 software online help system 5 32 shortcuts 5 12 signing on to Navios software 6 5 specifications 4 5 See also Navios software software messages list of 13 25 table See als...

Page 577: ...acquisition 10 111 condition display in acquisition manager 10 65 counter maximum events 10 113 minimum count 10 127 save histogram data in FCS format 10 113 use stop condition 10 113 counter setup 10 112 Cytometer 10 166 value display in acquisition manager 10 65 stop count effect on AutoGate region 5 21 Stopping appears during sample cycle 8 5 8 9 8 13 supply cart air filters location 11 2 defin...

Page 578: ...quisition manager 10 21 Automator 10 21 buttons 5 14 customize command tab 10 67 customize toolbars tab 10 66 Cytometer 10 22 file options 10 17 FlowPAGE 10 20 gate color options 10 19 gate options 10 19 help 10 19 plot options 10 18 region options 10 19 statistic options 10 19 Taskbar buttons 5 6 tools listmode playback 10 84 menu 10 78 menu Automator 10 79 publish results 10 78 special used to r...

Page 579: ...ame 10 42 user name See User ID user info cell type 10 47 experiment 10 47 institute 10 46 institute address 10 46 project 10 46 sample source 10 46 workspace preferences 10 45 user name at software installation 10 1 signing on to Navios software 10 3 view all users 10 6 user privileges add user modify user 10 14 user profiles create 10 4 using Navios software 10 1 the online help system 5 32 V va...

Page 580: ...on 13 28 location 5 5 13 28 Waste Level Error 13 24 Waste Level Warning 13 24 waste line connection 2 5 web site access to Beckman Coulter 10 176 welcome to Navios software 10 1 when to shutdown 6 6 whole blood run as a control 7 3 window See pop up window window menu 10 171 Windows arrange icons 10 173 cascade 10 171 close all 10 173 Desktop 5 6 Explorer use to browse 10 16 force square 10 173 ne...

Page 581: ...ist verifying 5 31 8 2 workspace preferences 10 39 acquisition options 10 43 gating 10 50 LMD file name 10 40 plot display 10 47 publish 10 52 user info 10 45 Workstation definition Glossary 6 description 1 2 front view 5 5 server option 1 3 specifications 4 4 Z zoom 10 68 ...

Page 582: ...Index 36 Index ...

Page 583: ...provided that it is used on the computer hardware and in the operating system environment for which it was designed Should the media on which your software arrives prove defective Beckman Coulter will replace said media free of charge within 90 days of delivery of the Product This is your sole remedy for any breech of warranty for this software Except as specifically noted above Beckman Coulter ma...

Page 584: ...773232AH Warranty 2 Beckman Coulter Inc Customer End User License Agreement ...

Page 585: ......

Page 586: ...ions for Use PN 773232AH Introduction Use and Function Installation Operation Principles Specifications System Overview Daily Routine Quality Control Running Samples How to Using Navios Software Cleaning Procedures Replace Adjust Procedures Troubleshooting Bar Code Specifications Maintenance Log References Glossary Index ...

Reviews: