9
Configuration
a.
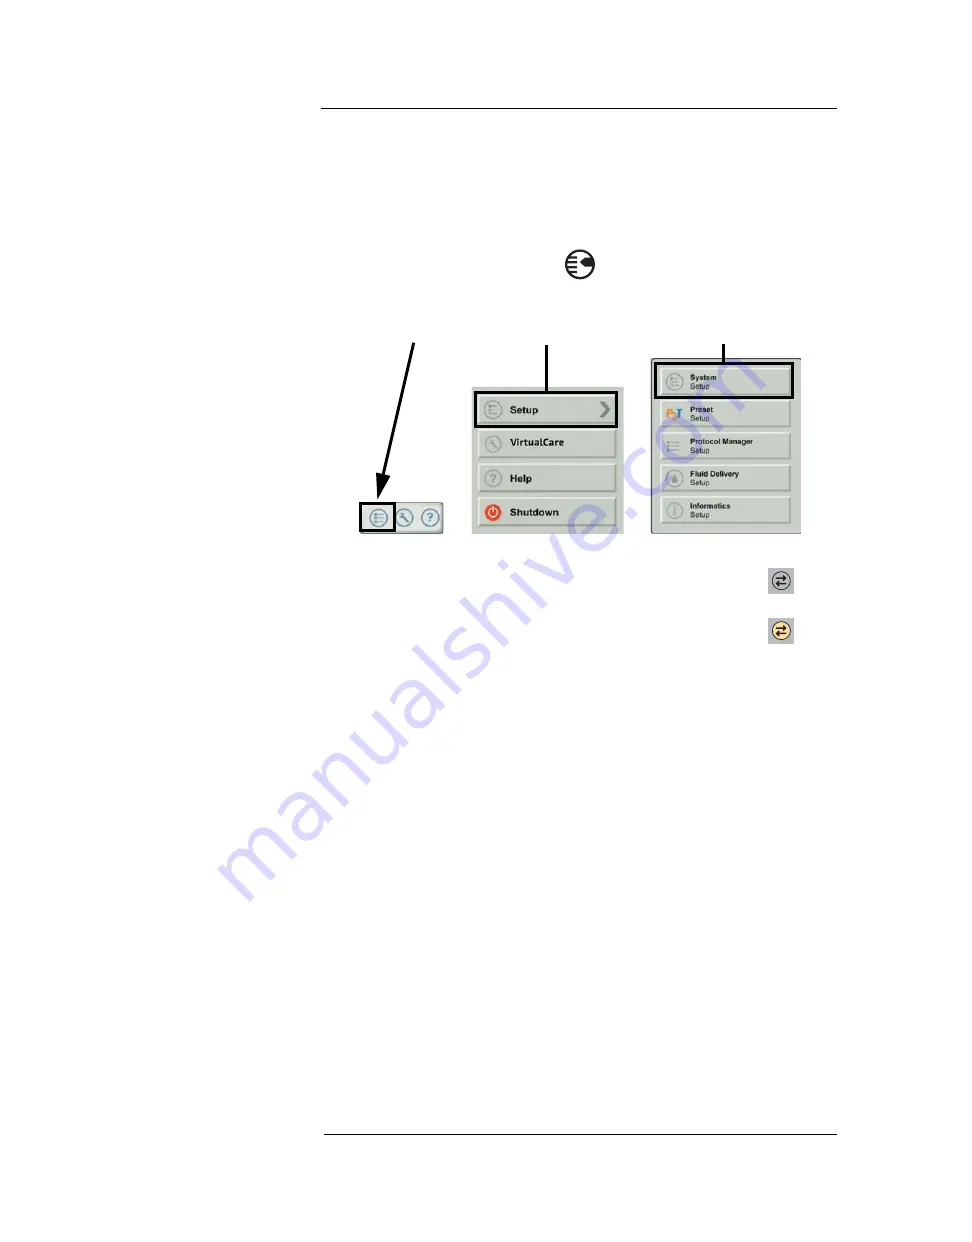
If you have the Display and Control Unit (DCU), press the setup button, below. Note
that this button is a physical, rubber button and not a touchscreen button.
b.
If you have a Certegra Workstation, press the following touchscreen buttons:
Overview of Operation
For the most efficient and error free operation of a CT scan, the injector and scanner should be
interfaced. Interfacing is the process by which signals are transmitted and coordinated
between the injector and scanner.
The injection system does not control the imaging system via the ISI module. The ISI notifies
the scanner of the injector status which enables the scanner to synchronize the scan timing
based upon when the injection started. The scanner controls the start of the scan sequence
after it has received the injection start status and will not start the scan unless the scanner is in
the correct state. The scanner system maintains full control of the radiation initiation.
The ISI module supports the following two methods:
1.
By pressing the injector start switch the injector notifies the scanner that it can begin the
scanning sequence.
2.
The scanner initiates the entire scanning sequence by starting the scanner and notifying
the injector that it can start.
At the time of installation, the scanner installer may select one of the above modes of
operation.
When the injection complete screen appears, do not press “OK” on the Display and Control
Unit (DCU), or the "Same Patient" or "New Patient" buttons on the Certegra Workstation until
the scanner is finished scanning and the procedure is complete. Doing so will send a request to
the scanner to stop the scan. If the injector disarms prematurely, it will send the request to stop
1.
Configure the ISI module on the injector setup screen by first accessing Setup. To
access Setup, do the following depending on your Monitor.
i. Press this button ii. Then this button iii. Then this button
2. After installation and configuration have been performed successfully, you
will see the following icon.
3. Program the scanner. You will see the following icon when the scanner is
ready.
Summary of Contents for MEDRAD SCT 110
Page 2: ......
Page 4: ...MEDRAD Stellant ISI700ModuleOperationandInstallationManual ii...
Page 6: ...MEDRAD Stellant ISI 700 Module Operation and Installation Manual iv...
Page 22: ...MEDRAD Stellant ISI700ModuleOperationandInstallationManual 16...
Page 28: ...MEDRAD Stellant ISI700ModuleOperationandInstallationManual 22...
Page 29: ......


