6. Setup and configuration
6.8
Linked CLO
CLO setting needs to be done in the master only!
Prior to enabling linked CLO, ensure that the Slave projectors have been added to the list of Linked devices.
See procedure "Linking MCM-400 HFR devices in a multi-channel system", page 53.
How to link CLO?
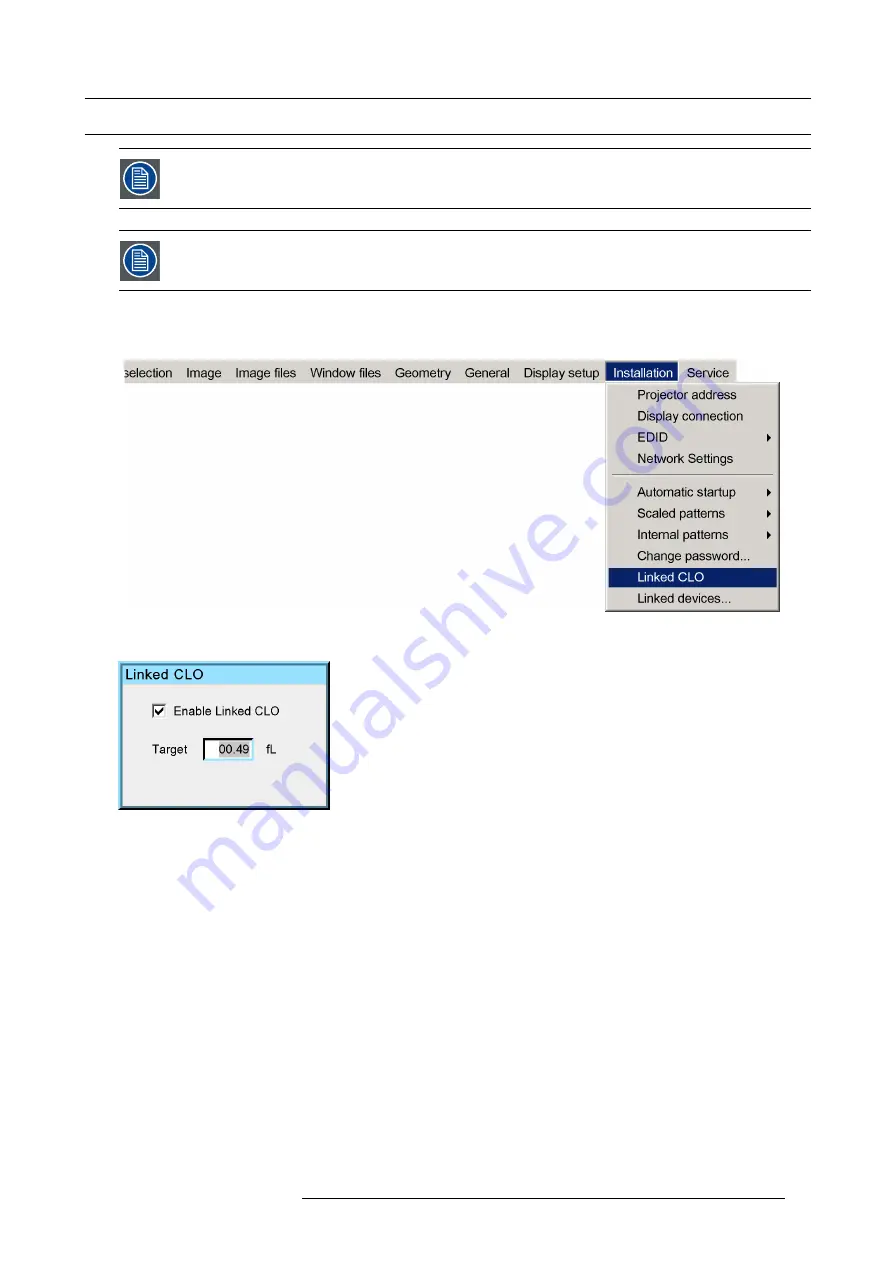
1. In the OSD of the MCM-400 HFR navigate to
Installation
>
Linked CLO...
and press
ENTER
to select.
Image 6-20
2. In the dialog box that appears, set the ’enabled CLO’ check box and
fi
ll in the target foot-lambert (fL).
Image 6-21
R5909056 MCM-400 HFR 11/05/2016
57
Summary of Contents for MCM-400 HFR
Page 1: ...MCM 400 HFR User Guide R5909056 02 11 05 2016 ...
Page 8: ...Table of contents 4 R5909056 MCM 400 HFR 11 05 2016 ...
Page 36: ...4 Facility and system requirements 32 R5909056 MCM 400 HFR 11 05 2016 ...
Page 53: ...6 Setup and configuration 5 Exit the menu R5909056 MCM 400 HFR 11 05 2016 49 ...
Page 60: ...6 Setup and configuration Image 6 19 56 R5909056 MCM 400 HFR 11 05 2016 ...
Page 62: ...6 Setup and configuration 58 R5909056 MCM 400 HFR 11 05 2016 ...
Page 86: ...7 Getting started 82 R5909056 MCM 400 HFR 11 05 2016 ...
Page 154: ...10 Expert operation Image 10 61 150 R5909056 MCM 400 HFR 11 05 2016 ...
Page 161: ...10 Expert operation Image 10 68 R5909056 MCM 400 HFR 11 05 2016 157 ...
Page 176: ...11 Maintenance 172 R5909056 MCM 400 HFR 11 05 2016 ...
Page 192: ...12 MCM 400 HFR tools 188 R5909056 MCM 400 HFR 11 05 2016 ...
Page 204: ...14 RCU Control 200 R5909056 MCM 400 HFR 11 05 2016 ...
Page 208: ...15 Environmental information Image 15 1 204 R5909056 MCM 400 HFR 11 05 2016 ...


