


11. Image files menu
Image 11-10
video info
a
Hs
Hs
b
Image 11-11
Hs horizontal sync pulse
a
active low
b
active high
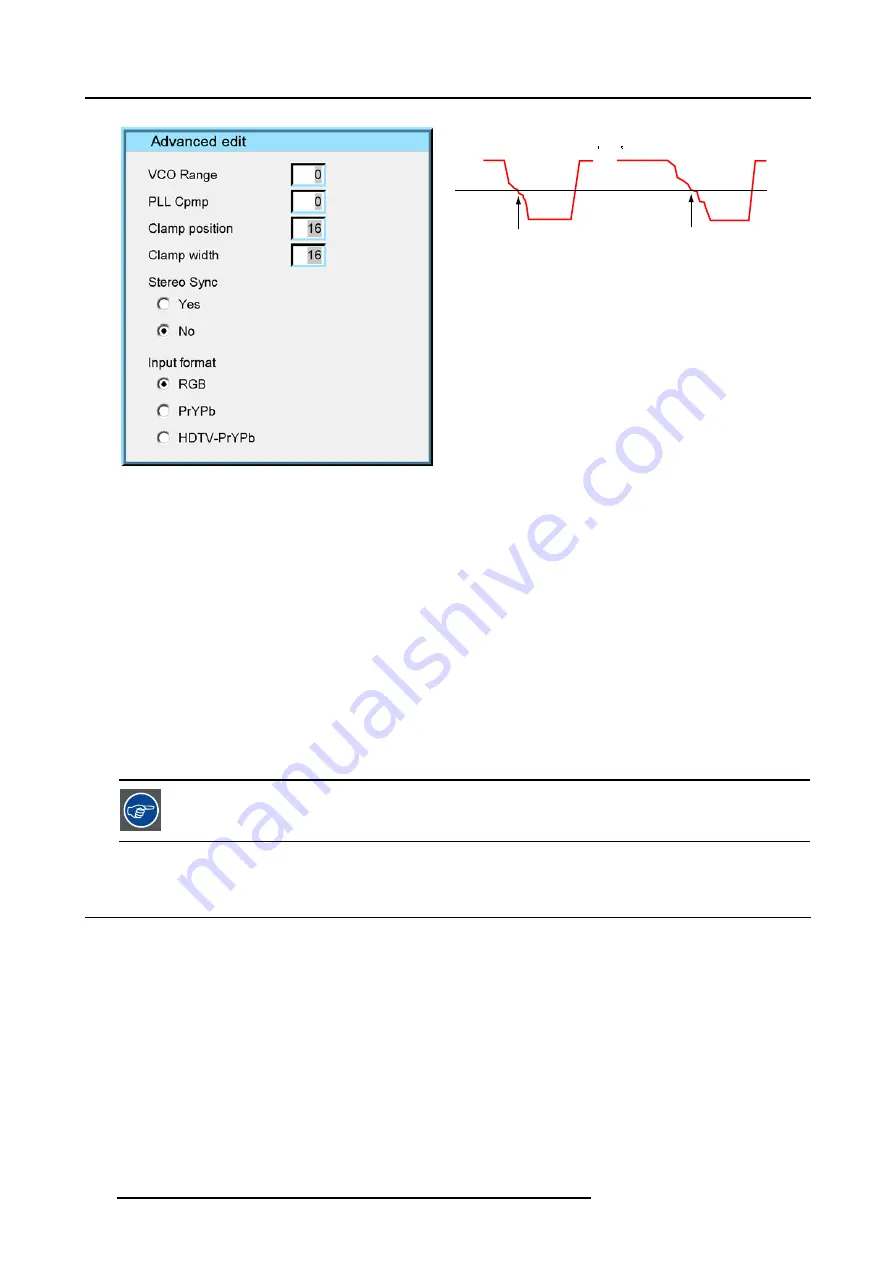
The
VCO range
setting determines the frequency range of the VCO (Voltage Controlled Oscillator).
The
Cpmp
(Charge pump current) sets the low pass filter current.
Both VCO range & Cpmp are set by the image file, changing these settings is only indicated in for special purposes.
The
horizontal sync polarity
setting can be useful in case of a bad shaped edge, one can choose between the leading (active low)
or trailing (active high) edge.
The input format settings are used to "tell more" about the signals connected on the BNC’s, it completes the information in the source
selection menu.
- RGB is selected by default and means that an RGB signal is connected to the BNC’s
- PR/Y/PB must be selected whenever:
•
a progressive signal (32 kHz frequency video signal ) is connected to the BNC’s (select the source with
Data on BNC’s
in the
Source selection menu).
•
one wants (in PiP mode) to visualize the component video signal in a Data window hereby adding a video image in the PiP
layout.
-HDTV-PR/Y/PB for high definition component video signals.
It is recommended to use the default values.
11.4 Rename file
How to rename a file ?
1. Press
MENU
to activate the Tool bar
2. Press
→
to select the
Image files
item
3. Press
↓
to Pull down the
Image files
menu
4. Use
↑
or
↓
to select
Rename
5. Press
ENTER
A dialog box is displayed (image 11-13)
6. Use
↑
or
↓
to select the desired file
7. Press
ENTER
A text box is displayed (image 11-14)
Use
←
or
→
,
↓
or
↑
the numeric keys on the remote, or the keypad to edit and change the values, confirm with ENTER.
100
R5976694 IQ PRO R500 01/02/2007
Summary of Contents for iQ Pro R500
Page 1: ...iQ Pro R500 Owner Manual R9010221 R5976694 04 01 02 2007 ...
Page 6: ......
Page 10: ...Table of contents 4 R5976694 IQ PRO R500 01 02 2007 ...
Page 17: ...2 Installation Guidelines 1 2 3 4 Image 2 1 R5976694 IQ PRO R500 01 02 2007 11 ...
Page 24: ...2 Installation Guidelines 18 R5976694 IQ PRO R500 01 02 2007 ...
Page 34: ...3 Connections 28 R5976694 IQ PRO R500 01 02 2007 ...
Page 48: ...4 Getting started 42 R5976694 IQ PRO R500 01 02 2007 ...
Page 54: ...5 Source Selection Image 5 9 48 R5976694 IQ PRO R500 01 02 2007 ...
Page 60: ...6 General Menu Image 6 10 54 R5976694 IQ PRO R500 01 02 2007 ...
Page 80: ...7 Image Menu Image 7 38 74 R5976694 IQ PRO R500 01 02 2007 ...
Page 100: ...10 Lamp Menu 94 R5976694 IQ PRO R500 01 02 2007 ...
Page 110: ...11 Image files menu Image 11 20 104 R5976694 IQ PRO R500 01 02 2007 ...
Page 120: ...12 Display setup 114 R5976694 IQ PRO R500 01 02 2007 ...
Page 188: ...19 Troubleshooting 182 R5976694 IQ PRO R500 01 02 2007 ...


