


5. Setup
5.5
Setting up the orientation
What must be done ?
Depending on the mechanical orientation of the projector, the projector’s internal settings have to be adapted.
The projector is shipped (default) with a table/front orientation.
How to set the orientation ?
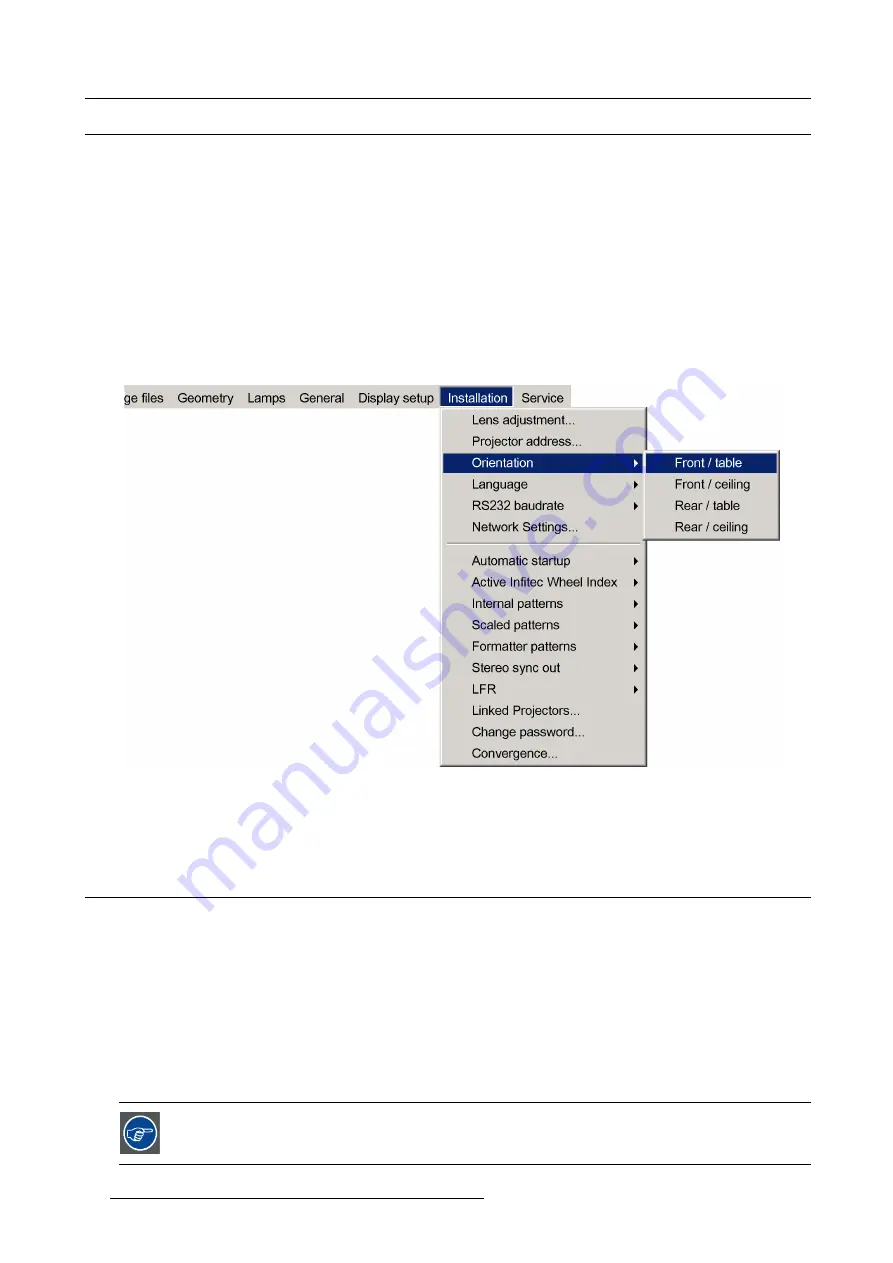
1. Press
MENU
to activate the Tool bar
2. Press
→
to select the
Installation
item
3. Press
↓
to Pull down the
Installation
menu
4. Use
↑
or
↓
to select
Orientation
5. Press
→
to pull down the menu
6. Use
↓
or
↑
to select the desired orientation
Image 5-11
7. Press
ENTER
The projection is adapted and a bullet shows the active con
fi
guration.
5.6
Adjusting the lens
What must be done ?
Depending on the projection distance and the lens used, the image may not be at the desired size, position and/or may be out of
focus.
The projector will always allow you to shift your image Vertically as well as horizontally to position it on the screen. In addition,
motorized lenses will also allow you to Zoom and focus the image.
All these lens parameters can be adjusted using the RCU, the local keypad or in the Installation menu of the projector’s OSD.
•
Zoom (only for motorized lenses)
•
Focus (only for motorized lenses)
•
horizontal/vertical Shift
The lens can also be adjusted via the dedicated keys on the remote.
46
R59770288 GALAXY NW-12, GALAXY NW-7 20/06/2013
Summary of Contents for Galaxy NW-7
Page 1: ...Galaxy NW 12 Galaxy NW 7 User guide R9040410 R9040405 R59770288 10 20 06 2013...
Page 8: ...Table of contents 4 R59770288 GALAXY NW 12 GALAXY NW 7 20 06 2013...
Page 10: ...1 Introduction 6 R59770288 GALAXY NW 12 GALAXY NW 7 20 06 2013...
Page 60: ...6 Getting started 56 R59770288 GALAXY NW 12 GALAXY NW 7 20 06 2013...
Page 103: ...7 Advanced Image 7 82 Image 7 83 Image 7 84 R59770288 GALAXY NW 12 GALAXY NW 7 20 06 2013 99...
Page 192: ...7 Advanced 188 R59770288 GALAXY NW 12 GALAXY NW 7 20 06 2013...


