


R5910032 /00
Freya
280
1
2
3
7
Image 14
–
28
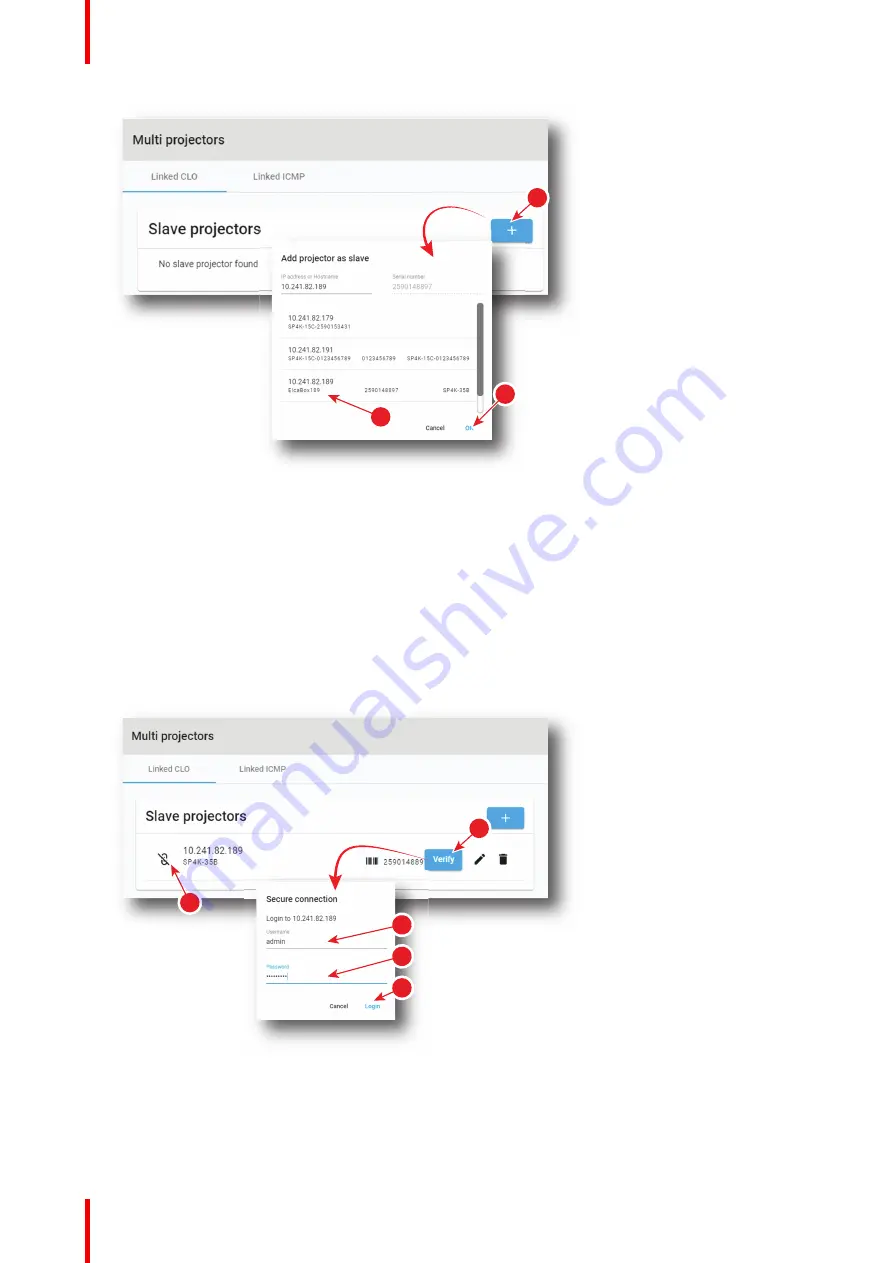
2.
Select an IP address (reference 2) in the list automatically proposed (List of available projectors in the
local network).
3.
Click
Ok
(reference 3) .
New slave projector is now displayed in the
Slave Projectors
list.
How to verify secure connection with the slave projector
1.
While in tab
linked CLO
in
Configuration
>
System access
> Multi projectors, click on
Verify
icon
(reference 1) of the projector slave you want to verify.
The window
Secure connection
is displayed.
1
7
2
3
4
5
Image 14
–
29
2.
Sign in using user name (reference 2) and password (reference 3) then click login (reference 3).
Secure connection is checked.
3.
If connection is successfully verified a confirmation message is displayed. Click
Ok.
Summary of Contents for Freya
Page 1: ...ENABLING BRIGHT OUTCOMES User guide Freya...
Page 12: ...R5910032 00 Freya 12...
Page 26: ...R5910032 00 Freya 26 Safety...
Page 60: ...R5910032 00 Freya 60 Projector configuration process overview...
Page 74: ...R5910032 00 Freya 74 Control Projector...
Page 184: ...R5910032 00 Freya 184 Configuration Light output...
Page 208: ...R5910032 00 Freya 208 Configuration Projector automation...
Page 234: ...R5910032 00 Freya 234 Configuration Media server automation...
Page 240: ...R5910032 00 Freya 240 Configuration License and certificates...
Page 254: ...R5910032 00 Freya 254 Configuration Media server...
Page 296: ...R5910032 00 Freya 296 Diagnostics Analysis...
Page 338: ...R5910032 00 Freya 338 Specifications...
Page 348: ...R5910032 00 Freya 348 Pin configurations...
Page 354: ...R5910032 00 Freya 354 Environmental information...
Page 365: ...365 R5910032 00 Freya Z Zoom Lens 65 Index...
Page 366: ...R5910032 00 Freya 366 Index...
Page 368: ...R5910032 00 Freya 368 List of tools...
Page 369: ......


