601–426 /15
F70 Series
130
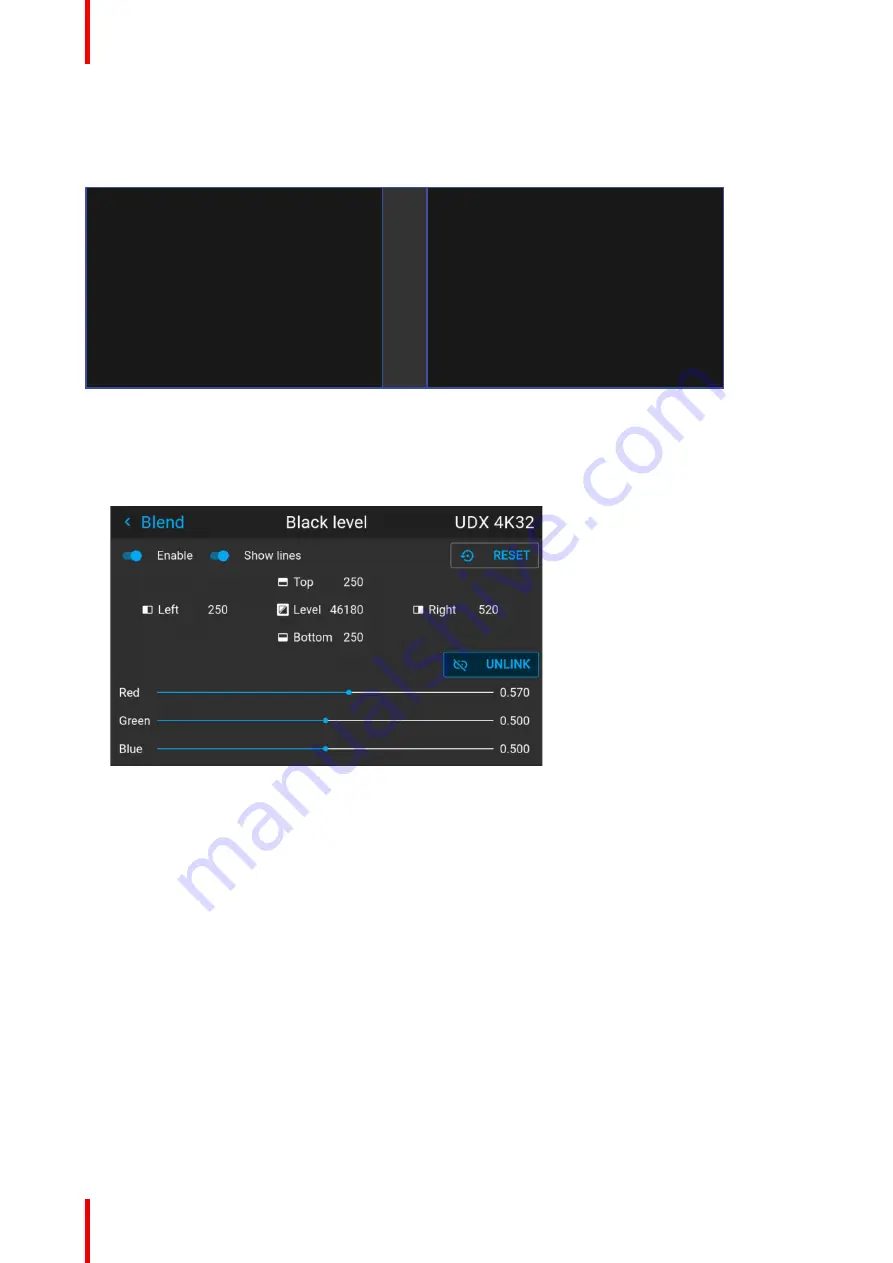
different black levels: one for the zone where only the picture of the left projector (zone 1), one for the Blend
zone (zone 2), and one for the zone where there is only the picture of the right projector (zone 3).
Picture Left
Picture Right
Blend Zone
Image 8–7
How to perform an RGB adjustment
1.
In the main menu, select
Installation
/
Blend and mask / Black Level
for all projectors in the setup.
The Black level menu is displayed, containing the sliders for color adjustment.
Image 8–8
2.
Use “black” test picture for the projectors.
3.
Observe manually the color saturation from each projector unit, and identify the difference.
4.
If one projector, as an example, has more red in the test picture, select the red slider in the black level
menu for this projector and adjust the slider with the arrow keys to obtain a similarity in the rendering.
5.
Repeat for every projector and color until the desired result is achieved on screen.
8.5.7 Black level files
Black Level Files introduction
Next to setting your specific Black Level Adjustment in the GUI, you can also upload or download a custom
Black Level adjustment file in png, jpeg or tiff format to/from the projector.
To upload or download Black Level masks you can use the Prospector tool. Alternatively, you can contact the
“file endpoint” directly via the curl program or some other tool that supports http upload.
For more information on uploading/downloading Black Level files using the Prospector, refer to the Prospector
user manual.
For more information on uploading/downloading Black Level files using curl or other tools that supports HTTP
upload, refer to the Pulse API Reference Guide.
Summary of Contents for F70 Series
Page 1: ...ENABLING BRIGHT OUTCOMES User Manual F70 Series...
Page 10: ...601 426 15 F70 Series 10...
Page 60: ...601 426 15 F70 Series 60 Lenses Handling and features...
Page 82: ...601 426 15 F70 Series 82 Getting started...
Page 88: ...601 426 15 F70 Series 88 Source menu...
Page 162: ...601 426 15 F70 Series 162 System settings menu...
Page 166: ...601 426 15 F70 Series 166 GUI Status menu...
Page 170: ...601 426 15 F70 Series 170 3D...
Page 171: ...171 601 426 15 F70 Series 13 1 Upgrade procedure 172 Upgrade projector firmware 13...
Page 182: ...601 426 15 F70 Series 182 Technical Specifications...
Page 191: ...191 601 426 15 F70 Series C 1 DMX chart Basic 192 C 2 DMX chart Extended 193 DMX Chart C...
Page 216: ...601 426 15 F70 Series 216 Index...
Page 217: ......


