

adjust projector settings
1
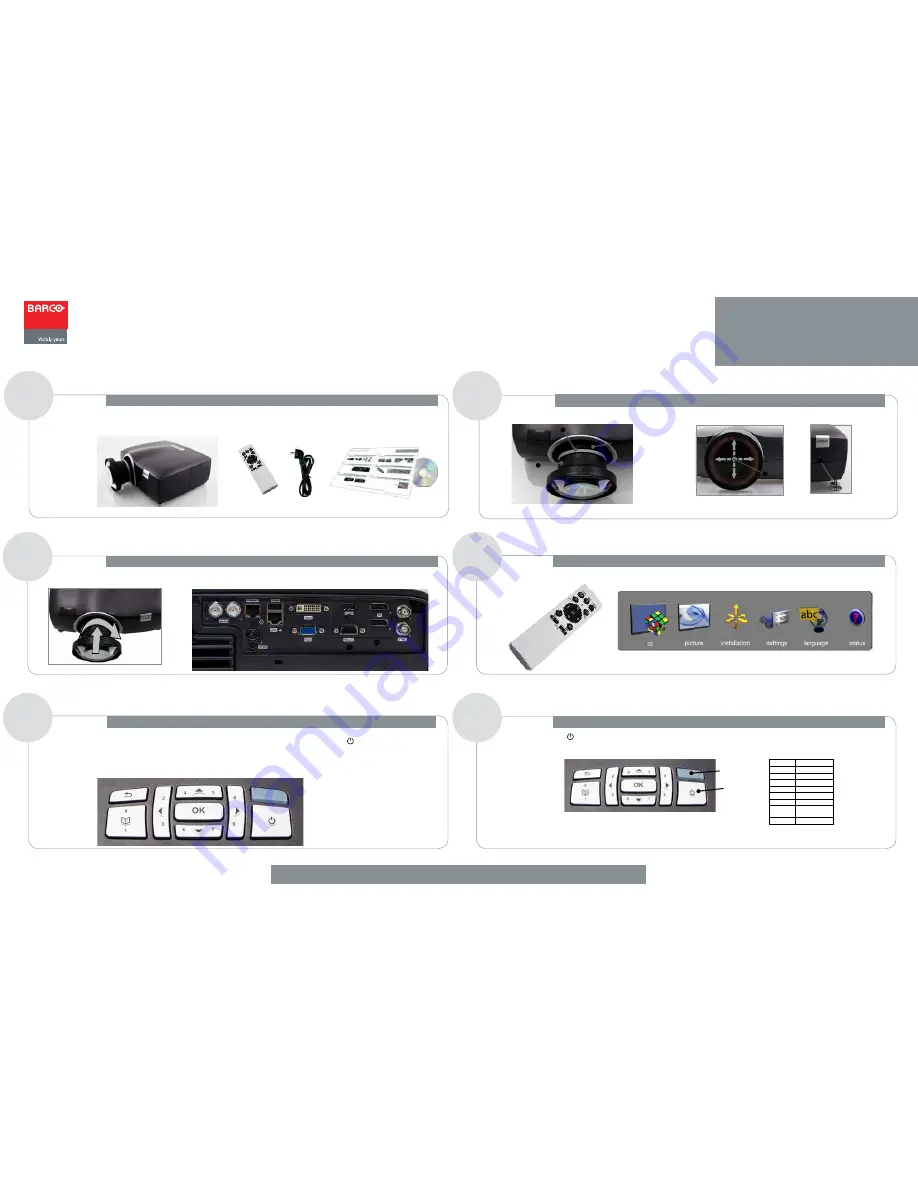
getting started
This Quick Start Guide has been designed to help you quickly getting started using your new projector. If you require further help, or have questions on the details of
how to operate this unit, please refer to our web site in order to download the complete product documentation. You can also access FAQ’s and download detailed
white papers in order to get to know the more specific product features and benefits.
Packaging contents:
5
adjust image and system settings
connect sources, connect power, power on
3
Change and adjust settings such as brightness and contrast, ceiling mount and rear projection display, as well as color calibration, and other system settings by using
the remote control or through the menu system that is accessible from the on-board keypad.
Make sure the projector is switched off, and not connected to power when connecting to sources. Connect video and computer sources, then insert the power
cable. Power up sources, including computers and other playback devices. Power up the projector by pressing the power key (
). A steady, blue indicator light will
indicate it is in operation.
CAUTION!
Connecting sources to a powered projector may result in product failure. It is recommended that the power cable connector (projector-end) or the mains
power socket are accessible whilst the product is in use to enable mains power to be disconnected or switched off when connecting source devices. This should be
considered during product installation. In order to prevent damage to the projector caused by over-voltages (e.g. lightning), connect to a line (mains) circuit which has
overvoltage protection when installing.
projector unit
A
: Focus
B
: Iris
C
: Zoom Manually adjust until optimal picture quality
D
: Lens shift (operated from keypad or remote)
E
: Adjustable front feet/rear foot
D
remote control
power cable
product documentation
2
mount projection lens, get to know the connector panel
Carefully mount the projection lens. Remove protection end caps on lens and bayonet mount, then insert, and turn clockwise until it stops and a click sounds. The
connector panel at the back features a wide range of connectors for all sorts of source connections. Decide which one(s) that meet(s) your requirement(s).
C
B
A
Power on/off
4
Manually adjust zoom (C) to set the correct image size, shift (D) to position correctly (motorized), focus (A) for clarity and iris (B) for adjusting contrast and focus depth.
Adjust image level with the 2 feet in the front (E) and the 1 at the rear.
6
power off and allow to cool down
To power off, press the power (
) key once, and confirm by pressing again. Allow to cool down until all fans have stopped (a minimum of 30 seconds), and a
steady yellow indicator light shows that the projector has been safely turned off (status/color table below). Disconnect any cables, sources and power cables before
uninstalling the projector.
STATUS
COLOR
On (active)
Blue
Wait on
Blue flashing
Standby (off) Yellow
Wait
Yellow flashing
Lamp failure
Red
Overheating
Red flashing
Configure/
upgrade
Yellow fast flashing
Error
Red fast flashing
Power key
Indicator light
Quick Start Guide
iVison 50
601-0346-00
E
E
601-0324-00
Features in the quick start pictures/drawings may be different from your projector depending on model/version.
When referring to the term F50 in this document, it means that the content is applicable for the following Barco products:
• F50 1080
(1920x1080)
• F50 WUXGA
(1920x1200)
• F50 WQXGA
(2560x1600)
• F50 Panorama (2560x1080)
www.barco.com
Quick Start Guide
F50
Please visit our web site to download full user manual or find related information
E
E