Attaching the display to an arm stand
49
Attaching the display to an arm stand
The panel, standard attached to the tilt & swivel foot, is compatible with
the VESA 100 mm standard. So it can be used with an arm stand
according to the VESA 100 mm standard.
Therefore, the tilt & swivel foot must be removed from the panel.
Important:
• Use an arm that is approved by VESA (according to the VESA 100
mm standard).
• Use an arm that can support a weight of at least 13 kg (28.66
lbs).
To attach the display to an arm stand:
1.
Put the display face down on a clean and soft surface. Be careful
not to damage the panel screen.
2.
Remove the tilt & swivel foot cover.
3.
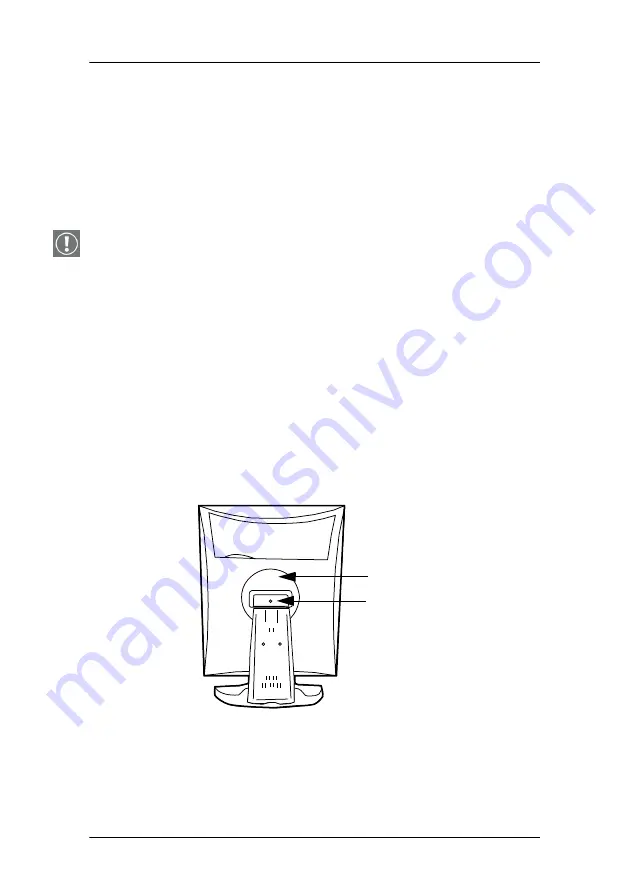
Remove the small screw (A) fixing the small plastic cover on top of
the foot. Next, remove the small cover itself.
Figure 18: Display with tilt & swivel foot cover removed
4.
Unscrew the 2 screws fixing the round plastic cover (B).
5.
Lift up the round plastic cover.
A
B
Summary of Contents for Coronis 21-inch Installation & user manua
Page 1: ...Installation User Manual Supported displays MFGD 2621 MFGD 3621 Coronis 21 inch...
Page 2: ...This page intentionally left blank 2 This page intentionally left blank...
Page 4: ...4 This page intentionally left blank...
Page 7: ...7 Preface...
Page 8: ...Preface This page intentionally left blank 8 This page intentionally left blank...
Page 16: ...Explanation of symbols This page intentionally left blank 16...
Page 17: ...17 Introduction...
Page 18: ...Introduction This page intentionally left blank 18 This page intentionally left blank...
Page 28: ...Parts controls and connectors This page intentionally left blank 28...
Page 29: ...29 Display controller installation...
Page 36: ...BARCOMED CORONIS display controller installation This page intentionally left blank 36...
Page 37: ...37 Display installation...
Page 38: ...Display installation This page intentionally left blank 38 This page intentionally left blank...
Page 51: ...51 Display controller software installation...
Page 57: ...Display controller software installation 57 Figure 21...
Page 58: ...Display controller software installation This page intentionally left blank 58...
Page 59: ...59 Settings for optimal display performance throughout the product lifetime...
Page 62: ...Avoiding image retention This page intentionally left blank 62...
Page 63: ...63 Display controller tools...
Page 71: ...71 Display operation...
Page 72: ...Display operation This page intentionally left blank 72 This page intentionally left blank...
Page 85: ...85 MediCal Pro software...
Page 86: ...MediCal Pro software This page intentionally left blank 86 This page intentionally left blank...
Page 88: ...MediCal Pro installation and operation This page intentionally left blank 88...
Page 89: ...89 Cleaning instructions...
Page 90: ...Cleaning instructions This page intentionally left blank 90 This page intentionally left blank...
Page 96: ...LCD panel This page intentionally left blank 96...
Page 97: ...97 Troubleshooting...
Page 98: ...Troubleshooting This page intentionally left blank 98 This page intentionally left blank...
Page 105: ...105 Technical Information...
Page 110: ...Technical specifications 110 Altitude 7500 m storage 3000 m operation Item Specification...
Page 113: ...113 Warranty Statement...
Page 114: ...Warranty Statement This page intentionally left blank 114 This page intentionally left blank...


