12. Alignment menu
The selected pattern is displayed.
The following patterns are available:
-
Checker board
-
Color bars
-
Focus
-
Full screen black
-
Full screen blue
-
Full screen green
-
Full screen red
-
Full screen white
-
Hatch
-
Outline
-
Purity
-
ScenergiX
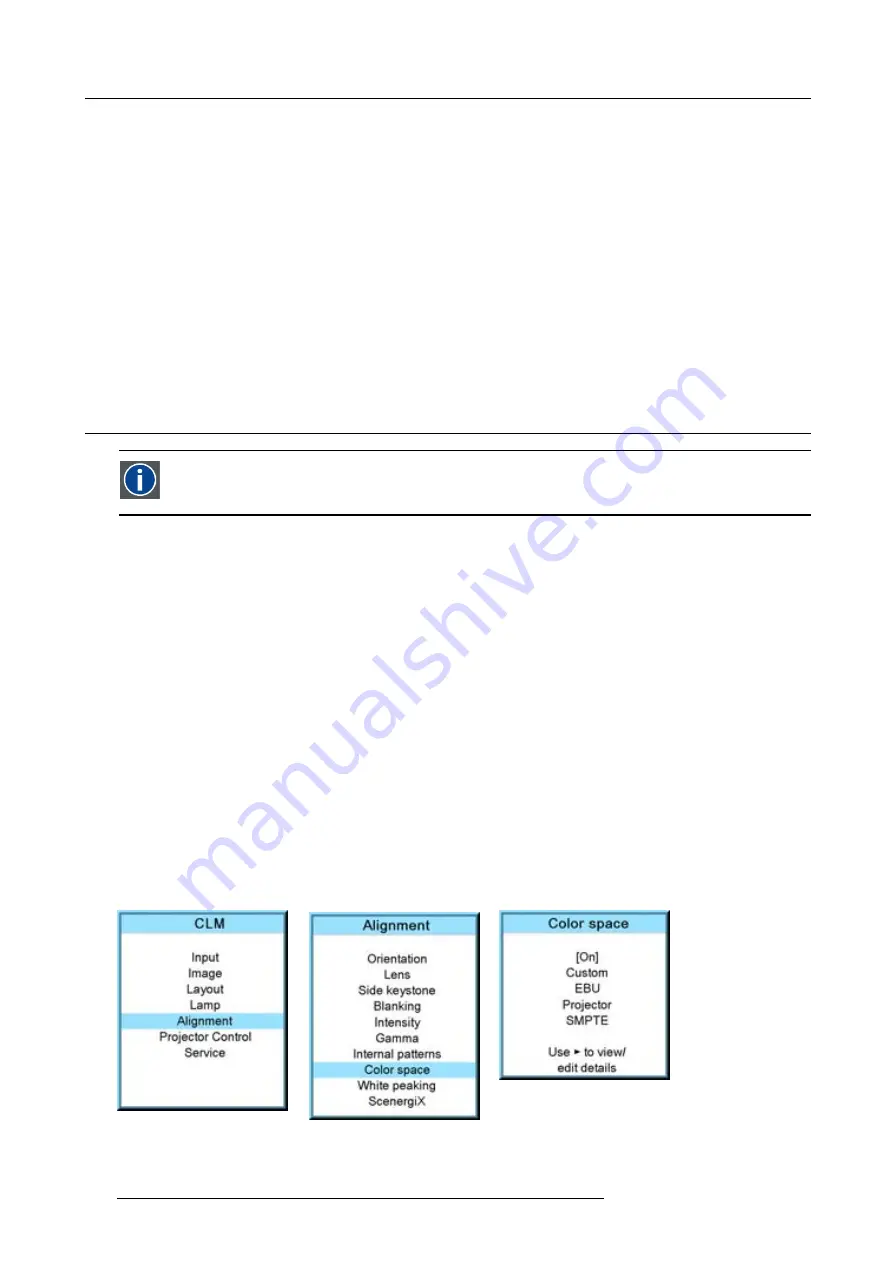
12.9 Color space
Color space
A color space or color standard is a mathematical representation for a color. For example the RGB color space is
based on a Cartesian coordinate system.
What can be adjusted ?
The color space (gamut), the collection of colors which can be reproduced by the projector, can be adjusted to 4 prede
fi
ned stored
values (one projector speci
fi
c, 2 international standards and one custom preset). A temporary custom adjustment is possible. The
maximum color space which can be displayed is the projector color space. This color space is measured at the factory and stored
inside the projector.
How to select a color standard?
1. Press
MENU
to activate the menus.
2. Use the
▲
or
▼
key to select
Alignment
and press
ENTER
.
3. Use the
▲
or
▼
key to select
Color space
and press
ENTER
.
4. Use the
▲
or
▼
key to select the [On] or [Off] selection and
ENTER
to toggle color space on or off.
5. When color space is [On], use the
▲
or
▼
key to select the desired color standard and press
ENTER
to activate. Use the
►
key
to view the details or to edit the details when Custom is selected.
Projector
Maximum color space
EBU
European Broadcasting Union. This organization de
fi
nes a European standard.
SMPTE
American standard.
Custom
The user can de
fi
ne the x and y coordinates for red, green and blue which forms the corners of the color space.
By changing the coordinates, the color reproduction can be changed.
Image 12-28
Image 12-29
Image 12-30
6. When custom is selected, use the
►
key to view the details. To adjust the custom values, select the desired color point using
the
▲
or
▼
key and change the value with
◄
or
►
key until the desired value is reached. When
fi
nished, press
EXIT
to return.
124
R59770021 CLM R10+ 15/03/2010
Summary of Contents for CLM R10+ R9050100
Page 1: ...CLM R10 Users manual R9050100 R90501001 R59770021 10 15 03 2010 ...
Page 14: ...1 Safety 10 R59770021 CLM R10 15 03 2010 ...
Page 22: ...2 General 18 R59770021 CLM R10 15 03 2010 ...
Page 35: ...3 Physical installation Skew Image 3 28 Skew adjustment R59770021 CLM R10 15 03 2010 31 ...
Page 36: ...3 Physical installation 32 R59770021 CLM R10 15 03 2010 ...
Page 48: ...5 Connections 44 R59770021 CLM R10 15 03 2010 ...
Page 64: ...7 Start up of the Adjustment mode 60 R59770021 CLM R10 15 03 2010 ...
Page 74: ...8 Input menu 70 R59770021 CLM R10 15 03 2010 ...
Page 116: ...10 Layout menu 112 R59770021 CLM R10 15 03 2010 ...
Page 158: ...13 Projector control 154 R59770021 CLM R10 15 03 2010 ...
Page 172: ...14 Service menu 168 R59770021 CLM R10 15 03 2010 ...
Page 186: ...16 Servicing 182 R59770021 CLM R10 15 03 2010 ...
Page 196: ...17 Projector covers removal and installation 192 R59770021 CLM R10 15 03 2010 ...
Page 204: ...C DMX Chart 200 R59770021 CLM R10 15 03 2010 ...
Page 210: ...D Specifications 206 R59770021 CLM R10 15 03 2010 ...
Page 216: ...E Troubleshooting 212 R59770021 CLM R10 15 03 2010 ...
Page 222: ...F Mounting optional Carry handle 218 R59770021 CLM R10 15 03 2010 ...
Page 224: ...G Order info 220 R59770021 CLM R10 15 03 2010 ...


