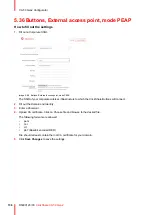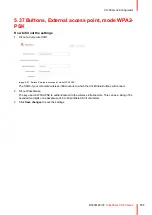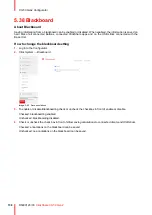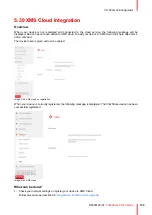
background image

141

R5900120 /03

ClickShare CX-50 Gen2

5.40 Firmware Update

About Firmware update

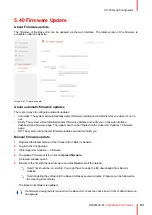
The firmware of the Base Unit can be updated via the web interface. The latest version of the firmware is

available on Barco's website.

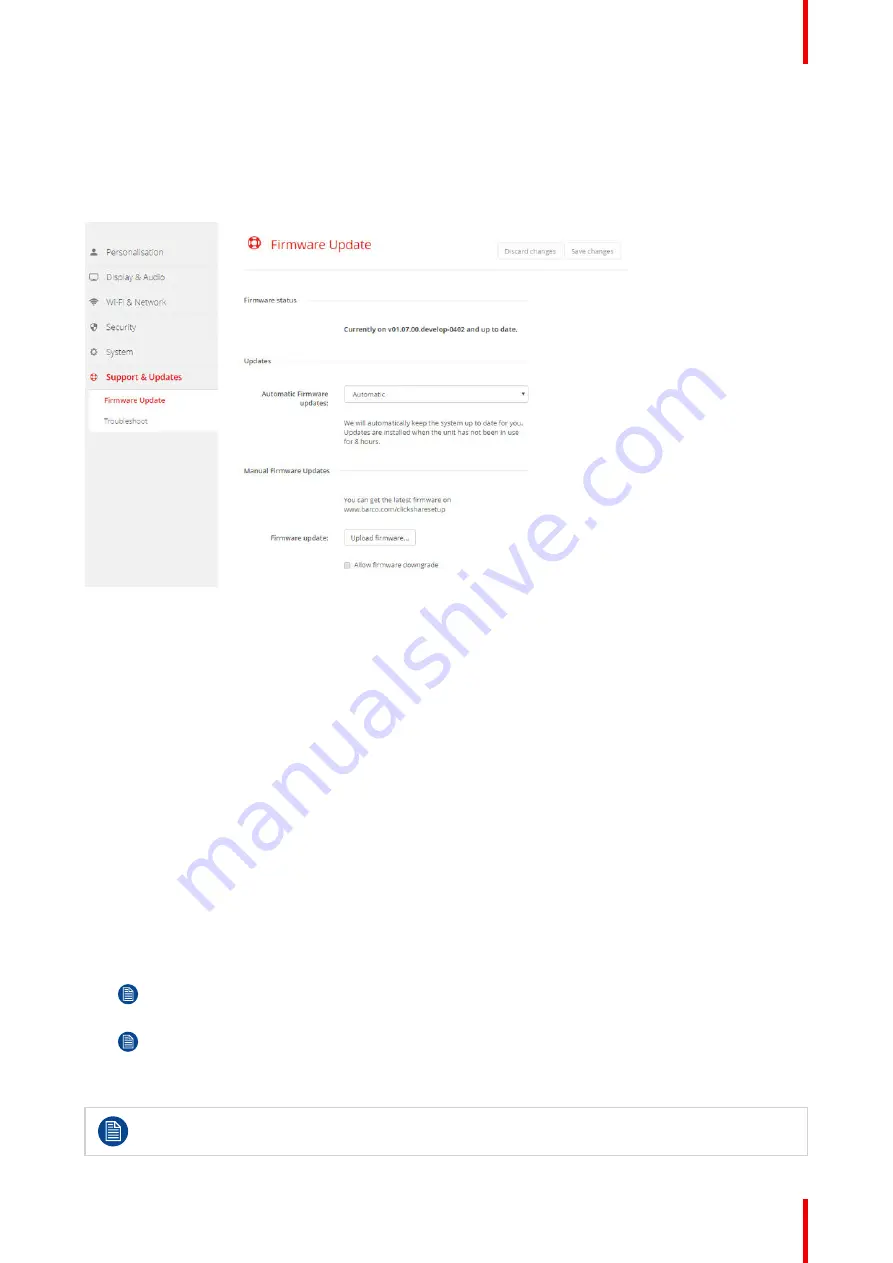
Image 5–61 Firmware update

About automatic firmware updates

There are 3 ways to configure automatic updates:
• Automatic: The system will automatically detect firmware updates and install them for you when it’s not in

use.

• Notify: The system will automatically detect firmware updates and notify you on the web interface

dashboard and firmware page. The update can then be initiated via the

Support & Updates

>

Firmware

page

• Off: The system will not detect firmware updates and will not notify you.

Manual firmware update

1.

Download the latest version of the firmware from Barco's website.

2.

Log in to the

Configurator

.

3.

Click

Support & Updates

Firmware

.

4.

To upload a firmware version, click on

Upload firmware..

.

A browser window opens.

5.

Browse to the file with the new firmware and click

Open

to start the upload.

Note:

This should be an .enc file. You might have to unzip the file downloaded from Barco's

website.

Note:

Updating the software to the Base Unit takes several minutes. Progress can be followed on

the meeting room display.

The Base Unit software is updated.

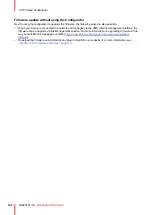
If a firmware downgrade is required on the Base Unit, check the check box in front of

Allow firmware

downgrade

.

CX-50 Gen2 Configurator

Summary of Contents for C5011S

Page 1: ...ENABLING BRIGHT OUTCOMES Installation manual Model C5011S ClickShare CX 50 Gen2...

Page 2: ...Registered office Barco NV President Kennedypark 35 8500 Kortrijk Belgium www barco com en support www barco com Barco NV Beneluxpark 21 8500 Kortrijk Belgium www barco com en support www barco com...

Page 3: ...signin Product Security Incident Response As a global technology leader Barco is committed to deliver secure solutions and services to our customers while protecting Barco s intellectual property When...

Page 4: ......

Page 5: ...6 Network deployment requirements 30 3 7 Network connected setup 32 3 8 Dual network connected setup 33 3 9 Dedicated network setup 34 3 10 Display connection to the Base Unit 36 3 11 Fully equipped A...

Page 6: ...ess Client EAP TTLS 106 5 16 Wi Fi settings Wireless Client PEAP 107 5 17 Wi Fi settings Wireless Client WPA2 PSK 109 5 18 LAN settings 110 5 19 LAN Settings Wired Authentication 112 5 20 LAN Settings...

Page 7: ...7 R5900120 03 ClickShare CX 50 Gen2 5 44 Troubleshoot diagnostics 146 6 Firmware updates 147 6 1 Updating the CX 50 Gen2 firmware 148 7 Troubleshooting 149 7 1 Troubleshooting list 150 Index 153...

Page 8: ...R5900120 03 ClickShare CX 50 Gen2 8...

Page 9: ...rational It provides detailed information on how to configure your CX 50 Gen2 Available System documentation Next to the installation manual a user guide and a safety manual are available on Barco s w...

Page 10: ...platforms and connects instantly with most brands of peripherals speakers microphones webcams soundbars when using the Conferencing Button or ClickShare app At the moment 6 different versions are ava...

Page 11: ...cord Printed safety manual R9861622xx2B2 R9861622 2x R9861600D01C3 DC adapter with regional depending power cord Printed safety manual R9861600D01C3 1x R9861600D01C3 Contact your local sales represen...

Page 12: ...160 30Hz USB C DP ALT mode front Audio output USB jack HDMI Connections Front side 1x USB C 3 1 Rear side 1x USB C 3 1 2x USB A 3 1 1x Ethernet LAN 2 5Gbit Audio analog line out on jack socket 3 5mm C...

Page 13: ...and reporting Yes Warranty 1 year standard 5 years coverage via SmartCare Conferencing Button Weight 60 gr 0 132 lb Frequency band 2 4 GHZ and 5 GHz Wireless transmission protocol IEEE 802 11 a b g n...

Page 14: ...ebcam and soundbar Furthermore it will send out the content from the camera and or the speakerphone towards the Button The Base Unit can be inside a cabinet in the meeting room or put on the meeting r...

Page 15: ...the system LEDs behavior Explanation static red receiving content from the Buttons and streaming towards the display during the first phase of the Base Unit boot process blinking white system is star...

Page 16: ...om of the Base Unit reference 1 on Image 1 5 1 1 2 Image 1 5 Antenna The antenna is built in in the CX 50 Gen2 Bottom layout of the Base Unit The serial number label containing the Barco part number t...

Page 17: ...17 R5900120 03 ClickShare CX 50 Gen2 markings for applicable standards CE CCC UL markings for waste regulation Made in CX 50 Gen2 Introduction...

Page 18: ...ur Windows or Mac pc Before you can use your mobile device with ClickShare you have to connect the mobile device Wi Fi with the ClickShare Base Unit Wi Fi Follow the instructions as given in your mobi...

Page 19: ...19 R5900120 03 ClickShare CX 50 Gen2 2 1 Environmental Condition Check 20 2 2 Security recommendations before starting 21 2 3 Basic Workflow 22 Getting started 2...

Page 20: ...ice is protected from the harmful effects of hostile airborne particles in the environment of the device The manufacturer reserves the right to refuse repair if a device has been subject to negligence...

Page 21: ...t and real time status monitoring of your devices distributed over different locations Enjoy easy automated scheduling of software updates Base Unit configuration creation of templates remote wallpape...

Page 22: ...nnect the audio devices via USB or jack if any to the Base Unit see Fully equipped Audio only or Camera only conference room page 38 or Content Audio connection page 44 5 Connect the USB camera to Bas...

Page 23: ...1 Fully equipped Audio only or Camera only conference room 38 3 12 Flexible Meeting Room setup 40 3 13 Touch screen connections to the Base Unit 42 3 14 Camera connection 43 3 15 Content Audio connect...

Page 24: ...unt Wall mount A Kensington lock is foreseen on one side of the Base Unit WARNING Ceiling mount is not allowed Standalone or network integration The Base Unit can be used as standalone unit or integra...

Page 25: ...nit in an open emplacement and avoid installing a metallic shell For an optimal user experience both ClickShare and BYOD services such as AirPlay Google Cast or Miracast have different implementations...

Page 26: ...R5900120 03 ClickShare CX 50 Gen2 26 3 3 Table mounting Overview Put the Base Unit directly on the meeting room table The total weight of the Base Unit is 900 g CX 50 Gen2 Installation...

Page 27: ...How to install 1 Drill two holes in the wall or ceiling as indicated on the drawing Horizontal distance 162 mm 162 6 5 Image 3 1 Mounting holes 2 Insert a plug in each hole if needed depends on the wa...

Page 28: ...R5900120 03 ClickShare CX 50 Gen2 28 CX 50 Gen2 Installation...

Page 29: ...ClickShare Button allows you to stay connected to the internet Users who wish to share with the ClickShare Desktop App ClickShare Mobile App AirPlay and Chromecast will have to connect to the Base Un...

Page 30: ...utbound TCP Port 443 to xms cloud barco com MyBarco portal outbound TCP Port 443 to barco com login xms cloud barco com Optional Web Configurator of the device TCP ports 80 and 443 to the Base Unit or...

Page 31: ...31 R5900120 03 ClickShare CX 50 Gen2 Sender Receiver Ports SNMP UDP 161 and 162 REST API TCP 4003 CX 50 Gen2 Installation...

Page 32: ...without losing the internet connectivity Sharing via Miracast depends on the configuration of the device Using a ClickShare Button allows guests to stay connected to the Guest LAN and thus retain int...

Page 33: ...y over Wi Fi direct Image 3 4 How to setup via the Configurator 1 Connect the Base Unit and browse to the ClickShare Configurator and log in 2 Select Button in the System menu and click Edit settings...

Page 34: ...se Unit to share with the ClickShare Desktop App ClickShare Mobile App AirPlay and Chromecast and will only be able to access the internet if the device supports to use data 3G 4G 5G at the same time...

Page 35: ...ation mode 3 Open the Configure dropdown list and choose Network integration 4 Select one of the authentication modes for network integration mode and fill out the details 5 Re pair the ClickShare But...

Page 36: ...the display using a HDMI cable Note No display cables are included in the ClickShare box at purchase HDMI OUT Image 3 6 When setting up a display configuration connect the HDMI cable to the display Wh...

Page 37: ...way When an HDMI and USB Type C connection is made between the Base Unit and the display the HDMI connection has priority Ultra wide displays can only be connected with a Display Port to USB connecti...

Page 38: ...ew active B Camera and speakerphone attached only local view C Camera and speakerphone attached and active local view active 1 Local view active 2 Camera connected not active 3 Speakerphone connected...

Page 39: ...th the Button or ClickShare desktop app it allows you to connect the room speakerphone and microphone to your laptop for use in a conferencing call Video only room Video only rooms have just an USB ca...

Page 40: ...lugging a secondary display into the front USB C port directly is not supported 2 Connect an HDMI cable from the HDMI out port of the collaboration bar to the HDMI in port of the primary display refer...

Page 41: ...e CX 50 Gen2 Note It is not possible to pair new buttons while in Modular setup mode with the Base Unit in room system mode Modular Room System 1 2 3 Image 3 11 Example modular room system connections...

Page 42: ...list of supported touch screen can be found on Barco s website See https www barco com en support docs TDE9538 To connect 1 Connect an HDMI cable between the Base Unit and touch screen display When ne...

Page 43: ...cameras can be found on Barco s website Since the USB ports are USB 2 0 or higher ports HDMI cameras are supported via HDMI to USB converter To connect 1 Connect the camera via USB to the Base Unit C...

Page 44: ...peakerphone connected When your display is connected via HDMI and it supports audio a separate audio connection is not necessary The audio signal is sent together with the video signal to the display...

Page 45: ...sound icon in the system tray and select Default communication device The Sound window opens 2 Select Echo Cancelling Speakerphone select Set default and click Apply E g for Windows 10 1 Click on the...

Page 46: ...ngly advise the LAN connection and the use of XMS cloud for configuration monitoring and additional functionality The LAN connection also greatly improves the user experience when using the ClickShare...

Page 47: ...e connected HDMI signal will be converted to DipslayPort over USB C DisplayPort over USB C needs bo be enabled in the Configurator tab page Display Audio Inputs Required parts Barco HDMI in to USB C c...

Page 48: ...90 with power specifications input 100 240V 1 2A 50 60Hz and output 19 VDC 4 74A Image 3 13 Via the power adapter 1 Plug the barrel connector of the power adapter into the power input of the Base Unit...

Page 49: ...49 R5900120 03 ClickShare CX 50 Gen2 Image 3 14 The display sends power to the Base Unit and the Base Unit sends video signal to the display CX 50 Gen2 Installation...

Page 50: ...w to connect 1 Make a connection between the laptop USB Type CTMport and the front USB Type CTMport of the Base Unit can also with the USB Type CTMport on the Barco HDMI in to USB C convertor Note Mak...

Page 51: ...reen is seen on the connected monitor Image 3 16 Onboarding screen There are now 2 ways to continue 1 Check for updates optional configure your Base Unit and register to XMS Cloud See Preferred way to...

Page 52: ...hat package contains a 5 year coverage for hardware increased service levels 5 year analytics and XMS for management How to handle 1 Connect the device s WiFi with the given instructions The default S...

Page 53: ...version will be downloaded but the update of the firmware will be executed only when finishing the configuration wizard For more info about automatic firmware update see Firmware Update page 141 Click...

Page 54: ...of NTP For more info about manual time setup see Date Time setup manually page 128 For more info about the use of an NTP server see Date Time setup time server page 130 6 Security settings Image 3 21...

Page 55: ...o enter the Configurator For more info see Security passwords page 124 8 Network settings Image 3 23 Select the frequency band channel and enter a Wi Fi passphrase when desired For more info see Wi Fi...

Page 56: ...the registration procedure Follow the procedure in Registration to XMS Cloud page 59 10 Overview page Image 3 25 Gives an overview of the current configuration Click Finish configuration When your dev...

Page 57: ...57 R5900120 03 ClickShare CX 50 Gen2 Image 3 26 CX 50 Gen2 Installation...

Page 58: ...n on the meeting room display and the unit can be used with it s default configuration However as long as the Configuration Wizard has not been completed the initial startup screen will again be shown...

Page 59: ...tion can be done to XMS cloud by the end customer preferred flow or by the reseller in the name of the customer Online to XMS cloud 1 Surf to https xms cloud barco com add The XMS login page is displa...

Page 60: ...3 29 Company information 5 Enter the device token to setup your device and to receive your 5 years of service coverage The device token is indicated on the wizard screen see Image 3 25 Click Continue...

Page 61: ...61 R5900120 03 ClickShare CX 50 Gen2 Image 3 31 Assign meeting room Your device is successfully registered CX 50 Gen2 Installation...

Page 62: ...ch can be downloaded from Barco s website Verify the publisher Barco of the Enterprise Application before adding it to your tenant Limit the access of the Enterprise Application ClickShare Calendar Sy...

Page 63: ...t page is displayed Image 3 33 2 Click Connect Azure Account You will be redirected to your Microsoft Azure account The Microsoft sign in window will be displayed 3 Sign in with the correct administra...

Page 64: ...nd shows the Continue integration button Image 3 36 6 Click Continue integration to request the O365 admin s final permission to read calendar information for each room account and generate credential...

Page 65: ...alendar 1 On the Manage Calendar page spot the desired Meeting room and click on Link Base Unit Image 3 39 Example of the Manage Calendar window The Base Unit selector window is prompted Image 3 40 Ex...

Page 66: ...t device About Credentials By default the user does not need to do anything for expiring credentials as XMS Cloud auto renews credentials during an periodic credentials check If renewed the renew cred...

Page 67: ...1 Pairing 68 4 2 ClickShare Extension Pack 70 4 3 ClickShare Extension Pack installer 71 4 4 ClickShare Windows Certified driver 73 4 5 ClickShare Desktop App 74 4 6 MSI installer of the ClickShare D...

Page 68: ...nly be paired to one Base Unit at a time The Button will always make connection to the Base Unit it was last paired to To pair a Button to the Base Unit by plugging in 1 Insert the Button in the USB t...

Page 69: ...69 R5900120 03 ClickShare CX 50 Gen2 Image 4 3 Preparing the Buttons...

Page 70: ...ed by default To change the default behavior of the installer the installer will need to be executed with command line parameters The ClickShare Extension Pack can be installed by the end user manuall...

Page 71: ...stall the ClickShare Extension pack using the Windows command prompt Following is an example of a silent installation version numbers are only given as example always check Barco s web for the latest...

Page 72: ...auncher application will be started right after the installation finishes if this parameter is set to YES Otherwise the launcher application will not be started qn This parameter indicates that the in...

Page 73: ...automatically lauches the executable on the Button Note that at least version 1 20 0 is required in order to support Buttons with firmware version 4 10 or higher In case an older version is installed...

Page 74: ...onnect When using Outlook as your main agenda you get also an immediate overview of your next meetings No need to search for the appointment or invite in Outlook Just click Join to join your conferenc...

Page 75: ...nstaller by double clicking the downloaded file The installation wizard starts Follow the instruction on the different windows Image 4 5 3 Read the License Agreement and check the I accept the terms i...

Page 76: ...R5900120 03 ClickShare CX 50 Gen2 76 Preparing the Buttons...

Page 77: ...ion 112 5 20 LAN Settings EAP TLS security mode 113 5 21 LAN Settings EAP TTLS security mode 115 5 22 Service mobile devices 117 5 23 Service PresentSense 119 5 24 Service ClickShare API remote contro...

Page 78: ...figurator in XMS cloud will in time more elaborated than the local configurator Therefore it preferred to configure your devices via XMS cloud For more info see XMS documentation The next topics are d...

Page 79: ...hange your configuration instead of using the menus To access the Configurator via the LAN 1 Open a browser Note Supported browsers are Microsoft Edge Firefox Google Chrome and Safari 2 Browse to the...

Page 80: ...tor language changes to the selected language 4 Enter the user name admin and the password read and accept the EULA and the Privacy policy and click OK By default the password is set to admin Warning...

Page 81: ...een available you should connect to the Base Unit directly with your laptop via an Ethernet crossover cable and access the web interface using the fixed IP address 192 168 1 23 Make sure your own LAN...

Page 82: ...he password is set to admin The configurator opens The wired IP address is given on the startup page Older laptops might not support the 5 GHz Frequency Band If your Base Unit is set to that frequency...

Page 83: ...n wizard by clicking at the bottom left on Configuration wizard or on Lauch configuration wizard on the dashboard page Image 5 4 Configuration Wizard start All basic settings necessary to configure th...

Page 84: ...e automatically See Firmware Update page 141 Firmware update manually Personalisa tion Language on screen text See On Screen ID information page 85 Meeting room name location name and welcome message...

Page 85: ...sed to share content No status bar displayed anymore The status bar pops up to show status changes notifications pin code etc and fades out again With touch screens a tag enables you to bring up the s...

Page 86: ...name and enter a name for the meeting room This text is shown on the user s device when the Button is ready to share Ready to share on on the central screen connected to the Base Unit and in the list...

Page 87: ...hown The current selected wallpaper is shown with a red border 3 Select one of the available wallpapers and click on Save Changes Note By default two general Barco wallpapers are available They are au...

Page 88: ...their screen Checked wallpaper will be displayed when no one is sharing content Not checked no wallpaper will be displayed when no one is sharing content The video output of the Base Unit is disabled...

Page 89: ...sonalized wallpaper selection A browser window opens 4 Browse for the desired image click Open to load the image The content of the file is checked and when valid format and size the file is uploaded...

Page 90: ...ts a red border 4 Click on Save changes to apply the personalized wallpaper and replace the previous file The message Successfully applied changes is displayed on top of the page Remove personalized w...

Page 91: ...tion Configuration Files Image 5 12 Configuration files 3 To download a full backup click on Full Backup An xml file containing all information and history will be downloaded This file can be reused o...

Page 92: ...R5900120 03 ClickShare CX 50 Gen2 92 CX 50 Gen2 Configurator...

Page 93: ...s connected to the output the Model Vendor or indicated When no display is connected the indication Not Connected is displayed next to Model Vendor Display mode The display mode can be set to either C...

Page 94: ...HDMI or DP or audio jack The UI illustration image shows a device with USB speakerphone connected Since all audio is played out and captured from the echo cancelling speaker the peripheral will cance...

Page 95: ...elect the desired option The following option are possible Wired RoomDock display screen will be displayed on local device DisplayPort over USB C input from HDMI device via convertor to DisplayPort ov...

Page 96: ...s going on with the camera stream quality and format change The quality score reflects the image quality where zero means the lowest quality accepted by ClickShare lowest bandwidth and 100 means the m...

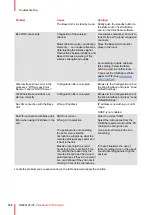
Page 97: ...ia the configurator is supported for Logitech Meetup and Rally and only when the camera is not in use When the installed firmware version is lower than the Barco certified peripheral firmware version...

Page 98: ...type Note Standby mode will automatically switch to and remain locked as ECO mode Modular setup 1 Set Audio Output to USB under Display Audio Outputs 2 Enable the check box under Peripheral switching...

Page 99: ...s is selected and Access Point is enabled Image 5 19 Wi Fi settings The Access Point Settings and the Wireless Client settings can be enabled or disabled after clicking Edit settings Check the check b...

Page 100: ...l number Base Unit 4 If you want to broadcast this SSID check the checkbox before Enable SSID broadcast About frequency band channel selection In an ideal setup overlapping channels should not be used...

Page 101: ...box and selecting the correct band Below the channel selection pane an indication is given of the available bandwidth of the current channel To see if sufficient bandwidth is available in a different...

Page 102: ...nality and central management in XMS It offers increased flexibility in the placement of the Base Unit as a network cable drop is no longer required on the installation location How to activate Wirele...

Page 103: ...ed using client certificates EAP TLS is considered one of the most secure EAP methods The only minor disadvantage compared to PEAP and EAP TTLS is that the user identity is transmitted in the clear be...

Page 104: ...erver From Base Unit firmware version 02 12 00 and later we support both NDES and standard SCEP NDES requires the following parameters SCEP Server This is the IP or hostname of the Windows Server in y...

Page 105: ...105 R5900120 03 ClickShare CX 50 Gen2 Image 5 25 Wi Fi Settings Wireless Client EAP TLS SCEP CX 50 Gen2 Configurator...

Page 106: ...edentials are transported in a securely encrypted tunnel established based upon the server certificates User authentication is performed against the same security database that is already in use on th...

Page 107: ...But in this application note with regard to PEAP we are referring to PEAPv0 with EAP MSCHAPv2 as the inner authentication method This is one of the two certified PEAP implementations in the WPA and W...

Page 108: ...R5900120 03 ClickShare CX 50 Gen2 108 File should at least contain the root CA certificate for your domain 6 Click Save Changes to save the settings CX 50 Gen2 Configurator...

Page 109: ...point is encrypted using a 256 bit key How to start up for WPA2 PSK 1 Select WPA2 PSK from the drop down list next to Authentication Mode Image 5 28 Wi Fi Settings Wireless Client WPA PSK 2 Fill out a...

Page 110: ...e assigned to each machine Without DHCP the IP address must be entered manually at each computer and if computers move to another location in another part of the network a new IP address must be enter...

Page 111: ...MUST be on the local subnet Note This must NOT be 0 0 0 0 If there is no router on the local subnet then just set this field to any IP Address on the subnet 5 Click in the DNS Servers input field and...

Page 112: ...tication Image 5 31 Wired authentication The setup wizard starts 2 Select the authentication method Click on the drop down and select the desired method The following methods are available No authenti...

Page 113: ...dvantage compared to PEAP and EAP TTLS is that the user identity is transmitted in the clear before the actual TLS handshake is performed EAP TLS is supported via SCEP or manual certificate upload How...

Page 114: ...ES service Only http is allowed E g http myserver or http 10 192 5 1 SCEP username This is a user in your Active Directory which has the required permission to access the NDES service and request the...

Page 115: ...TTLS is usually implemented in corporate environments without a client certificate we have not included support for this If you prefer using client certificates per user we suggest using EAP TLS How t...

Page 116: ...R5900120 03 ClickShare CX 50 Gen2 116 File should at least contain the root CA certificate for your domain 5 Click Save configuration CX 50 Gen2 Configurator...

Page 117: ...For more information about using Google Cast consult the user guide of your device The supported versions of Google Cast can be found on Barco s website www barco com clickshare The support of non re...

Page 118: ...ast check the check box in front of Streaming via Google Cast To allow streaming via Miracast check the check box in front of Streaming via Miracast Note from firmware version 2 12 after a factory res...

Page 119: ...n a popup on his PC The app will connect and disconnect automatically when you enter or leave the meeting room No meeting room selection nor entering pin codes is necessary Only those in the room can...

Page 120: ...ged in Security Passwords Image 5 38 ClickShare API documentation How to enable remote control via API 1 Log in to the Configurator 2 Click Wi Fi Network Services 3 Check the check box in front of Rem...

Page 121: ...Log in to the Configurator 2 Click Wi Fi Network Services 3 Scroll to SNMP Image 5 39 Service SNMP 4 Check the check box in front of Enable The configuration fields become available How to configure 1...

Page 122: ...s level is used for organizations that have extremely strict requirements with regards to security Level 3 contains the level 2 security extended with blocking of mobile apps downgrading firmware not...

Page 123: ...123 R5900120 03 ClickShare CX 50 Gen2 Image 5 40 Security levels 3 Select the desired security level icon 4 Click Save changes to apply the setting CX 50 Gen2 Configurator...

Page 124: ...gs Changing the ClickShare Configurator API password 1 Log in to the Configurator 2 Click Security Passwords Image 5 41 Passwords 3 Click in the Password pane in the input field next to Old password a...

Page 125: ...default a self signed certificate is used How to setup 1 Log in to the Configurator 2 Click Security Passwords Image 5 42 HTTP Encryption 3 Click on HTTP encryption 4 Choose the certificate The follow...

Page 126: ...ens 3 Select the desired custom certificate file and click Open The allowed file formats are pfx p12 PKCS 12 pem Base64 encoded 4 Click on Generate CSR A Download Certificate Signing Request page open...

Page 127: ...ed Current uptime time since last startup Lifetime uptime time used since first startup Overall status Base Unit restart 1 Log in to the Configurator 2 Click Support Base Unit Status Image 5 45 3 To r...

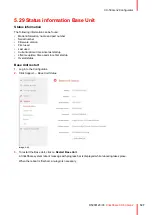
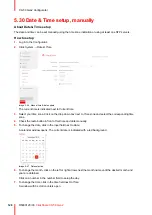
Page 128: ...down box next to Time zone and select the corresponding time zone 4 Check the radio button in front of Set time and date manually 5 To change the date click in the input field next to Date A calendar...

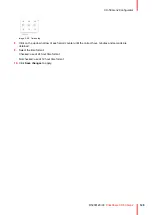
Page 129: ...Click on the up down arrow of each scroll counter until the correct hour minutes and seconds are obtained 9 Select the time format Checked use of 24 hour time format Not checked use of 12 hour time f...

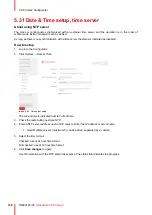
Page 130: ...n to the Configurator 2 Click System Date Time Image 5 49 Time server setup The current time is indicated next to Current time 3 Check the radio button next Use NTP 4 Enter a NTP server address next t...

Page 131: ...Plugging in an HDMI display Plugging in an HDMI source When a camera starts streaming Standby mode When the Base Unit goes in deep standby mode it will shut down all processes including the Wi Fi acc...

Page 132: ...the Buttons List containing Serial number MAC address Article code Firmware version It is possible to update the software of the Buttons over Wi Fi Model info Amount of connections Last connection To...

Page 133: ...op down box and select the desired method Manually provide Client CA certificates Auto enrollment via SCEP Manually providing certificates 1 Upload client certificate Click on Choose file and browse t...

Page 134: ...p is allowed E g http myserver or http 10 192 5 1 SCEP username This is a user in your Active Directory which has the required permission to access the NDES service and request the challenge password...

Page 135: ...r corporate wireless infrastructure to which the ClickShare Buttons will connect 2 Fill out the Domain and Identity 3 Enter a Password 4 Upload CA certificate Click on Choose file and browse to the de...

Page 136: ...rporate wireless infrastructure to which the ClickShare Buttons will connect 2 Fill out the Domain and Identity 3 Enter a Password 4 Upload CA certificate Click on Choose file and browse to the desire...

Page 137: ...point mode WPA2 PSK The SSID of your corporate wireless infrastructure to which the ClickShare Buttons will connect 2 Fill out Passphrase The key used in WPA2 PSK to authenticate onto the wireless in...

Page 138: ...the blackboard setting 1 Log in to the Configurator 2 Click System Blackboard Image 5 58 Save annotations 3 To enable or disable Blackboarding check or uncheck the checkbox in front of enable or disab...

Page 139: ...cloud click here https xms barco com add The device token is given and can be copied Image 5 59 XMS cloud no registration When your device is correctly registered the following message is displayed Th...

Page 140: ...company with budget predictability swift hardware replacement and expert support from both Barco and our partners for up to 5 years When SmartCare is activated in the SmartCare pane the message Smart...

Page 141: ...e Support Updates Firmware page Off The system will not detect firmware updates and will not notify you Manual firmware update 1 Download the latest version of the firmware from Barco s website 2 Log...

Page 142: ...k and managed via the XMS Cloud management platform the firmware can be upgrade via this Management solution For more information on upgrading firmware in this way consult Barco s web pages on XMS htt...

Page 143: ...vers only a few hours before it will be overwritten Therefore it is important if you discover a problem with your system to download the logging immediately How to use 1 Log in to the Configurator 2 C...

Page 144: ...everted to defaults There is no need to go through the onboarding procedure The device will not be removed from the organization account in XMS cloud How to erase 1 Log in to the Configurator 2 Click...

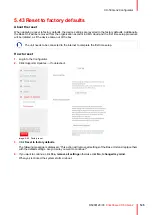
Page 145: ...e box The unit needs to be connected to the internet to complete the first time setup How to reset 1 Log in to the Configurator 2 Click Support Updates Troubleshoot Image 5 64 Factory reset 3 Click Re...

Page 146: ...ate file in the log archive This file can only be opened with a network monitoring tool How to start 1 Log in to the Configurator 2 Click Support Updates Troubleshoot 3 In the Diagnostics pane click R...

Page 147: ...147 R5900120 03 ClickShare CX 50 Gen2 6 1 Updating the CX 50 Gen2 firmware 148 Firmware updates 6...

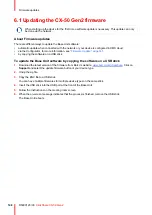
Page 148: ...the software on a USB stick To update the Base Unit software by copying the software on a USB stick 1 Download the latest version of the firmware from Barco s website www barco com clickshare Click o...

Page 149: ...149 R5900120 03 ClickShare CX 50 Gen2 7 1 Troubleshooting list 150 Troubleshooting 7...

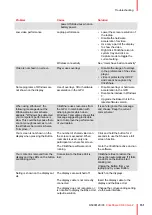
Page 150: ...ling away Wireless congestion Use a WiFi scanner to find a free wireless channel and select it via the web interface You can use commercial as well as free online tools such as inSSIDer or Xirrus for...

Page 151: ...r scheme To improve ClickShare uses resources from the GPU In combination with other programs which do so Windows 7 sometimes shows this message suggesting to disable Aero to improve the performance o...

Page 152: ...ttings ClickShare Base Unit does not start up correctly Configuration file is corrupted Browse to the Configuration tab of the Web Interface and press Load Default Settings No LAN connection with the...

Page 153: ...8 Button Pairing 68 Prepare 67 Buttons 132 External access point EAP TLS 133 EAP TTLS 135 PEAP 136 WPA2 PSK 137 C Calendar Integration XMS Cloud 62 ClickShare API 120 Password 124 Configuration Wizard...

Page 154: ...nit 26 Wall mounting Base Unit 27 L LAN settings 110 LAN Settings Wired authentication 112 EAP TLS 113 EAP TTLS 115 Language 85 Location name 85 Log settings 143 M Meeting room name 85 Mobile Device S...

Page 155: ...ng 144 Troubleshooting list 150 U Update Firmware Base Unit 141 Button 141 Upload configuration 91 W Wall mounting Base Unit 27 Wallpaper 87 Personalized 89 WebUI password 124 Welcome text 85 Wi Fi se...

Page 156: ...R5900120 03 ClickShare CX 50 Gen2 156 Index...

Page 157: ......

Page 158: ...www barco com R5900120 03 2023 10 04 Wi Fi...

Reviews: