Configuring a Match Sensor
Finish
Adjust Percent Match
(Optional)
Start
Adjust Rotation Range
(Optional)
Set Pass Count
Use Manual Trigger to Test
Range of Good and Bad
Parts
Select ROI Type and
Adjust
Click Teach
Click Outside ROI
NOTE: Under normal operation
any parameter modifications take
effect on the next trigger.
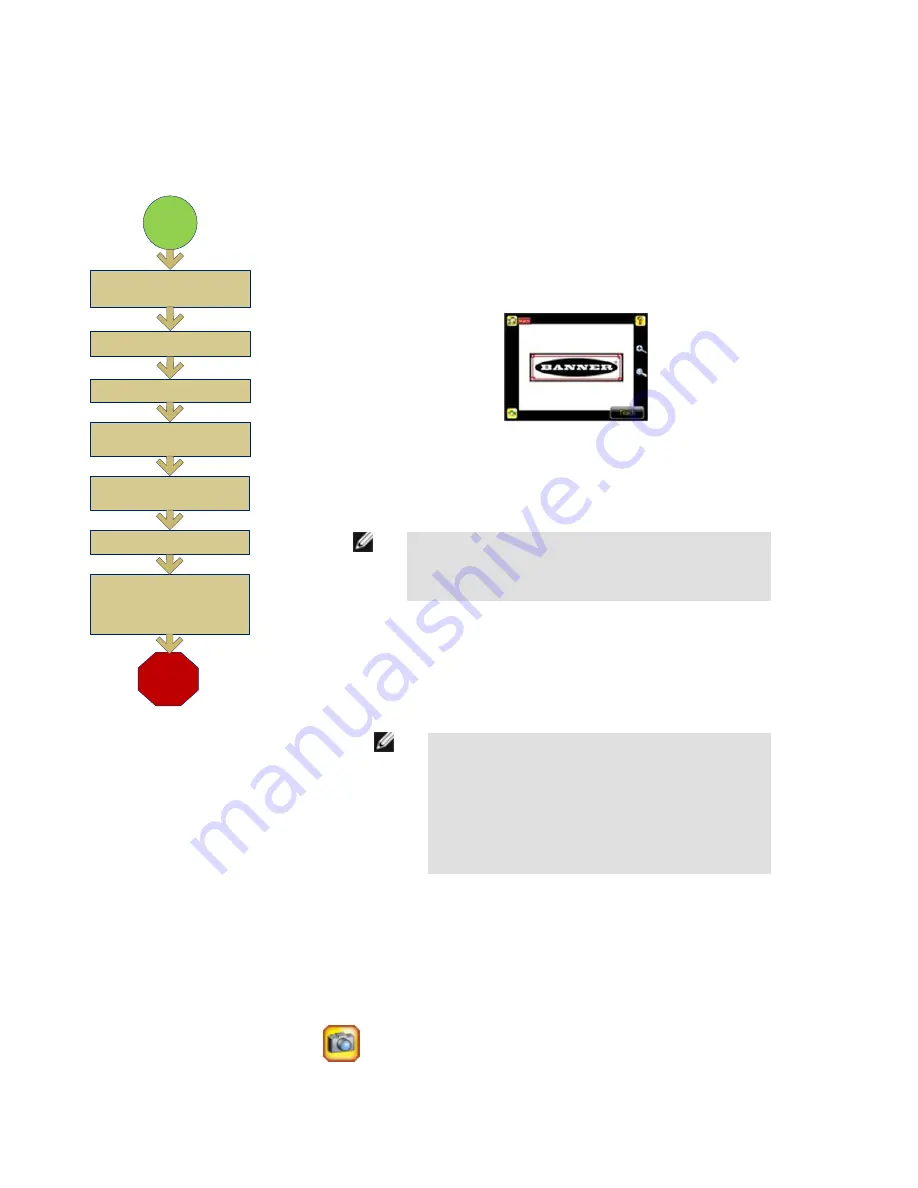
The flow chart at left provides an overview of the steps to setting up an inspection on the iVu TG
sensor as a Match sensor.
1. Make sure you use a good part for the inspection setup. Normally, the part will be centered
in the field of view with the feature of interest surrounded by the Region of Interest (ROI), a
blue rectangle. The ROI can be rotated and resized. The ROI turns red when selected for
adjustment.
2. Select the ROI by clicking inside it. Move it, resize it, and rotate it by dragging the ROI or its
corners. Once the feature of interest is within the ROI, click the Teach button. The feature
will be highlighted in green.
NOTE: When running a Match inspection, the sensor will look
for any possible patterns to match anywhere within the field of
view.
3. Configure the following parameters:
• The Percent Match setting adjusts how closely the inspected part or label needs to
match the reference part or label. The Percent Match scale is from 0 to 100, where 0 is
the most tolerant and 100 is the least tolerant. Move the slider to the left or to the right to
adjust the setting. For the best results, use a value from 50 to 90.
NOTE: When running a Match inspection, the sensor will
highlight in green any pattern matches that are within the
specified Rotation Range and meet or exceed the value
specified for Percent Match. Patterns that are within the
specified Rotation Range and within approximately 20% be-
low the specified value for Percent Match will be colored
yellow.
• The Rotation Range sets the expected rotation of parts or labels during an inspection.
For example, a value of 45 means that the part may rotate 45 degrees in either direction
from the reference part and still pass. Move the slider from 0 to 180 degrees. Note that
the smaller the rotation range, the faster the inspection will run.
• The Minimum Pass Count is the minimum number of parts, labels, or features expected
to fall within the specified criteria; the Maximum Pass Count is the maximum number
expected to fall within the specified criteria. These settings are used to determine the
pass or fail result of the inspection.
4.
Use the Manual Trigger, located in the lower-right corner of the screen, to test good
and bad parts. Adjust settings as necessary and retest.
Rev. C
www.bannerengineering.com - tel: 763-544-3164
13


