44
44
Truing the Fence
To ensure that the fence is parallel with itself and square with the table:
1. Ensure that the bolts through the wood facing on each side are tight and adequately
countersunk.
2. To align the wood facing, adjust one or both fence halves so they are in close alignment.
Micro-adjust and check the alignment with a straightedge.
3. If the wood fences are not coplanar with each other, resurface as one unit. You can perform
this operation on a jointer.
Note:
Make sure the screws are countersunk deep enough so the workpiece will
not come in contact with the heads of the screws. Or use electrical washers between the fence
and the fence bracket to shim the fence into the correct position.
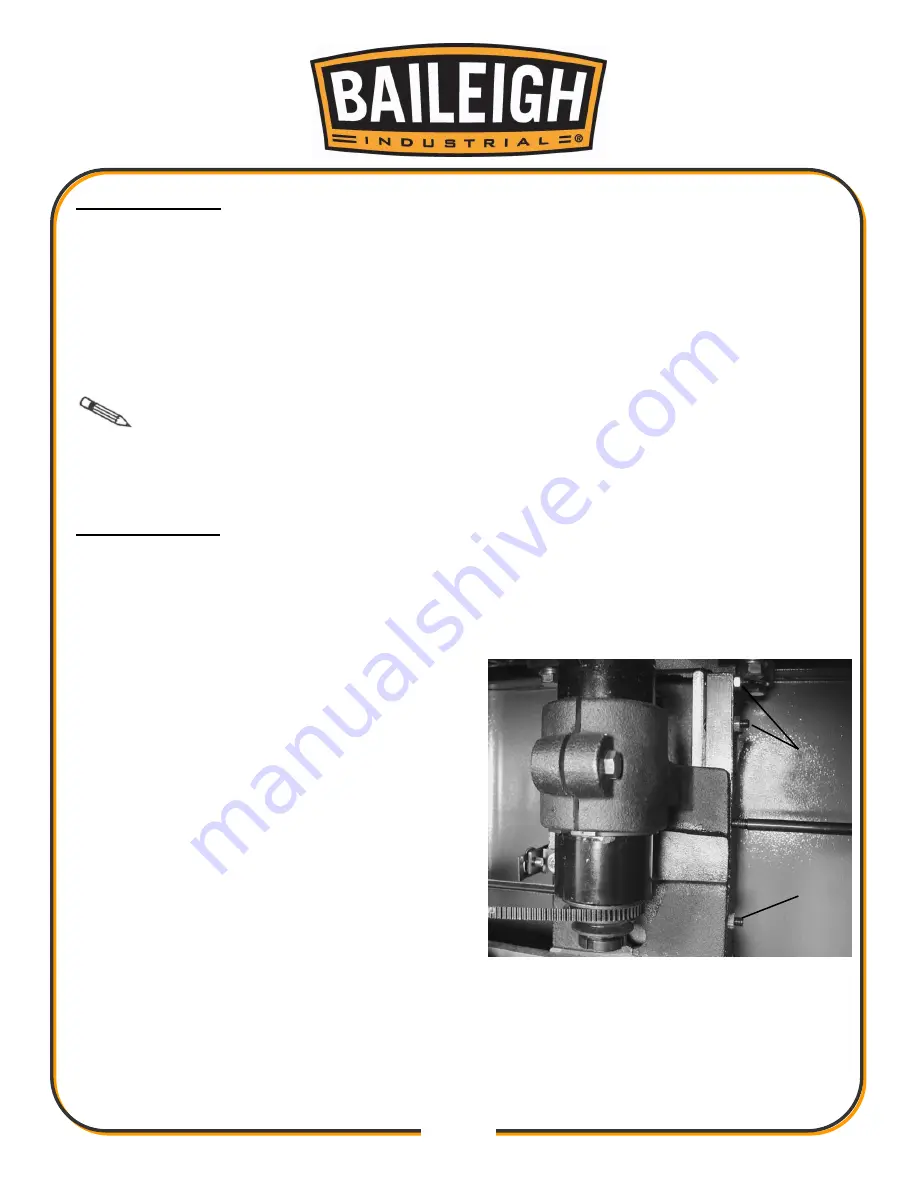
Gib Adjustments
The spindle gibs ensure there is no play in the spindle that could cause it to wobble.
1. Disconnect and lockout power to the shaper!
2. Elevate the spindle to its maximum 3" height.
3. If there is movement, adjust the gib against
the elevation housing, using the adjustment
screws at the top (A) and bottom (B, only one
shown) of the elevation housing.
4. Loosen the four 12mm locknuts and remove
the slack between the elevation housing and
spindle cartridge slide by tightening the four
5⁄16" setscrews with a 4mm hex wrench.
Alternate between the upper and lower
adjustments to ensure consistent tightness.
Failure to do so may cause disappointing
results. DO NOT over-tighten the gib. Over-
tightening will restrict spindle movement.
5. Loosen the spindle assembly lock knob and
raise or lower the spindle to check for free
movement.
Since there is an unbalanced weight distribution on the cartridge slide, you may have to perform
a number of adjustments before you find the ideal location. Don’t get discouraged; it may take a
few tries to get it right.
A
B
Summary of Contents for SS-2421-V2
Page 48: ...45 45 TABLE AND FENCE PARTS DIAGRAM...
Page 51: ...48 48 TABLE AND CABINET PARTS DIAGRAM...
Page 53: ...50 50 MOTOR AND ELEVATION PARTS DIAGRAM...
Page 56: ...53 53 SPINDLE PARTS DIAGRAM...
Page 60: ...57 57 Wiring Diagram...
Page 61: ...58 58 NOTES...
Page 62: ...59 59 NOTES...
Page 63: ...60 60 NOTES...


