80
Arranging Embroidery Designs (Layout & Editing)
Adding Text
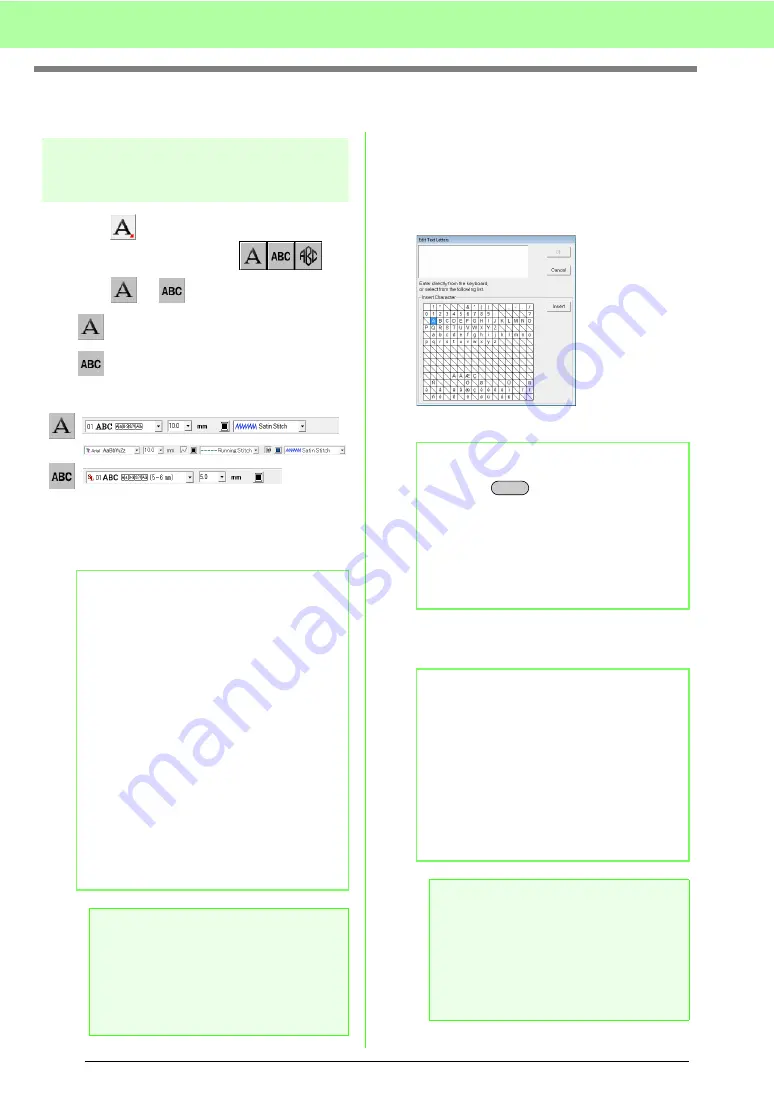
Entering text/Small text
1.
Click
on the Tool Box.
→
Three buttons appear:
.
2.
Click
or .
: Text
: Small text
→
The Sewing Attributes bar appears.
3.
If necessary, change the font, text size, color
and sew type.
4.
Click in the Design Page.
→
The
Edit Text Letters
dialog box
appears, containing a chart with all
characters available with the selected
font.
5.
Type the text.
6.
Click
OK
.
→
The text is displayed in the Design Page.
b
Memo:
• You can change the font, text size, color,
and sew type either before or after creating
the text.
c
“Font” on page 81, “Text Size” on
page 83, “Color” on page 95 and
“Sew type” on page 96.
• You can also use the settings in the
Text
Attribute Setting
dialog box to define other
attributes of the text.
c
“Specifying text attributes” on
page 83.
• You can also use the settings in the
Sewing
Attribute Setting
dialog box to define other
attributes for text.
c
“Specifying sewing attributes” on
page 96.
a
Note:
• If one of the fonts provided with this
application (01 to 35) or custom fonts is
selected, the line sew type cannot be
selected.
• A sew type cannot be selected for small
text.
b
Memo:
• Press the
key to enter a new line of
text.
• You can also enter a character by selecting
it in the character table, then clicking
Insert
,
or simply by double-clicking it. This is
particularly useful if you have to enter
accented characters that are not available
on your keyboard.
b
Memo:
• If you want to edit the entered text, select
it, and then select the menu command
Text – Edit Letters
. Edit the text in the
Edit Text Letters
dialog box that
appears.
c
“Editing entered text” on page 83.
• The Small Text tool is used to create text
patterns where the jump stitches between
the characters do not need to be cut.
a
Note:
• If the entered characters are not available
with the selected font or if the text cannot
be converted to an embroidery pattern, an
error message appears. Click
OK
to close
the message and return to the
Edit Text
Letters
dialog box, where you can correct
the text.
Enter
Summary of Contents for ECS8
Page 1: ......
Page 146: ...144 Arranging Embroidery Designs Layout Editing ...
Page 200: ...198 Managing Embroidery Design Files Design Database ...
Page 218: ...216 Creating Custom Stitch Patterns Programmable Stitch Creator ...
Page 244: ...242 Tips and Techniques ...
Page 264: ...262 Menus Tools ...
Page 266: ...264 Troubleshooting ...
Page 271: ...English ...


