


71
Arranging Embroidery Designs (Layout & Editing)
A
rr
a
ng
in
g Embr
oide
ry
D
e
s
igns
(
L
a
y
out
& E
d
iting)
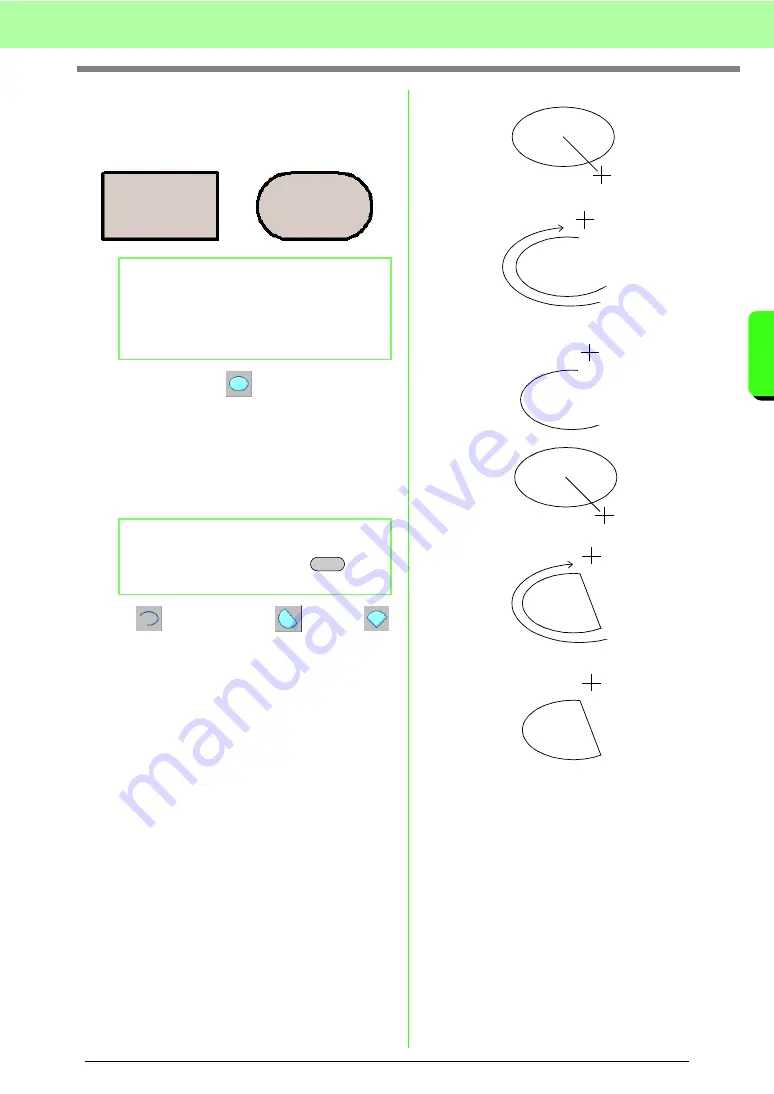
Drag the pointer to draw a rectangle with corners of
the currently specified radius.
■
Circle or Oval
The point where you start dragging is considered a
corner of an imaginary rectangle around the oval.
The point where you release the mouse button is the
diagonally opposite point of the rectangle. The oval
will fit inside this imaginary rectangle (its greater
axis is along the longer edge of the rectangle, and
its smaller axis is along the smaller edge).
■
Arc
, Arc & String
or Fan
1.
Proceed as you would to draw a circle or an
oval.
→
A radial line appears on the oval when the
mouse button is released.
2.
Move the pointer to the start point of the arc,
and then click.
→
The radial line disappears.
3.
Move the pointer until the arc/arc & string/fan
has the desired shape, and then click.
b
Memo:
Even if an object drawn with the Rectangle
tool is selected, the
Edge radius
selector
appears so that the setting for the radius of the
corners can be changed.
b
Memo:
To draw a circle, hold down the
key
while dragging the pointer.
Example 1
Edge radius: 0.0 mm
Example 2
Edge radius: 20.0 mm
Shift
Arc
Click at start point.
Move to end point.
Click at end point.
Click at start point.
Arc & String
Move to end point.
Click at end point.
Summary of Contents for ECS8
Page 1: ......
Page 146: ...144 Arranging Embroidery Designs Layout Editing ...
Page 200: ...198 Managing Embroidery Design Files Design Database ...
Page 218: ...216 Creating Custom Stitch Patterns Programmable Stitch Creator ...
Page 244: ...242 Tips and Techniques ...
Page 264: ...262 Menus Tools ...
Page 266: ...264 Troubleshooting ...
Page 271: ...English ...


