Getting Started 41
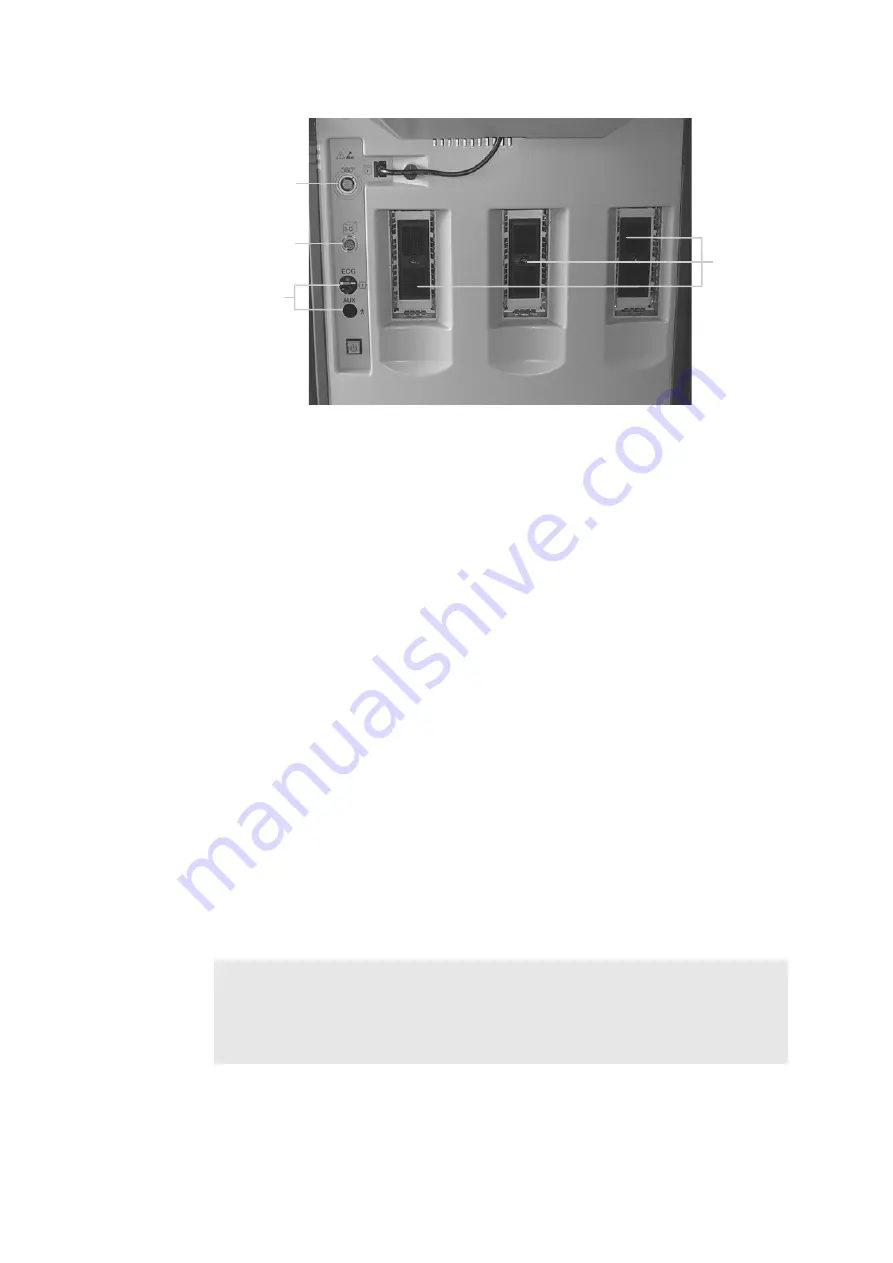
Figure 2-5. The transducer sockets.
To connect a transducer
1
Insert the transducer plug into the socket.
2
Turn the locking lever on the transducer plug clockwise.
To disconnect a transducer:
1
Turn the locking lever on the plug counterclockwise.
2
Remove the plug from the socket.
Transducer Holders
The 4 transducer holders beside the keyboard panel keep the transducers you need
safe and ready for use. Transducer-holder inserts (DZ9756) are available to hold the
smaller transducers in the B-K Medical range. See Appendix C, “Specifications” for
a list of accessories that can be ordered to use with the scanner.
Gel Holders
The two gel holders behind the transducer holders hold gel containers ready for use.
Selecting a Transducer
You can choose to scan with any of the transducers that are connected to the scanner.
The type number of the transducer currently selected is displayed, together with the
scanning frequency, in the Identification area at the top of the screen. See page 67.
Type number
displayed
must match
number on
transducer
socket for
mechanical
transducer
(optional)
sockets for
array
transducers
mover socket
(optional)
ECG
(optional)
WARNING Before you start to scan, make sure that the type number of the transducer
you have selected matches the number displayed on the screen. If they do not match,
the puncture line on the screen may not correspond to the true puncture path in the
tissue. In case of any inconsistency, stop scanning, turn off the scanner, and contact
your local B-K Medical representative.
Summary of Contents for Pro Focus 2202
Page 1: ...English BB1279 A June 2005 Pro Focus 2202 Extended User Guide ...
Page 14: ...14 ...
Page 15: ...Part 1 Basics ...
Page 16: ......
Page 32: ...32 Chapter 1 ...
Page 48: ...48 Chapter 2 ...
Page 49: ...Part 2 Working with the Image ...
Page 50: ......
Page 98: ...98 Chapter 5 ...
Page 117: ...Part 3 Imaging Modes ...
Page 118: ......
Page 136: ...136 Chapter 8 ...
Page 152: ...152 Chapter 10 ...
Page 164: ...164 Chapter 12 ...
Page 165: ...Part 4 Setting up and Maintaining Your System ...
Page 166: ......
Page 200: ...200 Chapter 13 ...
Page 208: ...208 Chapter 14 ...
Page 209: ...Part 5 Pro Packages ...
Page 210: ......
Page 288: ...288 Chapter 19 ...
Page 313: ...Part 6 Appendixes ...
Page 314: ......
Page 344: ...344 Appendix C ...


