AZTEC ROPEVENTURE 4 ASSEMBLY INSTRUCTIONS
Page 1: ...AZTEC ROPEVENTURE 4 ASSEMBLY INSTRUCTIONS...
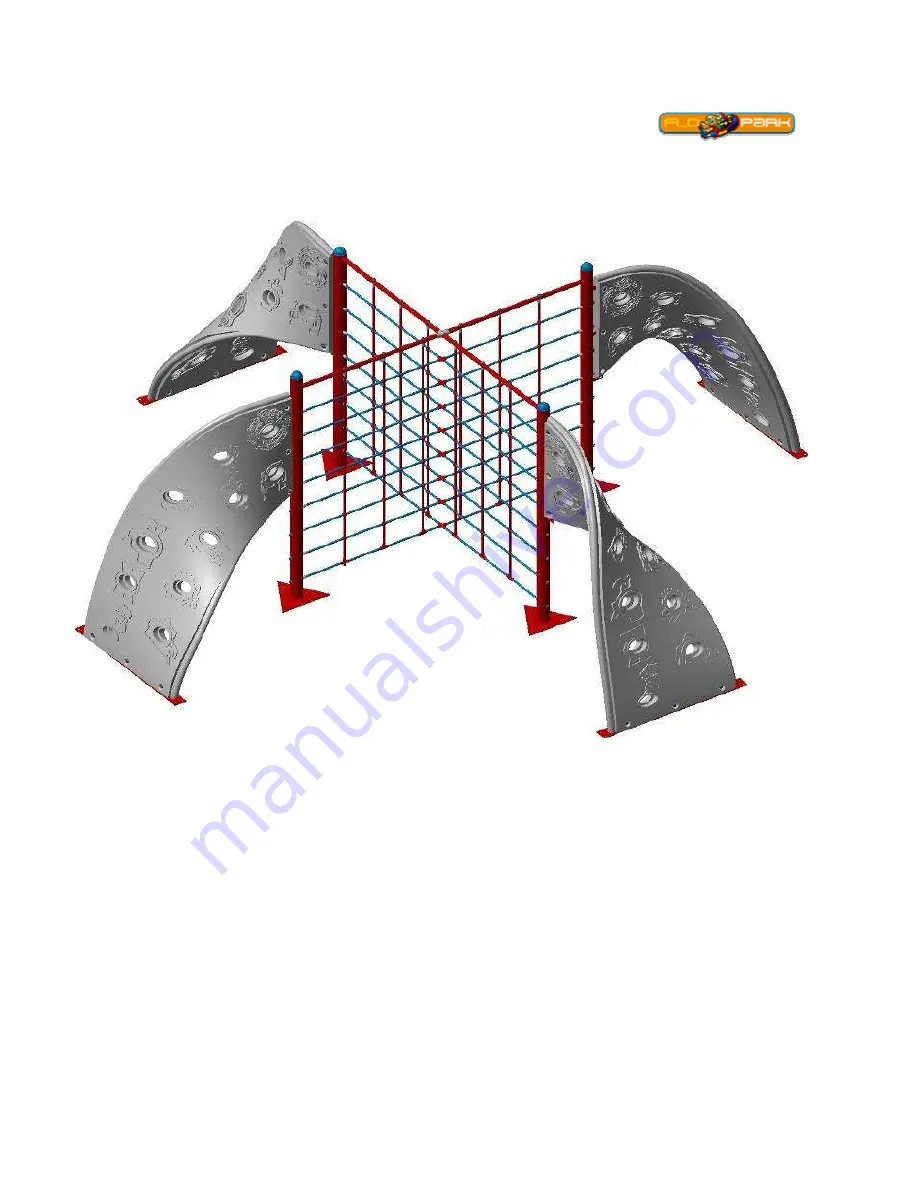
Page 2: ...Rope Connecting Tubes 3 Pieces 1 Long 2 Short and Connecting Piece Climbing Ropes Aztec Plastic Walls 4 Pieces Vertical Connecting Poles 4 Pieces Ground Metals 4 Pieces...
Page 3: ...ec plastic walls to the ground metal During the assembly king figure must be on bottom left Picture 1 Picture 1 King figure Ground Metal King figure Aztec Plastic Wall Ground Metal Bottom Bolt Cover M...
Page 4: ...e middle of the long connecting tubes Then squeeze the socket head cap screw Attach the short tubes on right and left side on the connecting piece then squeeze the socket head cap screw Picture 2 Long...
Page 5: ...Attach the rope connecting poles to the connecting pin on the top of the poles Use M10x60 Bolt M10 Nut and bolt cover for attaching Picture 3 Rope Connecting Tube M10x60 Bolt Bottom Bolt Cover Muhafaz...
Page 6: ...o the poles and rope connecting tubes Fix the bolts is on the edge of the ropes with using M10 Nut and bolt cover Picture 4 Picture 4 Displays connection ropes to the poles Nut Bottom Bolt Cover Displ...
Page 7: ...Picture 5 5 Attach the aztec plastic walls to the auricles on the vertical connecting poles Connect using bolts etc as before Picture 5 Top Bolt Cover M10x60 Bolt Bottom Bolt Cover...
Page 8: ...6 Drill the all holes through the anchor hole on the ground metals Use the anchors provided to secure the structure Picture 6 Picture 6 Anchor Concrete Ground Metal...