Section 8: RAID 1 (Mirroring)
StorPoint NAS 100 User’s Manual
60
Immediately after matching the disks, the StorPoint NAS will start to
make the pairs identical. During this process the SCSI LED is
alternating between green and amber. While creating identical images,
the hard disks can be accessed for both reading and writing.
Adding Disks for RAID 1
To add disks for RAID 1, follow these steps:
1. Start the Web browser.
2. Enter the name or IP address of the StorPoint NAS in the
location/address field.
3. Click
admin
. You will be prompted for User Name and Password. By
default this is set to
root
and
pass
respectively.
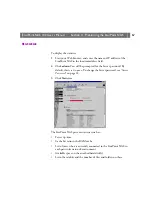
4. Click the Settings button and select the
RAID
tab.
5. Uncheck two or more disks that have not been used for RAID before.
6. Click
Match Disks
.
The StorPoint NAS will now add the unchecked disks for RAID 1.
Note:
❏
Existing RAID 1 pairs are not effected when new disks are added.
Removing a RAID 1 Volume
To break up a pair of mirrored disks, follow these steps:
1. Start the Web browser.
2. Enter the name or IP address of the StorPoint NAS in the
location/address field.
3. Click
admin
. You will be prompted for User Name and Password. By
default this is set to
root
and
pass
respectively.
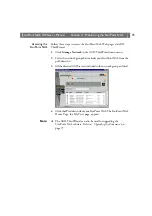
4. On the
This StorPoint
page, click on the disk icon that corresponds
to the volume you want to remove.
5. Click
Un-RAID
.

