SmartEdge Industrial IoT Gateway
User Guide
http://www.element14.com/gateway
Page 23
3.5.
IMAGE UPDATE
The onboard eMMC storage device can be mounted as a drive on another PC. This will allow re-imaging the Gateway.
REQUIREMENTS
Linux or Windows PC
USB Type A plug to microUSB plug data cable (charger cables without data signals will not work)
Special build of rpiboot utility
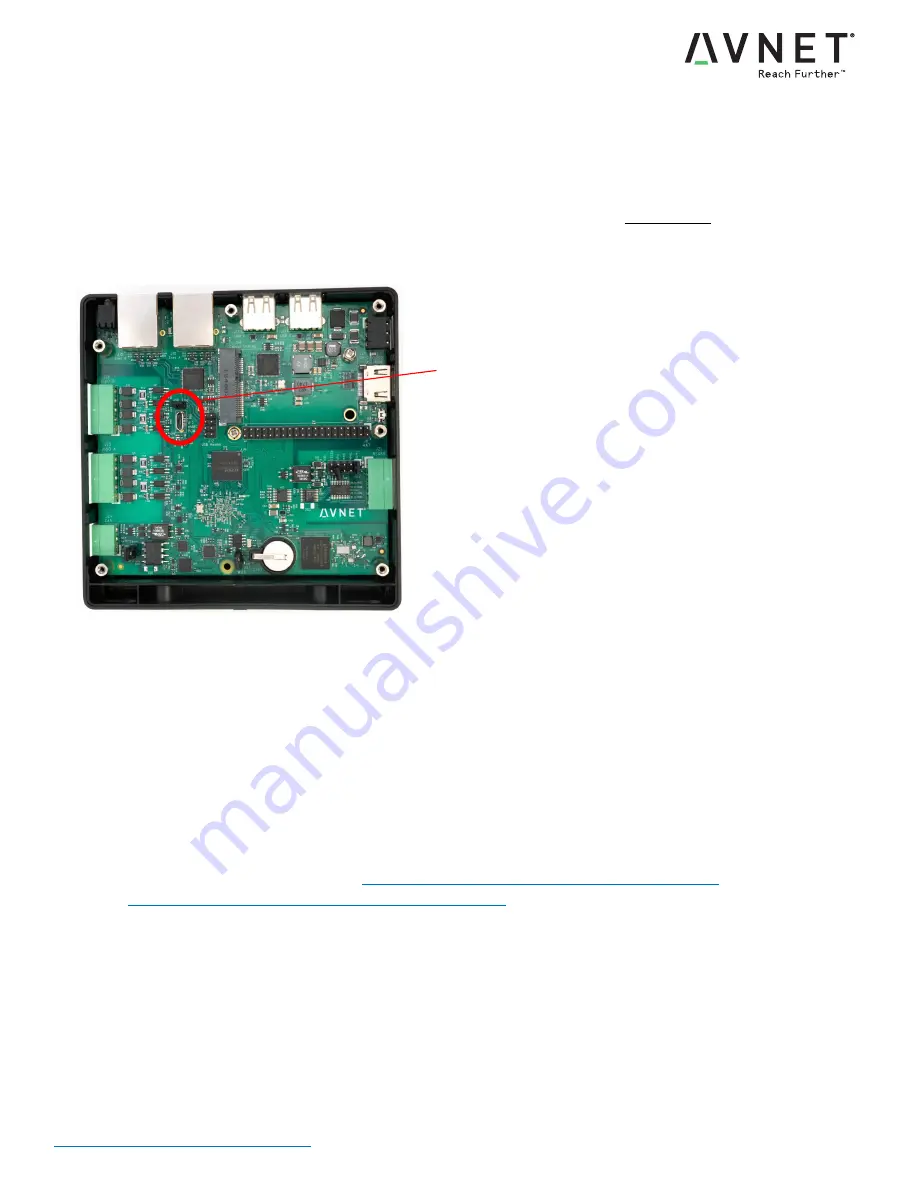
Location of eMMC update connection & jumper
EMMC MOUNTING STEPS
With Gateway power removed, open lid on Gateway by removing the four (4) screws
Ensure jumper is installed on J16 header
Connect USB cable between the microUSB port on the Gateway and Type A port on the PC
On Linux PC (recommended), install a special version of rpiboot to enable mass storage mode on the Gateway:
sudo apt install git libusb-1.0-0-dev
git clone https://github.com/Avnet/smartedge-iiot-gateway-custom.git
cd smartedge-iiot-gateway-custom/rpiboot
make
sudo ./rpiboot_secure.sh
On Windows PC, install a special version of rpiboot to enable mass storage mode on the Gateway:
Download Windows installer here:
https://github.com/Avnet/smartedge-iiot-gateway-
custom/raw/master/rpiboot/win32/rpiboot_setup.exe
Run the rpiboot_setup.exe, note that you may have to click through a few Windows warnings.
The installer adds USB drivers for the Gateway, along with the rpiboot.exe executable.
Once installation is complete, run the rpiboot.exe
After all above is complete, connect power to the Gateway, then rpiboot output should show:
Waiting for BCM2835/6/7
Sending bootcode.bin
Successful read 4 bytes
Waiting for BCM2835/6/7
Second stage boot server
eMMC Update
jumper and
connector location


