


Hardware Installation
18
BlueFRITZ!AP-X – 2 Hardware Installation
2 Hardware Installation
This chapter describes the hardware installation. This in-
volves connecting BlueFRITZ!AP-X to the ISDN line and the
power supply, connecting analog terminal equipment to the
PBX extensions, and connecting BlueFRITZ! AP-X to the com-
puter.
2.1 Preparations for Installation
BlueFRITZ!AP-X can be installed on any suitable horizontal or
vertical surface. The unit should be installed in a dry, dust-
free location out of direct sunlight. If you would like to con-
nect the PBX to your computer using cable, remember to ac-
count for the lengths of the supplied cables. Position the de-
vice in the vicinity of the computer. If you want to mount
BlueFRITZ!AP-X on the wall, you many use the drilling tem-
plate on the last page of this manual.
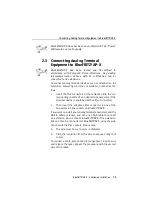
2.2 Connection to the ISDN Line and the
Power Supply
Proceed as follows to connect the necessary cables:
1.
Position your BlueFRITZ!AP-X so that the sockets on the
back panel are facing you.
2.
To connect BlueFRITZ!AP-X to the ISDN line, take the
ISDN cable from the package. Plug one end into the jack
labeled “ISDN” at the right end of the BlueFRITZ!AP-X
connector panel. Plug the other end into your ISDN jack.
3.
To connect BlueFRITZ!AP-X to the power supply, take the
AC power adapter from the package. Insert its RJ45 con-
nector in the jack labeled “Power” on the BlueFRITZ!AP-
X connector panel. Plug the other end into an AC power
outlet. The green “Power” LED lights up, signaling that
the “BlueFRITZ!AP-X” PBX is operational.
Summary of Contents for Bluefritz! AP-X
Page 1: ......