Installation Guide
Avigilon™ High Definition H.264 IP Micro Dome Camera Models:
1.0-H3M-DC1, 1.0-H3M-DC1-BL, 2.0-H3M-DC1 and 2.0-H3M-DC1-BL
Page 1: ...Installation Guide Avigilon High Definition H 264 IP Micro Dome Camera Models 1 0 H3M DC1 1 0 H3M DC1 BL 2 0 H3M DC1 and 2 0 H3M DC1 BL...
Page 2: ...k Environment 0 per IEC TR62101 The camera is to be connected only to PoE network that complies with IEEE 802 3af without routing to the outside plant CAUTION Failure to observe the following instruct...
Page 3: ...ation could void the user s authority to operate this equipment Disposal and Recycling Information When this product has reached the end of its useful life please dispose of it according to your local...
Page 4: ...ithout notice Avigilon reserves the right to make changes without notice in the specifications and materials contained herein and shall not be responsible for any damages including consequential cause...
Page 5: ...ing PoE 8 Mounting the Micro Dome Camera 9 Assigning an IP Address 10 Accessing the Live Video Stream 10 Aiming the HD Micro Dome Camera 11 Installing the Dome Cover 11 For More Information 12 LED Ind...
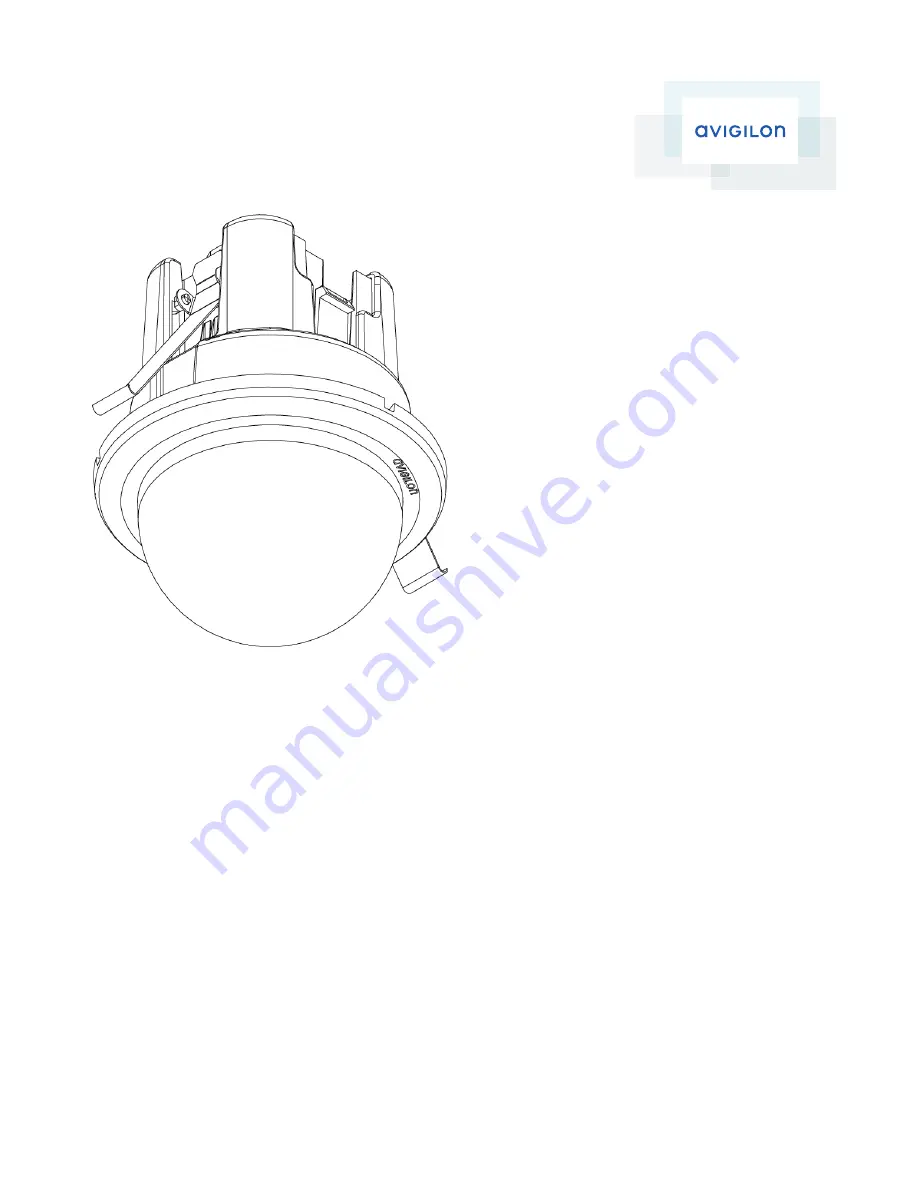
Page 6: ...Shroud View 1 Dome Shield Hides the camera s field of view from observers 2 Shield Locking Tab Locks the dome shield into place 3 Cover Release Tab Allows you to release and remove the dome cover 1 O...
Page 7: ...View 1 Locking Sheet Springs Locks the in ceiling camera into place 2 Lock Release Snaps Releases the in ceiling lock 3 Gimbal Allows you to move and aim the camera after it has been installed Side Vi...
Page 8: ...ont View 1 Vertical Marker Provides a vertical reference point for the video image Points up 2 Horizon Markers Provides a reference point for aligning the video image with the horizon line 3 Front Vie...
Page 9: ...vides information about device operation For more information see LED Indicators on page 13 3 Ethernet Port Accepts power and Ethernet connection to the network The camera can only be powered by Power...
Page 10: ...bber boot l Hole template sticker Installation Steps Complete the following steps to install the device Preparing for the Installation 6 Connecting PoE 8 Mounting the Micro Dome Camera 9 Assigning an...
Page 11: ...for cutting a hole in the mounting surface NOTE The camera supports a mounting surface that is between 1 mm 0 04 to 25 4 mm 1 thick 2 Pull the required Ethernet cables through the mounting hole 3 Remo...
Page 12: ...4 Squeeze the lock release snaps together and pull the dome camera up The locking sheet springs are released 7 Preparing for the Installation...
Page 13: ...d Ethernet cable to the camera 2 To protect the cable from dust and moisture slide the cable through the supplied rubber boot 3 Crimp the end of the cable with an Ethernet connector 4 Connect the crim...
Page 14: ...able assembly 7 Tuck the cable assembly into the mounting hole Make sure the cable assembly is not dangling by the cable Mounting the Micro Dome Camera 1 Hold the locking sheet springs together and in...
Page 15: ...IP address is set using Zeroconf the IP address is in the 169 254 0 0 16 subnet The IP address settings can be changed using one of the following methods l Avigilon Camera Installation Tool software...
Page 16: ...the dome shield a Insert one side of the dome shield into one of the shield locking tabs b Press the opposite side of the dome shield against the shield locking tab then push down until you hear the...
Page 17: ...ble in the following guides l Avigilon Camera Installation Tool User Guide l Avigilon Control Center Client User Guide l Avigilon High Definition H 264 Web Interface User Guide The manuals are availab...
Page 18: ...Connection Status LED Description Obtaining IP Address One short flash every second Attempting to obtain an IP address Discoverable Two short flashes every second Obtained an IP address but is not co...
Page 19: ...base The dome cover can only move in one direction 2 To uninstall the camera remove the dome shield then squeeze the lock release snaps together and pull the dome camera from the mounting surface For...
Page 20: ...ure The firmware revert button on the cable assembly 1 Disconnect power from the device 2 Using a straightened paperclip or similar tool gently press and hold the firmware revert button 3 While contin...
Page 21: ...ence 2 Open a Command Prompt window and enter the following commands a arp s New Camera IP Address Camera MAC Address For example arp s 192 168 1 10 00 18 85 12 45 78 b ping l 123 t New Camera IP Addr...
Page 22: ...multicast RTP RTSP TCP RTP RTSP HTTP TCP RTP RTSP HTTPS TCP HTTP Mechanical Dimensions xH 90 00 mm x 107 54 mm 3 58 x 4 23 Distance from mounting surface to rear of housing 61 28 mm 2 41 Weight 150 g...
Page 23: ...Emissions FCC Part 15 Subpart B Class B EN 55022 Class B IC ICES 003 Class B Electromagnetic Immunity EN 55024 Class B EN 61000 4 2 EN 61000 4 3 EN 61000 4 4 EN 61000 4 5 EN 61000 4 6 EN 61000 4 11 Sp...
Page 24: ...gents or employees shall create another warranty or modify this warranty This warranty states Avigilon s entire liability and your exclusive remedy against Avigilon for any failure of this product to...