Chapter 22: Events
201
Using the Templates
To add any of the Events listed in the table, do the following
(using the first template, Talkback (Toggle) as an example):
To use the templates:
1
Create a new event.
2
Edit the event name (for example, “Talkback (Toggle)” as
shown in the table). For renaming instructions, see “Renam-
ing an Event” on page 194.
3
Click the (Trigger)
Add
pop-up menu and choose
Footswitch
> Switch 1 (
Footswitch 1). The Switch 1 trigger type is added,
with a default
State
setting of
Closed
.
4
Click the (Action)
Add
pop-up menu and choose
Talkback
.
The Talkback action is added. By default, the action
State
is
Toggle
, and the behavior is
Latched
. There is no
Wait
(delay be-
fore firing) needed for this action.
Switch 1 (Footswitch 1) is now configured to toggle Talkback
On or Off each time the footswitch is pressed.
If you prefer momentary talkback, edit the event by doing the
following.
1
Double-click the
Talkback
action in the
Actions
list to access
its editable properties. Or, right-click the action and choose
Edit
.
2
Click the action
State
pop-up menu (it displays
Toggle
by de-
fault, or the current
State
setting) and select
On
.
3
Click the action
Behavior
pop-up menu and select
While Ac-
tive.
Together with the
State
setting (On),
While Active
estab-
lishes momentary control of the action; in this example,
Footswitch 1 is now assigned to provide momentary Talkback
control.
4
To quickly test the switch trigger, click the
Test
button, or
press the Footswitch. Adjust the trigger State for your foot-
switch, as necessary, for its open/closed orientation. (For in-
structions, see “Editing Trigger Type and Properties” on
page 196.)
5
After testing the trigger, click
Reset
to return the event to its
Ready state.
Tap Tempo for Plug-ins
Tap Tempo lets you quickly establish a system tempo to use as
a beat clock for delay and echo plug-ins that support Tempo
Sync.
The system tempo defaults to 120 BPM (beats per minute).
You can set a custom tempo in a number of ways including by
tapping a Function switch, Footswitch or other control as ex-
plained below. The system tempo is stored as a console setting
within the Show file.
Snapshots can also store and recall tempo.
Using Tap Tempo
Do the following three steps to start using Tap Tempo:
Enable the System Tempo
1
Go to the
Options > Misc
page, locate the
Tap Tempo
section
and do the following:
• Turn on the global tempo sync by clicking the
On
switch
directly below the encoder so that it is lit (on).
• If desired, use the encoder to set a system tempo value, or
type a value directly into the
Tempo
field.
• If desired, click the
Units
selector to choose
Beats Per Min-
ute (BPM)
or
Milliseconds
as the units for displayed values.
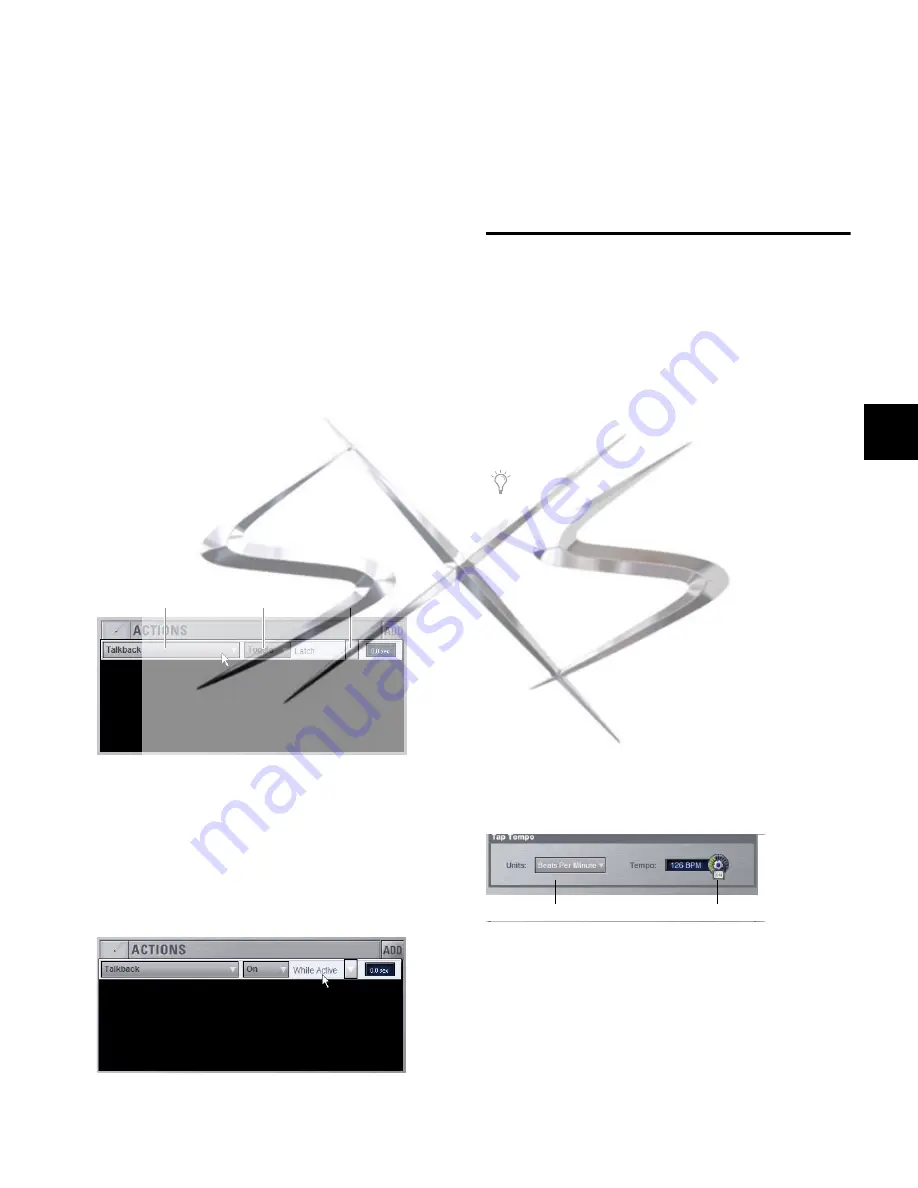
An action and its properties ready to be edited.
Talkback State and Behavior after editing
Action Type
Behavior
State
A preconfigured Event for tap tempo is installed in the
Demo Shows folder when you install VENUE D-Show soft-
ware. To use the example Event, go to the Filing page and
click the Load tab, then select the file Tap Tempo Examples
and click the Load button.
Tap Tempo settings
On/Off
Units
courtesy of
www.sxsevents.co.uk
Phone: 0870 080 2342
Event production and Audio-Visual Services
www.sxsevents.co.uk


