40
[Note]
Quick Set up for Presenter Mode
1.
Use IR remote to adjust the camera view properly then save to preset1 as the initial position.
2.
Press tracking “On” button on IR remote, here you go!
3.
Press “UPPER BODY” key to get closer view (up to 60% body), or FULL BODY to see entire
presenter in the view.
4.
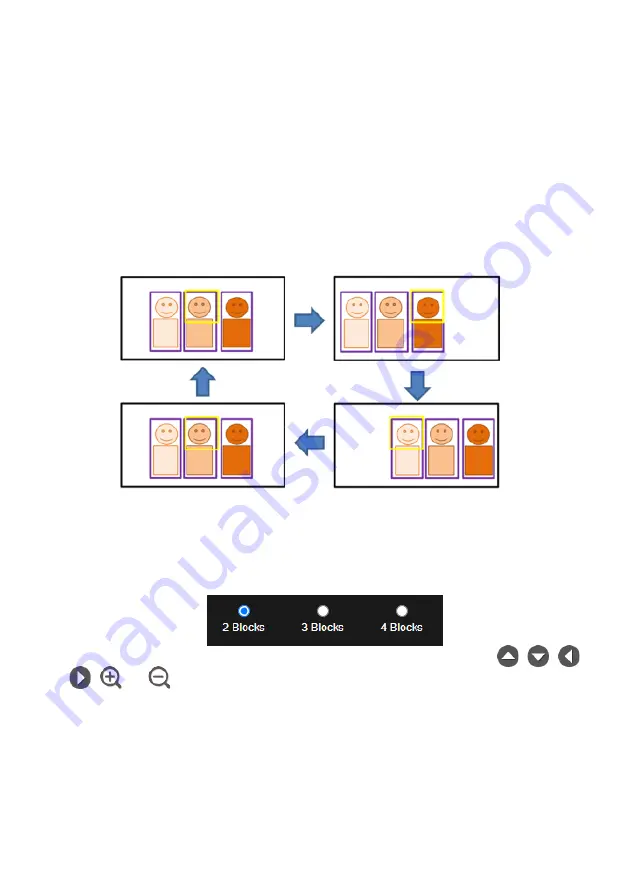
Press “Switch” key to switch between presenters. Initially the camera tracks the one who is in
the center of view. Every switch follows the sequence: left to right, then back to far left one in the
camera view (see picture below). To see which presenter is being tracked, press numeric key ”7”
for seven times to call/cancel engineering mode while tracking, you will see purple boxes shown
on all human-outline objects, and who under yellow box is being tracked.
Zone Mode
Set up the block area for the camera to detect object and follow the object when the object is in block
area that user has set.
1.
Select the
Blocks
(2, 3, or 4). Each block is corresponding to one preset position. The maximum
is 4 blocks (4 preset positions).
2.
Select the block and set the preset positions in order (preset 6 to preset 9). Use
,
,
,
,
and
to move the camera to wanted position and select “
Save
” to save the preset
position. And, a snapshot of the preset image will show at corresponding image display box.
Repeat the step to set another preset position.
Summary of Contents for TR313V2
Page 1: ...AI Auto Tracking PTZ Camera TR311V2 TR313V2 User Manual ...
Page 8: ...Specification 50 TR311V2 50 TR313V2 54 ...
Page 11: ...3 Pan and Tilt Angle Dimension 191 9mm 180 0mm 161 3mm 145 1mm ...
Page 16: ...8 Din8 to D Sub9 Cable Pin Definition 6 7 8 3 4 5 1 2 1 5 6 9 ...
Page 50: ...42 ...
Page 66: ...V1 ...


