54
System
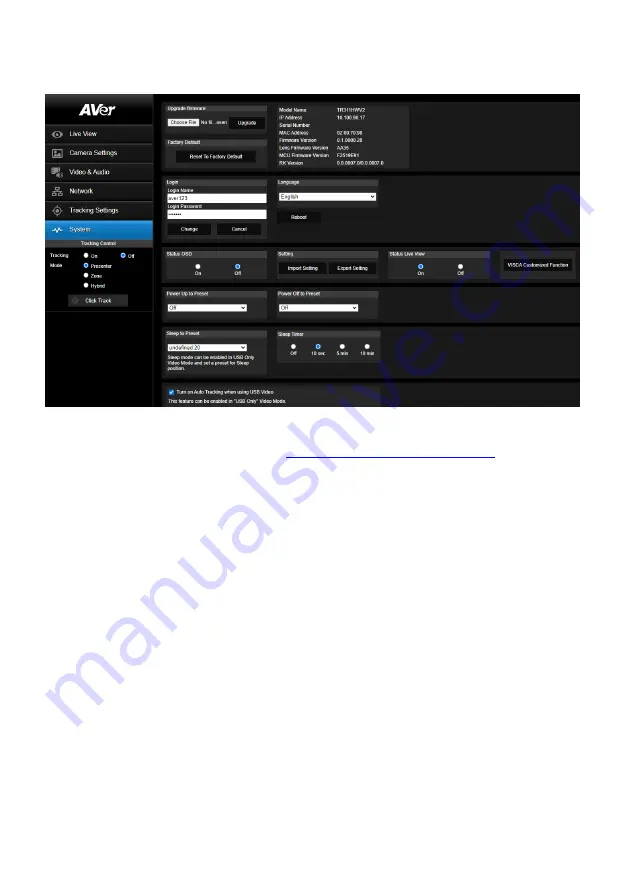
You can view the system information, or configure some system settings on this page.
Upgrade firmware:
Follow below steps to upgrade the firmware.
1.
Download the newest firmware from
https://www.aver.com/download-center/
2.
On the Web page, go to
System
>
Upgrade firmware
.
3.
Click
Choose File
to select the firmware.
4.
Click
Upgrade
to start upgrading the firmware.
5.
Refresh the browser after the upgrade process is complete.
Factory Default:
Clear all values and reset the camera back to factory default values.
Camera Information:
Displays the camera information.
Login
: The default login ID and password are
admin
/
admin
. To change the login ID and password,
input the new login ID and password and then click
Change
.
Language:
Change the Web UI language.
Status OSD:
Enable/disable to display the status info on the live view. When operating the Preset
(Save Preset, Call Preset, Cancel Preset), Zoom or Tracking functions, the status will be displayed
on the live screen.
Setting:
Click
Import Setting
to import camera configurations. Click
Export Setting
to export
camera configurations.
Status Live View:
Select
On
to display live view. Select
Off
to close live view.
VISCA Customized Function:
Configure the settings and then click
OK
.
Power Up to Preset:
If this function is enabled, after camera power-up, the camera will move to
the input preset position. To set up this function, input a preset position and then click
Save
.
Ensure the preset positions have been pre-configured before enabling this function.
Summary of Contents for PTC310HWV2
Page 10: ...3 Pan and Tilt Angle ...
Page 12: ...5 Ceiling Mount 153mm 180mm 161 3mm 200 8mm 80mm 104mm 35mm 112mm ...
Page 13: ...6 180mm 206mm 161 3mm 263 2mm Wall Mount 35 8mm 259 7mm ...
Page 18: ...11 Din8 to D Sub9 Cable Pin Definition 6 7 8 3 4 5 1 2 1 5 6 9 ...
Page 65: ...58 Visca over IP Settings ...


