


63
4.5
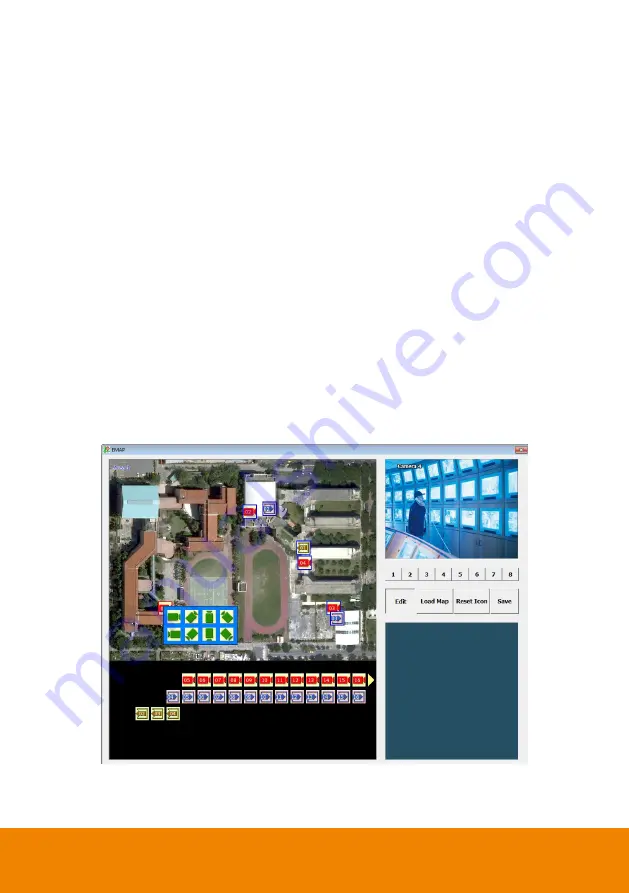
Setting Up and Using the Emap
EMAP can hold up to 8 maps in *.bmp/*.jpg format. You may locate the camera, sensor and relay
on the map.
4.5.1
To Set Up the Emap
1. Click
Emap
.
2. When the Emap screen appears, click the area number (1 to 8 buttons) on where you want to
insert the map.
3. Click
Load Map
to insert the map. When the open dialog box appears, locate and select the
map and click
Open
.
4. When the inserted map appears on the Emap screen, click
Edit
. You may now drag the
camera, sensor, and relay icons to its place on the map. Icons on the map can be relocated
anywhere.
5. To set the camera direction, right click camera icon can select the camera direction in 8
angles.
6. If you are going to locate the icon on the map to other area, you need to drag the icon to the
black pane at the bottom of the Emap screen and then switch to the area on where you want to
locate the icon. To bring all the icons back to the black pane at the bottom of the Emap screen,
click
Reset Icon
.
7. When you are done, click
Save
button to save the new setting. To close Emap screen, click
X
.
Summary of Contents for IWH5000 Series
Page 1: ...IWH5000 series IWH5416 16 IWH5416 Touch II User s Manual v 1 1 0 0 ...
Page 54: ...46 9 User can select the Date Camera and Cycle to view the report of object counts In Out ...
Page 65: ...57 3 Select and click one in the bookmark list to preview the file ...
Page 238: ...230 7 Select Add Zone Domians Service to register the domain name ...


