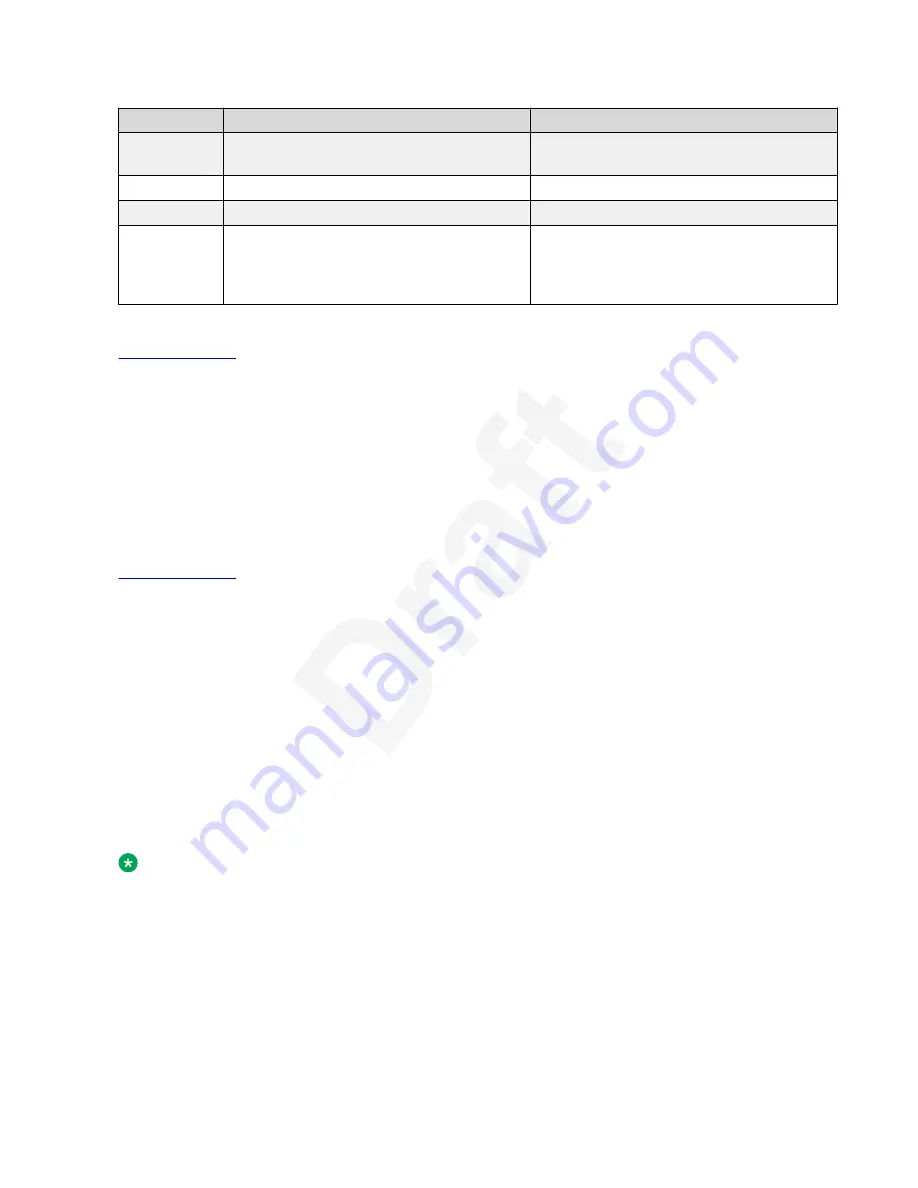
No.
Name
Description
6
WLAN Module Panel
To integrate the wireless module for Wi-Fi/
Bluetooth support.
7
Type-C USB port
To connect to external devices.
8
Type-A USB port
To connect to external devices.
9
PoE Slide Switch
To set the PoE value to one of the following:
• L: Class 2
• H: Class 3
Related links
1
on page 14
2
Secondary display
3
The secondary display of the phone provides additional call appearances and feature or
4
application display.
5
It has six lines of four-page display that provides 24 additional lines for incoming calls, outgoing
6
calls, auto-dialing, and calling features. It displays the dedicated view for keys 25-48. You can
7
switch between the pages using the left and right keys.
8
Related links
9
on page 14
10
Optional components
11
You can use the following components for your phone. These components are not a part of your
12
phone package and needs to be ordered separately. You might need the assistance from your
13
system administrator to install few of these items:
14
• PSAC12R–050 – 5V DC Power adapter.
15
• Avaya J100 Expansion Module.
16
• PoE power supply.
17
• Avaya J100 Wireless Module (Wi-Fi Module).
18
• USB devices such as USB Flash drive and keyboard.
19
• Handset adapter.
20
Note:
Avaya does not supply USB devices.
21
Avaya does not supply the handset adapter.
22
Avaya J100 Expansion Modules and USB power supply
23
Avaya J189 IP Phone supports up to two Avaya J100 Expansion Modules and USB charging. The
24
following power limitations apply when you connect one or two Avaya J100 Expansion Module to
25
the phone:
26
Avaya J189 phone overview
October 2022
Using Avaya J189 SIP IP Phone in Avaya Aura
®
20
Avaya - Proprietary. Use pursuant to the terms of your signed agreement or Avaya policy.
DRAFT—October 5, 2022—8:17 AM (UTC+00:00)


