


4. Do one of the following:
• Click
Save
to save the changes.
• Click
Reset to default
to clear all the softkey values and revert to the default values.
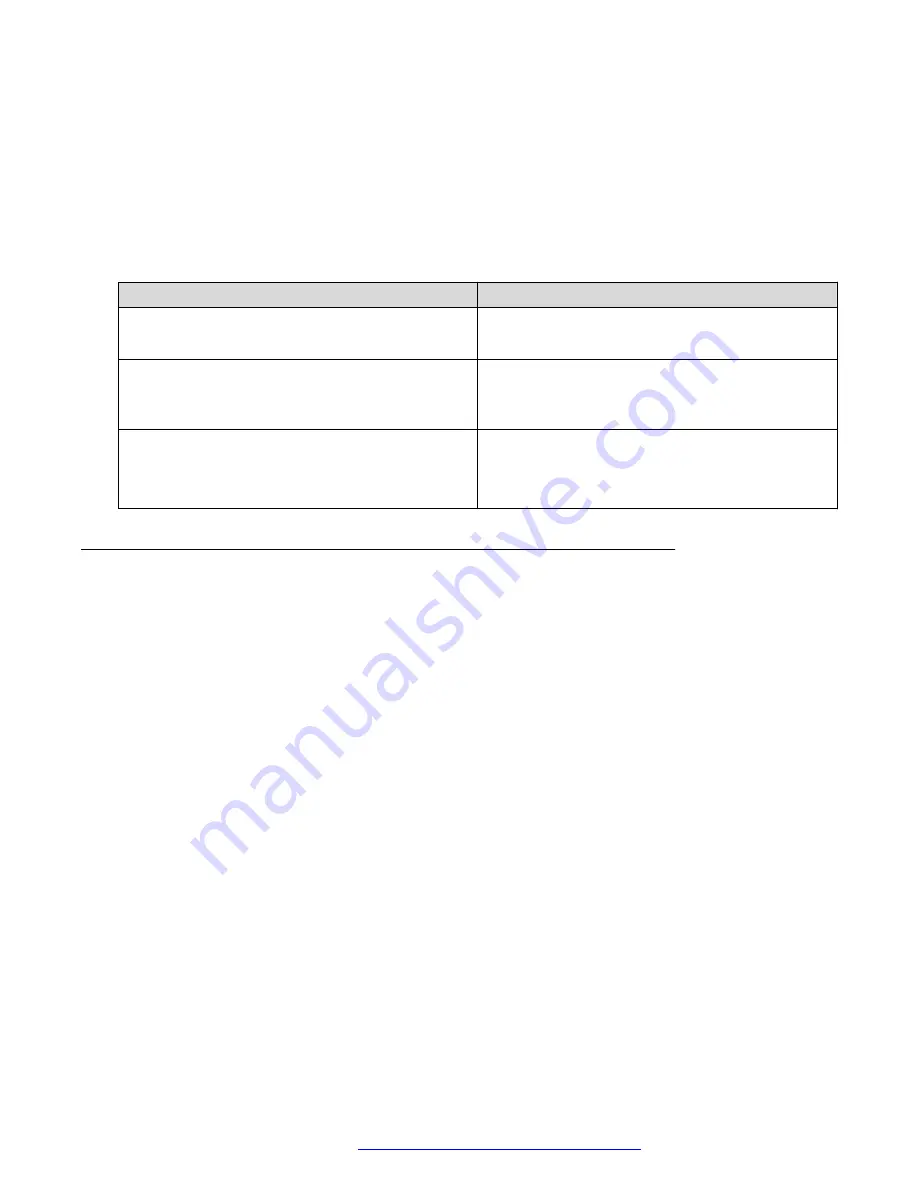
Softkey configuration fields
On the Active Call Softkey Configuration section, the following fields are available for configuring
softkeys on the phone.
Name
Description
Type
Specifies the key type of softkey configuration.
The value is DTMF.
Action
Specifies the dialing sequence.
The allowed values are 0–9,#,* you can enter up to
maximum of 32 characters.
Label
The value you enter here is the softkey label. You
can enter up to 13 characters only for Avaya J189
IP Phone for all other modules you can enter up to
8 characters.
Configuring Shared Lines
About this task
Use this procedure to configure Shared Lines and chose between Shared Call Appearance (SCA)
and Bridged Lines Appearance (BLA) modes.
Procedure
1. Log in to the web interface as an administrator.
2. In the navigation pane, click
Shared Line Configuration
.
3. In the Shared Line Configuration tab, configure the following fields:
•
Shared Line Mode
•
Primary Line Type
•
Shared line settings in user menu
•
Show “Call for” for Primary
•
SCA Line Seize Duration
4. In the Primary Shared Line tab and all additional Shared Line tabs, configure the following
fields:
•
Status
•
SIP User ID
Configuring the phone using the web interface
April 2020
Installing and Administering Avaya J100 series IP Phones in an Open SIP
environment
173