


3
Verify the installation. Confirm that the program has been correctly
installed. See
Verify a Group Policy Deployment
(page 57).
Use Group Policies to Assign a Deployment to Com-
puters
Perform the following procedures from a Windows XP computer or a Windows
2000 or 2003 server that has Group Policy Management Console installed,
and has access to the Active Directory server.
NOTE
For more information, go to
Microsoft TechNet
and search for "Group Policy
Management Console".
To assign a deployment to a computer
1
Start the Group Policy Management Console (gpmc.msc).
2
Right-click the organizational unit where you want to create the group
policy object (GPO). Then select Create and Link a GPO Here and name
the Group Policy.
3
Edit the policy.
4
In the Group Policy Object Editor dialog box, under Software Settings,
right-click Software Installation, and click New
➤
Package.
5
In the Open dialog box, navigate to the administrative image created by
the deployment process. Navigate to AdminImage\<processor
type>\<product name folder>. The processor type is either x86 or x64,
depending on the processor type for which you created your deployment.
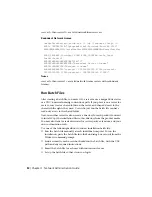
Examples
For x86 deployments:
\\server123\Deployment\AdminImage\x86\acad
For x64 deployments:
\\server123\Deployment\AdminImage\x64\acad
6
Select the Windows Installer Packages file called acad-<deployment
name>.msi. Click Open.
If the deployment was called “Design 2013 32 bit,” then the deployment’s
MSI file would be acad-Design 2013 32 bit.msi.
54 | Chapter 3 Network Administration Guide
Summary of Contents for AutoCAD Design Suite 2013
Page 1: ...AutoCAD Design Suite 2013 Installation Guide ...
Page 6: ...vi ...
Page 44: ...38 ...
Page 76: ...70 ...