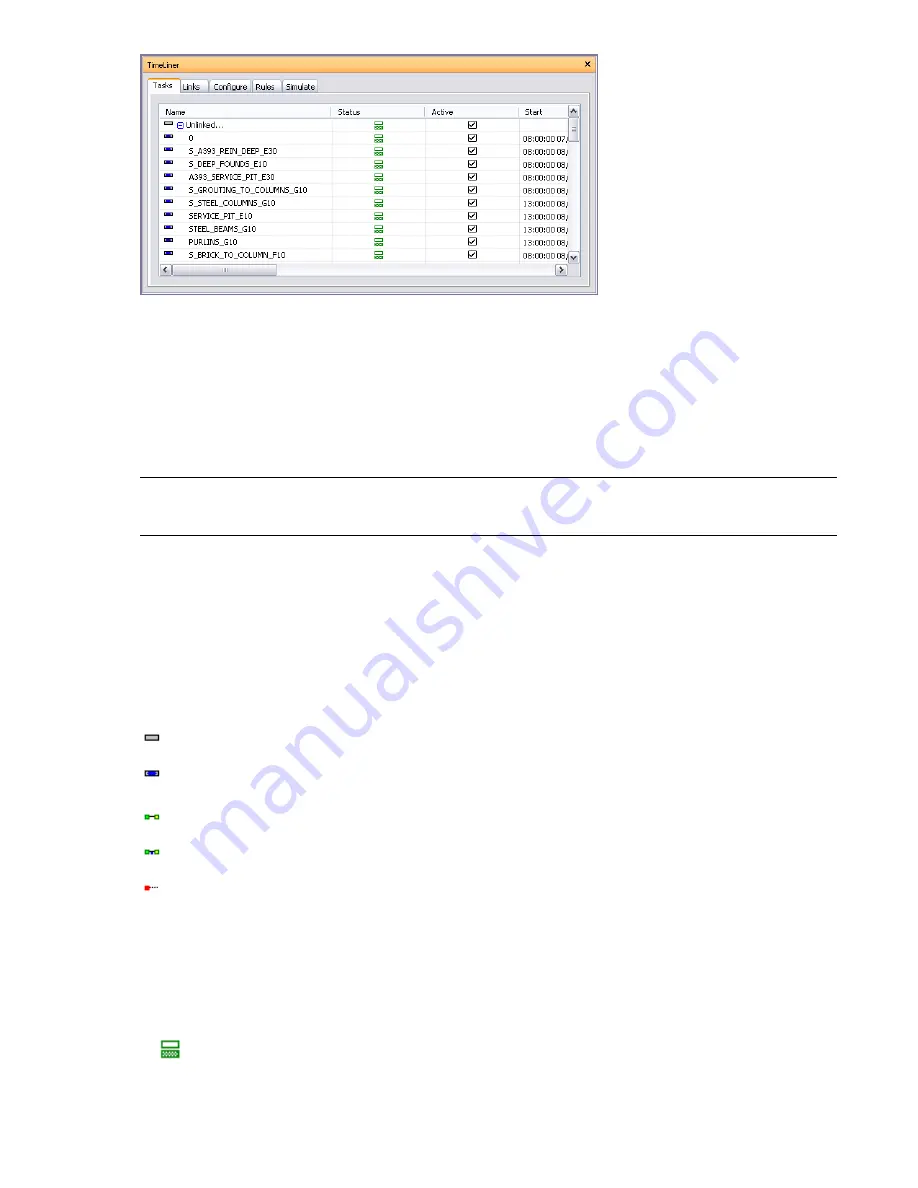
The Task View
The tasks are shown in a multi-column table, which provides some flexibility in how records are displayed. You
can:
■
Move or resize columns
■
Sort column data in ascending or descending order
■
Add new user columns to the default column set
TIP
It is possible to move between entries in a manually editable task using the keyboard. Simply select a task that has
been set to be manually editable, and use
Tab
and
Shift-Tab
keyboard keys to move forwards and backwards between
fields. The keyboard can then be used to edit and set each entry where necessary.
The Task Hierarchy
Autodesk Navisworks TimeLiner supports a hierarchical task structure, as brought through from a link to your
scheduling software, for example Microsoft Project
™
see “
” on page 339 for more information). The
hierarchy can be expanded or contracted by clicking on the plus or minus sign, respectively, to the left of the
task.
The Task Icons
An icon is displayed to the left of each task name. These identify the current status of the task, with relation to
attached items and links to external schedules:
Task with no attached items.
Task with attached items.
Task with link synchronized to external schedule.
Task with link synchronized to external schedule, including Task Type.
Task with link to external schedule that is either broken or old (unsynchronized).
The Status Icons
Each task has its own Status identified by an icon, representing planned against actual relationships. Each icon
shows two bars. The top bar represents the Planned dates, and the bottom bar represents the Actual dates. If the
Actual start and finish dates are the same as the Planned start and finish dates, the bars are displayed in green.
Any variations between Planned and Actual dates are displayed in red. Missing Planned or Actual dates are shown
in grey.
Actual start and end dates equal Planned start and end dates.
TimeLiner Window | 337
Summary of Contents for 507B1-90A211-1301 - NavisWorks Manage 2010
Page 1: ...Autodesk Navisworks Manage 2010 User Guide March 2009 ...
Page 12: ...xii Contents ...
Page 14: ...2 Part 1 Welcome to Autodesk Navisworks Manage 2010 ...
Page 64: ...52 Chapter 3 Installation ...
Page 97: ...Get a Whole Project View 85 ...
Page 98: ...86 Part 2 Get a Whole Project View ...
Page 136: ...124 Chapter 5 Work with Files ...
Page 178: ...To toggle ViewCube Click View Head Up Display ViewCube 166 Chapter 6 Explore Your Model ...
Page 262: ...250 Chapter 9 Use Viewpoints and Sectioning Modes ...
Page 270: ...258 Chapter 11 Work Within a Team ...
Page 282: ...270 Chapter 12 Share Data ...
Page 346: ...334 Chapter 14 Create Photorealistic Visualizations ...
Page 460: ...448 Chapter 17 Autodesk Navisworks Reference ...
Page 466: ...454 Glossary ...


