■
'<property>'. Choose from the available list, which property you wish to define. Again, only the properties
in the scene within the chosen category will be available.
5
Click OK.
The Presenter Rules Example
To follow this procedure, open the file called
gatehouse_pub.nwd
located under the
Examples\Gatehouse
folder
in the Autodesk Navisworks installation directory.
Let's assume, you want to apply window glass material to all gatehouse items with material property of AutoCAD
Color Index 9, and red brick material to all gatehouse items with material property of AutoCAD Color Index 32.
The following procedure describes the necessary steps to achieve this, using the Presenter rules.
To apply materials with the custom Presenter rules
1
Open the Presenter window, and click the Rules tab.
2
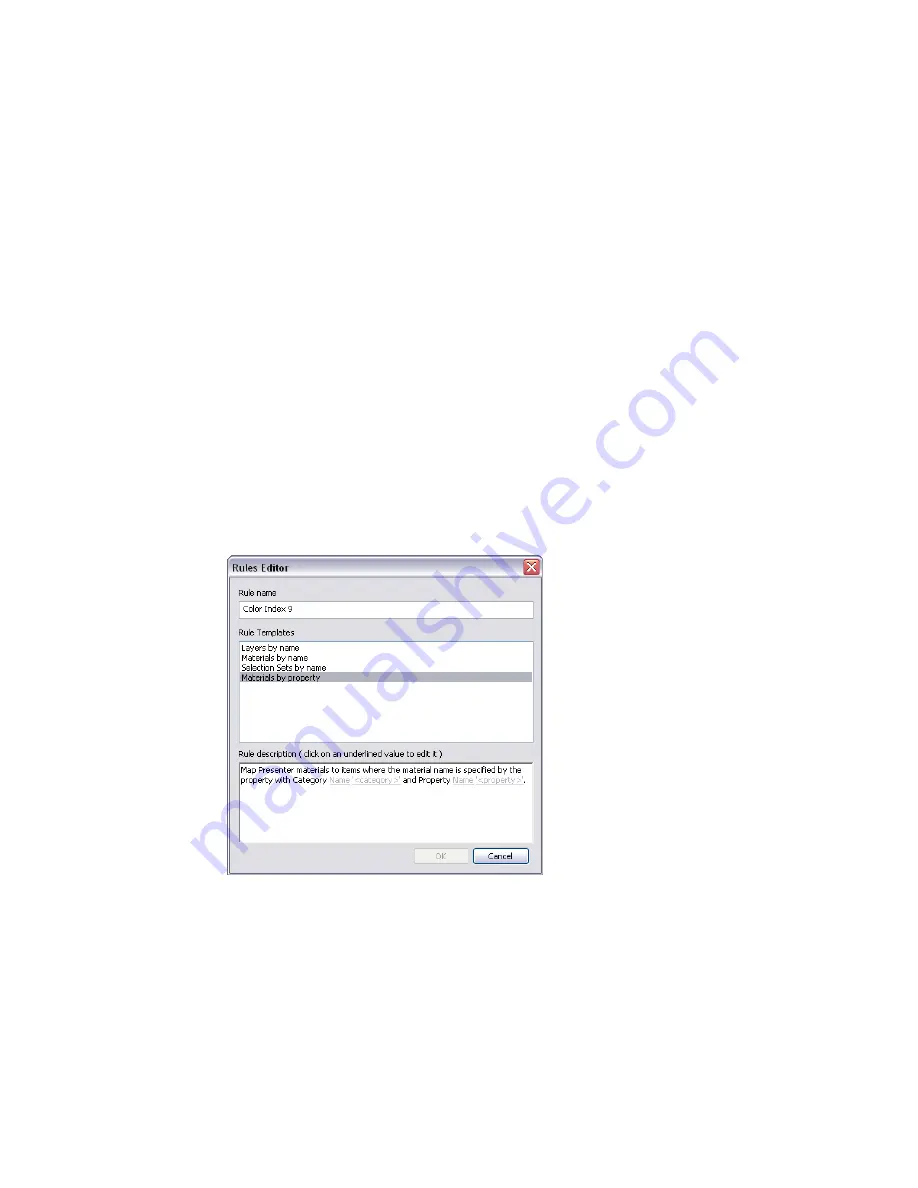
Create a rule called 'Color Index 9', based on the materials by property template:
a
From the Rules tab of the Presenter window, click the New button.
b
Enter a name for the rule, Color Index 9.
c
Choose the Materials by property template.
d
Click on '<category>' and choose Material from the drop-down list.
e
Click on '<property>' and choose Name from the drop-down list.
f
Click OK to save the custom rule.
3
Create another rule called Color Index 32 using the same settings as before.
4
Set up the necessary materials:
a
From the Recommended, Glass archive on the Materials tab, drag the Window Glass material into the
palette (right-hand pane).
b
Select the Window Glass material and press F2 and rename it to AutoCAD Color Index 9. Press Enter
to save the new name.
c
From the Recommended, Bricks archive on the Materials tab, drag the Red Brick material into the
palette, and rename it to AutoCAD Color Index 32.
332 | Chapter 14 Create Photorealistic Visualizations
Summary of Contents for 507B1-90A211-1301 - NavisWorks Manage 2010
Page 1: ...Autodesk Navisworks Manage 2010 User Guide March 2009 ...
Page 12: ...xii Contents ...
Page 14: ...2 Part 1 Welcome to Autodesk Navisworks Manage 2010 ...
Page 64: ...52 Chapter 3 Installation ...
Page 97: ...Get a Whole Project View 85 ...
Page 98: ...86 Part 2 Get a Whole Project View ...
Page 136: ...124 Chapter 5 Work with Files ...
Page 178: ...To toggle ViewCube Click View Head Up Display ViewCube 166 Chapter 6 Explore Your Model ...
Page 262: ...250 Chapter 9 Use Viewpoints and Sectioning Modes ...
Page 270: ...258 Chapter 11 Work Within a Team ...
Page 282: ...270 Chapter 12 Share Data ...
Page 346: ...334 Chapter 14 Create Photorealistic Visualizations ...
Page 460: ...448 Chapter 17 Autodesk Navisworks Reference ...
Page 466: ...454 Glossary ...


