items for later retrieval. There is no intelligence behind this set - if the model changes at all, the same items are
selected (assuming they are still available in the model) when recalling the selection set.
Search Sets
Search sets are dynamic groups of items, and work in a similar way to selection sets, except that they save search
criteria instead of the results of a selection, so that you can re-run the search at a later date as and when the
model changes. Search sets are much more powerful and can save you time, especially if your CAD files are
continuing to be updated and revised. It is also possible to export search sets, and share them with other users.
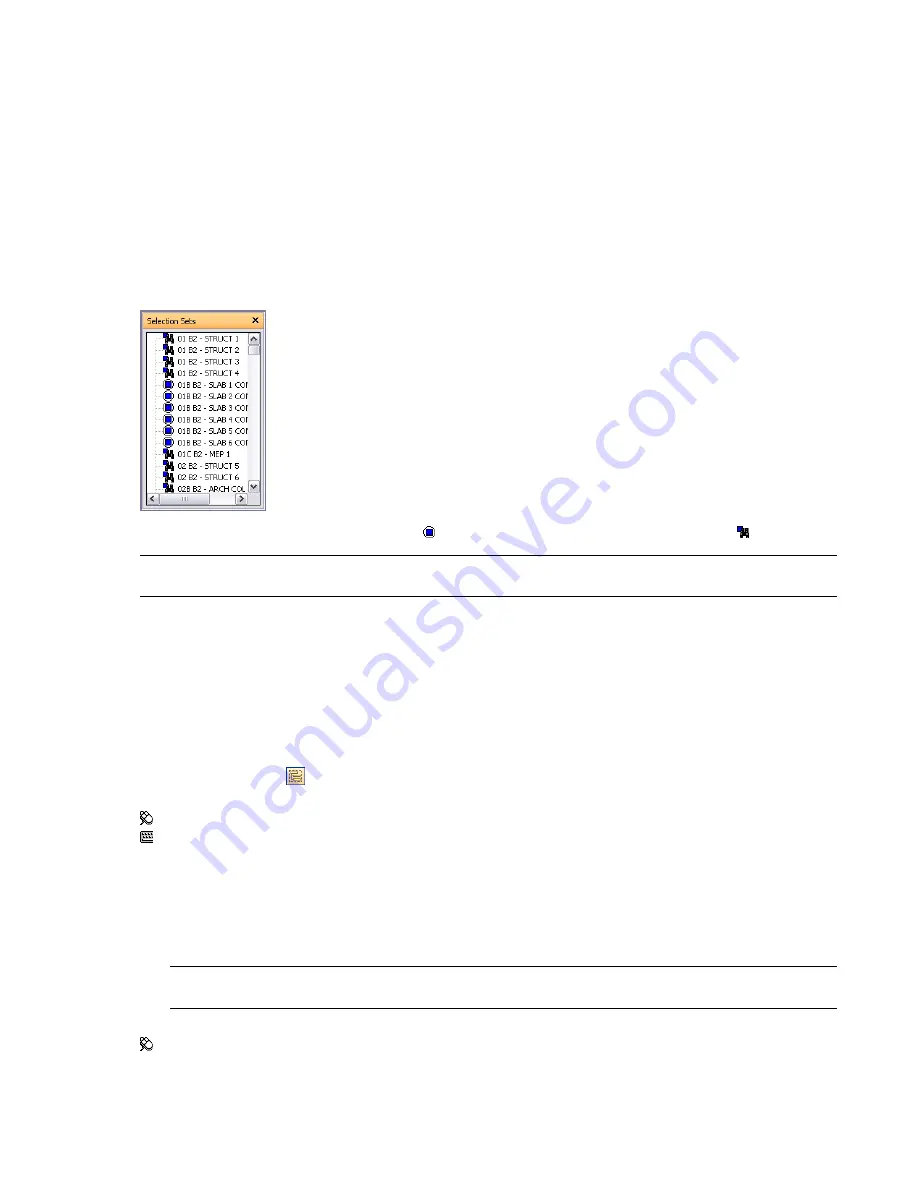
Selection Sets Window
The Selection Sets is a dockable window, which displays both selection sets and search sets available in your
Navisworks file.
The selection sets are identified by this icon: , and the search sets are identified by this icon: .
NOTE
The list of the items on the Selection Sets window is exactly the same as the list on the Sets tab of the Selection
Tree.
You can customize the names of selection and search sets, and add comments. You can also show the selection
and search sets as
in the Scene Area. These links are created automatically by Navisworks. Clicking on a
link restores the geometry within the corresponding selection or search set to the active selection, and highlights
it in the Scene Area and on the Selection Tree.
You can use the Selection Set shortcut menu to create and manage selection and search sets in the Navisworks
file.
To toggle the Selection Sets window
■
Click Selection Sets
on the Workspace toolbar.
Menu: View
➤
Control Bars
➤
Selection Sets
Command entry: SHIFT + F2
To use the Selection Sets window to select objects
1
Open the Selection Sets window.
2
Click the desired set in the list. The geometry in this set is selected in the Scene Area and in the Selection
Tree.
NOTE
If you clicked on a search set, the search is performed on the current model, looking for all geometry that
meets the search criteria, including any additional geometry that could have been added to the file.
Menu: Edit
➤
Select
➤
Selection Sets
➤
<Saved Set>
Selection Sets Window | 191
Summary of Contents for 507B1-90A211-1301 - NavisWorks Manage 2010
Page 1: ...Autodesk Navisworks Manage 2010 User Guide March 2009 ...
Page 12: ...xii Contents ...
Page 14: ...2 Part 1 Welcome to Autodesk Navisworks Manage 2010 ...
Page 64: ...52 Chapter 3 Installation ...
Page 97: ...Get a Whole Project View 85 ...
Page 98: ...86 Part 2 Get a Whole Project View ...
Page 136: ...124 Chapter 5 Work with Files ...
Page 178: ...To toggle ViewCube Click View Head Up Display ViewCube 166 Chapter 6 Explore Your Model ...
Page 262: ...250 Chapter 9 Use Viewpoints and Sectioning Modes ...
Page 270: ...258 Chapter 11 Work Within a Team ...
Page 282: ...270 Chapter 12 Share Data ...
Page 346: ...334 Chapter 14 Create Photorealistic Visualizations ...
Page 460: ...448 Chapter 17 Autodesk Navisworks Reference ...
Page 466: ...454 Glossary ...


