Rear Observation System Package
Model RVMPKG3
Installation Manual
2
1
Features:
•
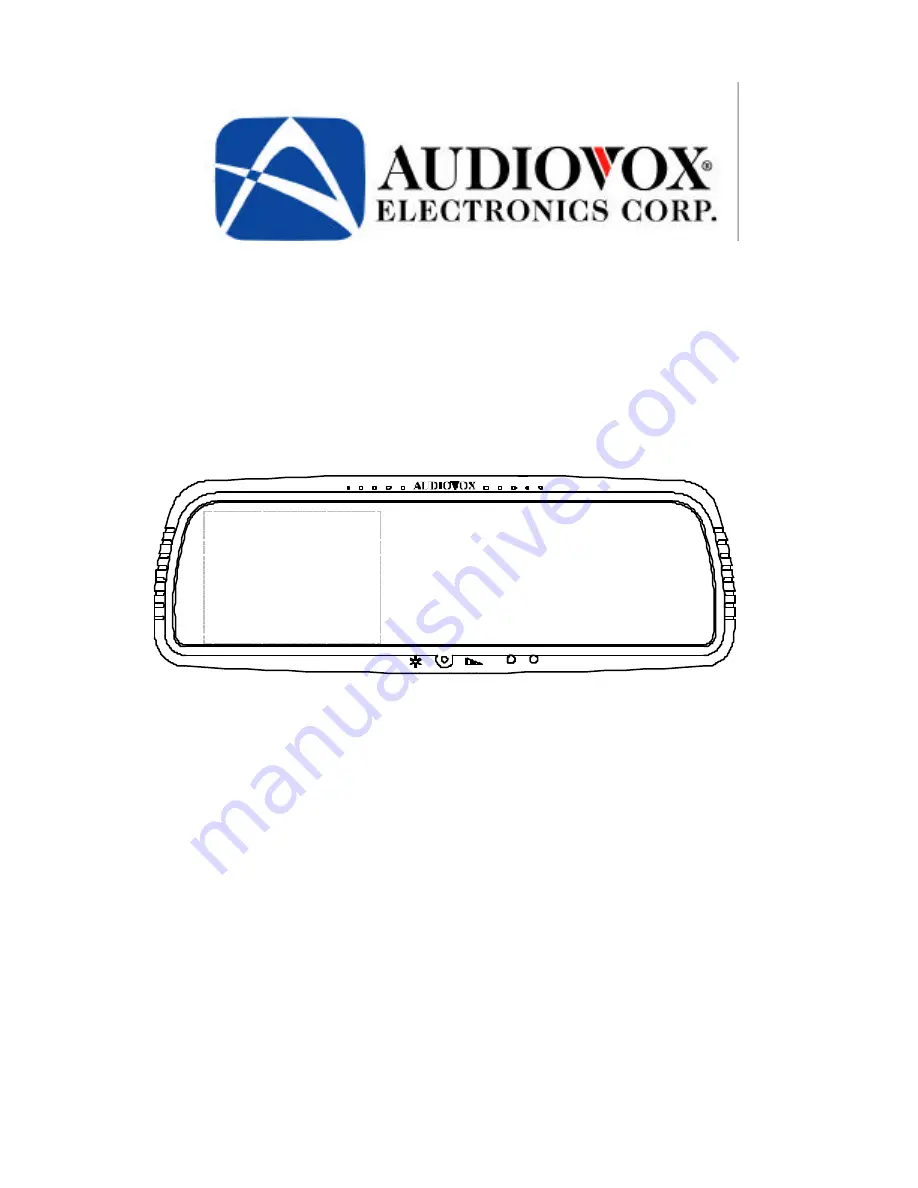
Rearview Mirror with 4” LCD
2 Built in Speakers
Rearview Camera Input
Auxiliary Video Input
Page 1: ...Rear Observation System Package Model RVMPKG3 Installation Manual 2 1 Features Rearview Mirror with 4 LCD 2 Built in Speakers Rearview Camera Input Auxiliary Video Input ...
Page 2: ...S Cautions 3 Preface 4 WARNING 4 Backing up vehicle 4 Packing list 4 1 Installation Instructions 5 2 Signal Inputs 6 3 Controls and Indicators 6 SW1 and SW2 8 Specifications 8 General 8 Maintenance 9 Troubleshooting 9 ...
Page 3: ...ltage Any unauthorized modifications or damage to the products may result in electrical shock Handle all components with care Inspect regularly for damage to components and cabling 2 You shall be responsible to ensure that the installation of this product does not void or affect the vehicle manufacturer s warranty Audiovox Electronics Corporation or its branches are not liable in full or in part f...
Page 4: ... vehicle Do not back up vehicle while watching the mirror monitor screen Always look in the direction of vehicle motion Use the mirror monitor as an aid in safety confirmation The distance looks different in the monitor The actual distance is shorter than it looks in the monitor The range of image is limited Beware of blind spots Packing list The Rear Observation System Package Model consists of t...
Page 5: ...de them into the slots on the top rear of the mirror with grooved side of the belt facing down Figure 1 b Take the buckles and slide them into the lower slots on the rear of the mirror with the buckle facing down toward the strap Figure 2 NOTE The large opened rectangle on the buckle will face away from the strap c Mount the new rearview mirror monitor onto the existing one Add ...
Page 6: ...volts when the ignition key switch is turned off 2 BLACK WIRE CHASSIC GROUND Connect this wire to a solid metal part of the vehicle s chassis 3 YELLOW WIRE GROUND WHEN PARKING BRAKE IS APPLIED Connect this wire to the wire from the parking brake that turns on the parking brake light on the dash This wire will have voltage on it while the Ignition key switch is turned on and 0 volts when the parkin...
Page 7: ...ut Plugs RCA are located at the end of the Main Cable By connecting video and audio signals with these plugs the user can enjoy watching video only while the parking brake is on Figure 5 3 Controls and Indicators E F G D C 1 B 2 H A Figure 6 ...
Page 8: ...2 see below H Speakers SW1 and SW2 SW1 Used to turn the LCD on off SW2 Used to toggle display image between rearview camera and DVD VCR Specifications General Power Supply 12VDC Power Consumption 10W Current Draw 500 mA Video Input 1Vp p 75 Impedance Audio Input 500mV Audio Power Output 0 5W 2 16O Operating Temperature Range 10 to 60 Overall Dimension 11W 3 75H 1 25D inch Display System Screen 4 T...
Page 9: ...ve moisture extreme heat or cold and magnetic fields 2 Keep liquids away from the display 3 Do not place external devices or other objects on the top of the mirror Occasionally clean the surface of the mirror with a soft cloth moistened with water or window cleaner Troubleshooting Table 1 Rearview Mirror Symptoms Solutions The ON OFF signal light D is not on after the car is started 1 Check the in...
Page 10: ... Brightness control knob whether the contrast knob is set too low 2 Check the rearview Camera lens 3 Check the rearview Camera wiring and connection 4 Check the cable from the rearview mirror is connected properly Video image is not sharp enough Clean the lens of the camera ...
Page 11: ...Figure 7 ...
Page 12: ... 2003 Audiovox Electronics Corp 150 Marcus Blvd Hauppauge N Y 11788 128 6927 ...