


AT-UHD-HDVS-300-KIT
14
AT-UHD-HDVS-300-TX
HDMI 1
POWER
INPUT
V
V
HDMI 2
VGA
DP
HDMI - RX
USB 2
USB 1
AUDIO
VGA IN
DP IN 4
USB HUB
HDBaseT OUT
RS-232
RX TX
LAN
HDMI IN 2
HDMI IN 1
USB
USB
Installation
IP Configuration
The AT-UHD-HDVS-300-KIT is shipped with DHCP enabled. Once connected to a network, the DHCP server
(if available), will automatically assign an IP address to the unit. Execute the
arp -a
command at the Windows
command line or use an IP scanner to locate the AT-UIHD-HDVS-300-KIT on the network.
If the AT-UHD-HDVS-300-KIT is unable to detect a DHCP server, within 15 seconds, then the unit will be assigned
the following.
•
IP address
192.168.1.254
• Subnet mask
255.255.0.0
• Gateway
192.168.1.1
If a static IP address is desired, the unit can be switched to static IP mode. Use one of the following procedures to
switch between DHCP and static IP mode.
192.168.1.254
is the default static IP address.
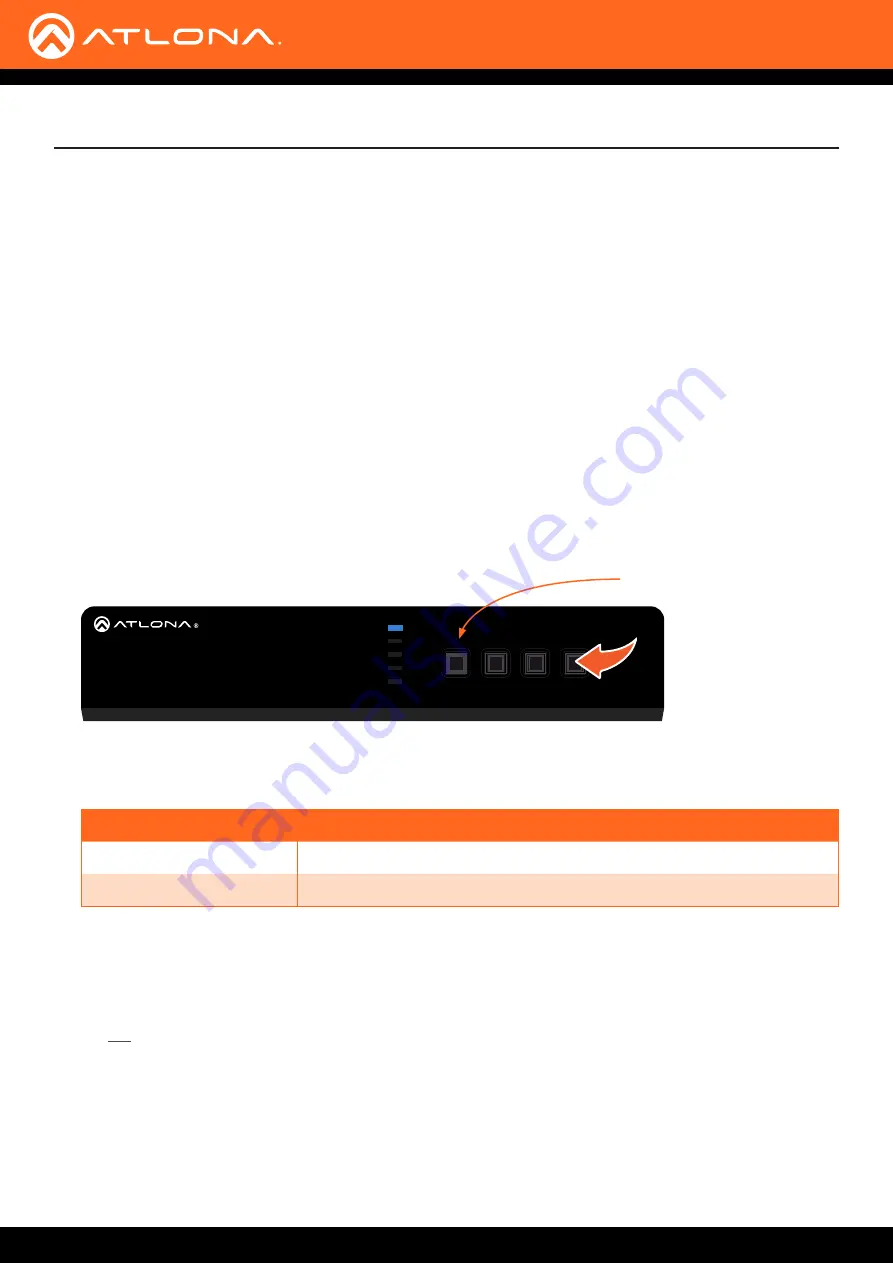
Using the Front Panel
1.
Make sure the AT-UHD-HDVS-300-TX is powered.
2.
Press and hold the
INPUT
button for approximately 10 seconds.
3. Release the
INPUT
button once the
POWER
LED indicator begins to flash. The number of flashes will indicate
the currently selected IP mode.
POWER LED indicator
POWER LED flashes
Description
Two
Static IP mode
Four
DHCP mode
4.
Once the unit has changed IP modes, the unit will shut down. To restart the unit, the power will need to be
disconnected from the AT-UHD-HDVS-300-TX then reconnected using one of the following methods:
• Disconnect then reconnect the power from the receiver.
OR
• Disconnect then reconnect the Ethernet cable from the
HDBaseT OUT
port on the transmitter.
5.
The unit is now set to the new IP mode and ready for use.