AT-HDVS-200-RX
10
GND
GND
RX
TX
RX
TX
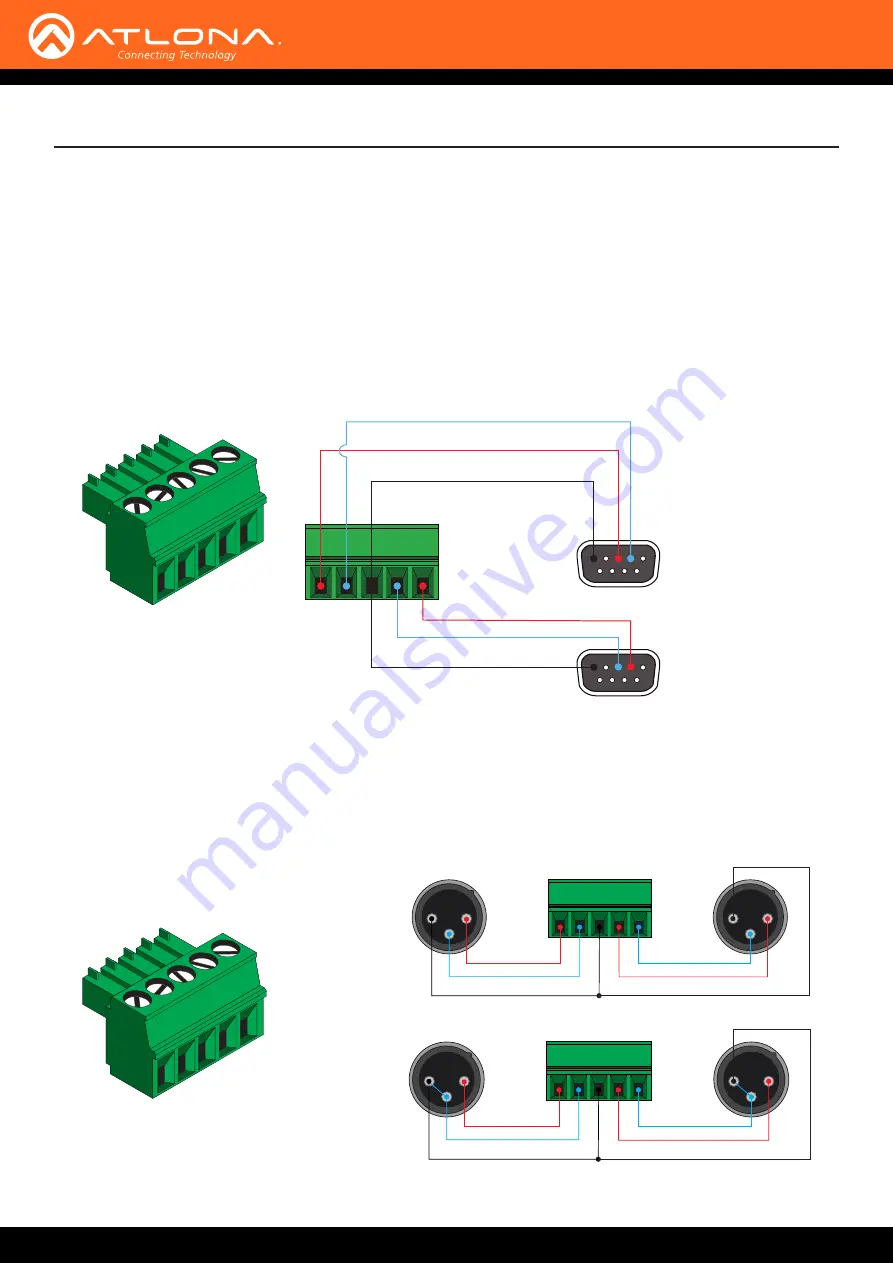
The AT-HDVS-200-RX provides two RS-232 ports. Port 1 is used for controlling a display or other sink device. Port 2
is used to control the AT-HDVS-200-RX. This step is optional.
1.
Use wire strippers to remove a portion of the cable jacket.
2.
Remove at least 3/16” (5 mm) from the insulation of the RX, TX, and GND wires.
3.
Insert the TX, RX, and GND wires into correct terminal on the included Phoenix block. If using non-tinned
stranded wire, presss the orange tab, above the terminal, while inserting the exposed wire. Repeat this step for
the TX, RX, and GND connections. The illustration below, shows how to connect both RS-232 cables.
RS-232 1
RS-232 2
RS-232 Connector
Installation
The
AUDIO OUT
connector on the AT-HDVS-200-RX provides the connection of either balanced or unbalanced
audio outputs using XLR connectors. Use the included 5-pin Phoenix terminal block.
Balanced audio connections use two signal wires and a ground to minimize interference in audio signals. Unbalanced
audio connections use one signal wire and a ground and are used if system components don’t support balanced
signals.
Audio Connector
1
2
3
1
2
3
GND
GND
+
-
+
-
1
2
3
1
2
3
GND
GND
+
-
+
-
Balanced
Unbalanced


