


Unlock mode
There are two unlock modes, normally open mode or 0 (default) and normally close mode or 1. To
change follow below steps:
1.
Select
Settings
from the
Main Menu.
2.
Press and hold for three seconds the
Unlock key
button.
3.
On the keypad, type
a.
8010 to set unlock mode to normally open mode or 0.
b.
8011 to set unlock mode to normally close mode or 1.
Unlock time
The unlock time of the lock release can be adjusted at any time between the range of one second
and 99 seconds. Follow below steps to adjust the unlock time:
1.
Select
Settings
from the
Main Menu.
2.
Press and hold for three seconds the
Unlock key
button.
3.
On the keypad, type 8401 for one second ~ 8499 for 99 seconds to set the unlock time.
Setting the user code
On the ATIGO system, every receiver must have assigned an identification code called
User Code
.
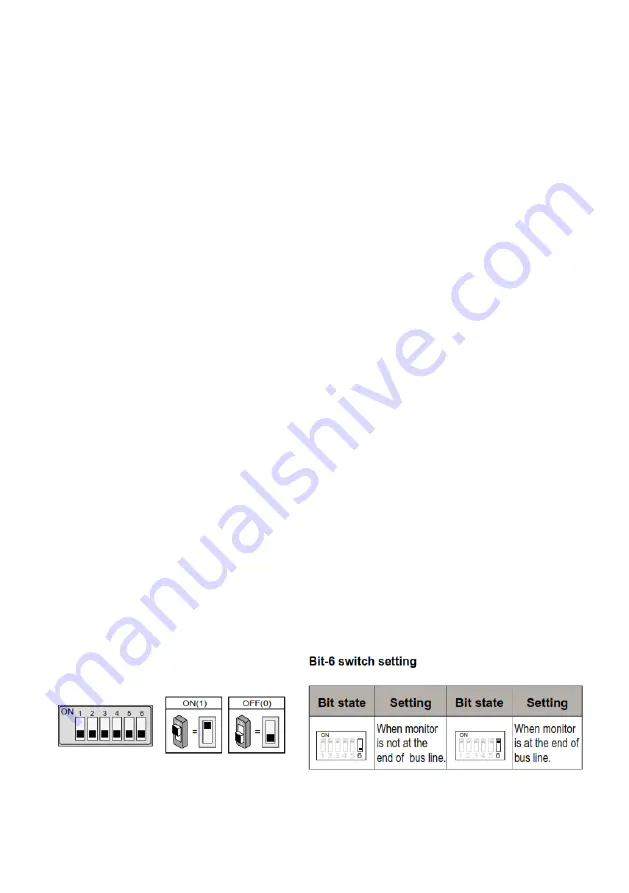
DIP Switch addresses
The DIP switches are used to set the user code for each monitor and maximum are 6 Bits.
•
Bit-1 ~ Bit-5 are used for addressing. The value range is from 0 to 31, a total of 32 different
codes for 32 monitors.
•
Bit-6 is BUS line terminal switch, which should be set to ON for the last monitor on the BUS
line, otherwise should be OFF.
NOTE
: When multi-monitors are installed in the same apartment, these monitors should use the
same code and the primary/secondary mode should be set on the monitor.
Use below reference table for setting the receiver User Code as required:


