User Guide
RT-AC1200
Wireless-AC1200 Dual Band USB Router
E10170_RT-AC1200_Guide.indd 1
2015/4/29 15:48:24
Page 1: ...User Guide RT AC1200 Wireless AC1200 Dual Band USB Router E10170_RT AC1200_Guide indd 1 2015 4 29 15 48 24 ...
Page 2: ...ENT SHALL ASUS ITS DIRECTORS OFFICERS EMPLOYEES OR AGENTS BE LIABLE FOR ANY INDIRECT SPECIAL INCIDENTAL OR CONSEQUENTIAL DAMAGES INCLUDING DAMAGES FOR LOSS OF PROFITS LOSS OF BUSINESS LOSS OF USE OR DATA INTERRUPTION OF BUSINESS AND THE LIKE EVEN IF ASUS HAS BEEN ADVISED OF THE POSSIBILITY OF SUCH DAMAGES ARISING FROM ANY DEFECT OR ERROR IN THIS MANUAL OR PRODUCT SPECIFICATIONS AND INFORMATION CON...
Page 3: ... 3 Connecting to your wireless network 19 3 Configuring the General settings 3 1 Using the Network Map 20 3 1 1 Setting up the wireless security settings 21 3 1 2 Managing your network clients 22 3 1 3 Monitoring your USB device 23 3 2 Creating a Guest Network 26 3 3 Using the Traffic Manager 28 3 3 1 Managing QoS Quality of Service Bandwidth 28 3 3 2 Monitoring Traffic 31 3 4 Setting up Parental ...
Page 4: ...ting 53 4 1 5 Professional 54 4 2 LAN 56 4 2 1 LAN IP 56 4 2 2 DHCP Server 57 4 2 3 Route 59 4 2 4 IPTV 60 4 3 WAN 61 4 3 1 Internet Connection 61 4 3 2 Port Trigger 64 4 3 3 Virtual Server Port Forwarding 65 4 3 4 DMZ 69 4 3 5 DDNS 70 4 3 6 NAT Passthrough 71 4 4 IPv6 72 4 5 Firewall 73 4 5 1 General 73 4 5 2 URL Filter 73 4 5 3 Keyword filter 74 4 5 4 Network Services Filter 75 E10170_RT AC1200_...
Page 5: ...5 3 Setting up your printer server 83 5 3 1 ASUS EZ Printer Sharing 83 5 3 2 Using LPR to Share Printer 87 5 4 Download Master 92 5 4 1 Configuring Bit Torrent download settings 93 5 4 2 NZB settings 94 6 Troubleshooting 6 1 Basic Troubleshooting 95 6 2 Frequently Asked Questions FAQs 98 Appendices Notices 108 ASUS Contact information 122 Networks Global Hotline Information 123 E10170_RT AC1200_Gu...
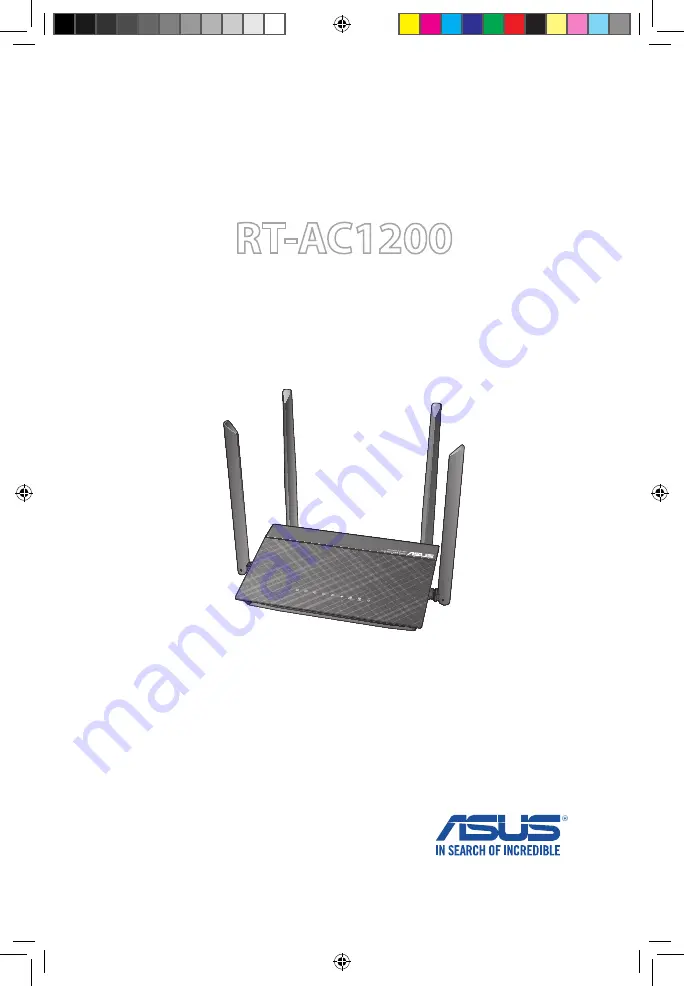
Page 6: ...ture warranty services such as repair or replacement RT AC1200 Wireless Router Network cable RJ 45 Power adapter Quick Start Guide Warranty card 1 1 Welcome Thank you for purchasing an ASUS RT AC1200 Wireless Router The ultra thin and stylish RT AC1200 features a 2 4GHz and 5GHz dual bands for an unmatched concurrent wireless HD streaming SMB server UPnP AV server and FTP server for 24 7 file shar...
Page 7: ...on On Has physical connection to USB device 4 2 4GHz LED 5GHz LED Off No 2 4GHz or 5GHz signal On Wireless system is ready Flashing Transmitting or receiving data via wireless connection 5 Power LED Off No power On Device is ready Flashing slow Rescue mode Flashing quick WPS is processing 6 Reset button This button resets or restores the system to its factory default settings Wireless AC1200 Dual ...
Page 8: ...er DC IN port Insert the bundled AC adapter into this port and connect your router to a power source 9 USB port Insert a USB device such as USB hard disk or USB flash drive into the port Insert your iPad s USB cable into the port to charge your iPad 10 WPS button This button launches the WPS Wizard 11 WAN Internet port Connect a network cable into this port to establish WAN connection 12 LAN 1 4 p...
Page 9: ...the device away from 802 11b g or 20MHz only Wi Fi devices 2 4GHz computer peripherals Bluetooth devices cordless phones transformers heavy duty motors fluorescent lights microwave ovens refrigerators and other industrial equipment to prevent signal interference or loss Always update to the latest firmware Visit the ASUS website at http www asus com to get the latest firmware updates To ensure the...
Page 10: ...e network With its dual band technology your wireless router supports 2 4GHz and 5GHz wireless signals simultaneously This allows you to do Internet related activities such as Internet surfing or reading writing e mail messages using the 2 4GHz band while simultaneously streaming high definition audio video files such as movies or music using the 5GHz band Some IEEE 802 11n devices that you want t...
Page 11: ...an existing router disconnect it from your network Disconnect the cables wires from your existing modem setup If your modem has a backup battery remove it as well Reboot your cable modem and computer recommended 1 6 1 Wired connection NOTE You can use either a straight through cable or a crossover cable for wired connection RT AC1200 Modem 3 1 4 2 WAN LAN E10170_RT AC1200_Guide indd 11 2015 4 29 1...
Page 12: ...Using the bundled network cable connect your computer to your wireless router s LAN port IMPORTANT Ensure that the LAN LED is blinking 3 Using another network cable connect your modem to your wireless router s WAN port 4 Insert your modem s AC adapter to the DC IN port and plug it to a power outlet RT AC1200 Modem 2 1 3 WAN E10170_RT AC1200_Guide indd 12 2015 4 29 15 48 26 ...
Page 13: ...t 3 Insert your modem s AC adapter to the DC IN port and plug it to a power outlet 4 Install an IEEE 802 11a b g n ac WLAN adapter on your computer NOTES For details on connecting to a wireless network refer to the WLAN adapter s user manual To set up the security settings for your network refer to the section Setting up the wireless security settings in Chapter 3 of this user manual E10170_RT AC1...
Page 14: ... 1 On your web browser manually key in the wireless router s default IP address 192 168 50 1 or enter http router asus com 2 On the login page key in the default user name admin and password admin 3 You can now use the Web GUI to configure various settings of your ASUS Wireless Router NOTE If you are logging into the Web GUI for the first time you will be directed to the Quick Internet Setup QIS p...
Page 15: ...gin username and password for your wireless router s Web GUI is admin For details on changing your wireless router s login username and password refer to section 4 6 2 System The wireless router s login username and password is different from the 2 4GHz 5GHz network name SSID and security key The wireless router s login username and password allows you to log into your wireless router s Web GUI to...
Page 16: ...Dynamic IP PPPoE PPTP and L2TP Key in the necessary information for your ISP connection type IMPORTANT Obtain the necessary information from your ISP about the Internet connection type for Automatic IP DHCP for PPPoE PPTP and L2TP E10170_RT AC1200_Guide indd 16 2015 4 29 15 48 26 ...
Page 17: ...s router is reset to its default settings If QIS failed to detect your Internet connection type click Skip to manual setting and manually configure your connection settings 3 Assign the wireless network name SSID and security key for your 2 4GHz and 5 GHz wireless connection Click Apply when done E10170_RT AC1200_Guide indd 17 2015 4 29 15 48 26 ...
Page 18: ...18 4 Your Internet and wireless settings are displayed Click Next to continue 5 Read the wireless network connection tutorial When done click Finish E10170_RT AC1200_Guide indd 18 2015 4 29 15 48 27 ...
Page 19: ...ant to connect to then click Connect 3 You may need to key in the network security key for a secured wireless network then click OK 4 Wait while your computer establishes connection to the wireless network successfully The connection status is displayed and the network icon displays the connected status NOTES Refer to the next chapters for more details on configuring your wireless network s settin...
Page 20: ...he General settings 3 1 Using the Network Map Network Map allows you to configure your network s security settings manage your network clients and monitor your USB device E10170_RT AC1200_Guide indd 20 2015 4 29 15 48 27 ...
Page 21: ...neral Network Map 2 On the Network Map screen and under System status you can configure the wireless security settings such as SSID security level and encryption settings NOTE You can set up different wireless security settings for 2 4GHz and 5GHz bands 2 4GHz security settings 5GHz security settings 3 On the Wireless name SSID field key in a unique name for your wireless network E10170_RT AC1200_...
Page 22: ...rate will drop to IEEE 802 11g 54Mbps connection 5 Key in your security passkey 6 Click Apply when done 3 1 2 Managing your network clients To manage your network clients 1 From the navigation panel go to General Network Map tab 2 On the Network Map screen select the Client Status icon to display your network client s information 3 To block a client s access to your network select the client and c...
Page 23: ...r network NOTE To use this feature you need to plug a USB storage device such as a USB hard disk or USB flash drive to the USB port on the rear panel of your wireless router Ensure that the USB storage device is formatted and partitioned properly Refer to the Plug n Share Disk Support List at http event asus com networks disksupport E10170_RT AC1200_Guide indd 23 2015 4 29 15 48 27 ...
Page 24: ...tor your USB device 1 From the navigation panel go to General Network Map 2 On the Network Map screen select the USB Disk Status icon to display your USB device s information 3 On the AiDisk Wizard field click GO to set up an FTP server for Internet file sharing NOTES For more details refer to the section 3 5 2 Using Servers Center in this user manual The wireless router works with most USB HDDs F...
Page 25: ...y cause data corruption To safely remove the USB disk 1 From the navigation panel go to General Network Map 2 In the upper right corner click Eject USB disk When the USB disk is ejected successfully the USB status shows Unmounted E10170_RT AC1200_Guide indd 25 2015 4 29 15 48 27 ...
Page 26: ... access to your private network NOTE RT AC1200 supports up to six SSIDs three 2 4GHz and three 5GHz SSIDs To create a guest network 1 From the navigation panel go to General Guest Network 2 On the Guest Network screen select 2 4Ghz or 5Ghz frequency band for the guest network that you want to create 3 Click Enable E10170_RT AC1200_Guide indd 26 2015 4 29 15 48 28 ...
Page 27: ...ireless name for your temporary network on the Network Name SSID field 7 Select an Authentication Method 8 Select an Encryption method 9 Specify the Access time or choose Limitless 10 Select Disable or Enable on the Access Intranet item 11 When done click Apply E10170_RT AC1200_Guide indd 27 2015 4 29 15 48 28 ...
Page 28: ...affic Manager QoS tab 2 Click ON to enable QoS Fill in the upload and download bandwidth fields NOTE Get the bandwidth information from your ISP 3 Click Save NOTE The User Specify Rule List is for advanced settings If you want to prioritize specific network applications and network services select User defined QoS rules or User defined Priority from the drop down list on the upper right corner E10...
Page 29: ...gits separated by colons in transmission order e g 12 34 56 aa bc ef For source or destination port range you can either a Enter a specific port such as 95 b Enter ports within a range such as 103 315 100 or 65535 The Transferred column contains information about the upstream and downstream traffic outgoing and incoming network traffic for one section In this column you can set the network traffic...
Page 30: ...ied network applications NOTES Low priority packets are disregarded to ensure the transmission of high priority packets Under Download Bandwidth table set Maximum Bandwidth Limit for multiple network applications in corresponding order The higher priority upstream packet will cause the higher priority downstream packet If there are no packets being sent from high priority applications the full tra...
Page 31: ...s the bandwidth usage and speed of your Internet wired and wireless networks It allows you to monitor network traffic even on a daily basis NOTE Packets from the Internet are evenly transmitted to the wired and wireless devices E10170_RT AC1200_Guide indd 31 2015 4 29 15 48 28 ...
Page 32: ... navigation panel go to General Parental control 2 Click ON to enable Parental Control 3 Select the client whose network usage you want to control You may also key in the client s MAC address in the Client MAC Address column NOTE Ensure that the client name does not contain special characters or spaces as this may cause the router to function abnormally E10170_RT AC1200_Guide indd 32 2015 4 29 15 ...
Page 33: ... 2009 networks disksupport for the file system support table 3 5 1 Using AiDisk AiDisk allows you to share files stored on a connected USB device through the Internet AiDisk also assists you with setting up ASUS DDNS and an FTP server To use AiDisk 1 From the navigation panel go to General USB application then click the AiDisk icon 2 From the Welcome to AiDisk wizard screen click Go 4 Click or to ...
Page 34: ...of Service and then select I will use the service and accept theTerms of service and key in your domain name When done click Next 3 Select the access rights that you want to assign to the clients accessing your shared data E10170_RT AC1200_Guide indd 34 2015 4 29 15 48 29 ...
Page 35: ...rvers Center Servers Center allows you to share the media files from the USB disk via a Media Server directory Samba share service or FTP share service You can also configure other settings for the USB disk in the Servers Center Using Media Server Your wireless router allows DLNA supported devices to access multimedia files from the USB disk connected to your wireless router NOTE Before using the ...
Page 36: ...rver directory Select your media server directory and click Apply to share files from the USB disk to media devices in the network Media Server Status Displays the status of the media server Using Network Place Samba Share service Network Place Samba Share allows you to set up the accounts and permissions for the Samba service To use Samba share 1 From the navigation panel go to General USB applic...
Page 37: ...and click Add The folder that you created will be added to the folder list 2 Follow the steps below to add delete or modify an account To create a new account a Click to add new account b In the Account and Password fields key in the name and password of your network client Retype the password to confirm Click Add to add the account to the list E10170_RT AC1200_Guide indd 37 2015 4 29 15 48 29 ...
Page 38: ... folder 4 Click Apply to apply the changes Using the FTP Share service FTP share enables an FTP server to share files from USB disk to other devices via your local area network or via the Internet IMPORTANT Ensure that you safely remove the USB disk Incorrect removal of the USB disk may cause data corruption To safely remove the USB disk refer to the section Safely removing the USB disk under 3 1 ...
Page 39: ...o assign for specific folders R W Select to assign read write access for a specific folder W Select to assign write only access for a specific folder R Select to assign read only access for a specific folder No Select this option if you do not want to share a specific folder 3 Click Apply to confirm the changes 4 To access the FTP server key in the ftp link ftp hostname asuscomm com and your user ...
Page 40: ...lication 3G 4G 2 In the Enable USB Modem field select Yes 3 Set up the following Location Select your 3G 4G service provider s location from the dropdown list ISP Select your Internet Service Provider ISP from the dropdown list APN Access Point Name service optional Contact your 3G 4G service provider for detailed information Dial Number and PIN code The 3G 4G provider s access number and PIN code...
Page 41: ...the 3G 4G network carrier USB Adapter Choose your USB 3G 4G adapter from the dropdown list If you are not sure of your USB adapter s model or the model is not listed in the options select Auto 4 Click Apply NOTE The router will reboot for the settings to take effect E10170_RT AC1200_Guide indd 41 2015 4 29 15 48 29 ...
Page 42: ... and access your files To use AiCloud 1 From Google Play Store or Apple Store download and install the ASUS AiCloud app to your smart device 2 Connect your smart device to your network Follow the instructions to complete the AiCloud setup process E10170_RT AC1200_Guide indd 42 2015 4 29 15 48 29 ...
Page 43: ...rage device into the wireless router 2 Turn on Cloud Disk 3 Go to https router asus com and enter the router login account and password For better user experience we recommend that you use Google Chrome or Firefox E10170_RT AC1200_Guide indd 43 2015 4 29 15 48 30 ...
Page 44: ...s connected to the network NOTE When accessing the devices that are connected to the network you need to enter the device s user name and password manually which will not be saved by AiCloud for security reason E10170_RT AC1200_Guide indd 44 2015 4 29 15 48 30 ...
Page 45: ...in name NOTES You can create a domain name for your router with ASUS DDNS For more details refer to section 4 3 5 DDNS By default AiCloud provides a secure HTTPS connection Key in https yourASUSDDNSname asuscomm com for a very secure Cloud Disk and Smart Access usage E10170_RT AC1200_Guide indd 45 2015 4 29 15 48 30 ...
Page 46: ...oud click Smart Sync Go 2 Select ON to enable Smart Sync 3 Click Add new account 4 Enter your ASUS WebStorage account password and select the directory that you want to sync with WebStorage 5 Click Apply E10170_RT AC1200_Guide indd 46 2015 4 29 15 48 30 ...
Page 47: ...frequency band for your wireless network 3 Assign a unique name containing up to 32 characters for your SSID Service Set Identifier or network name to identify your wireless network Wi Fi devices can identify and connect to the wireless network via your assigned SSID The SSIDs on the information banner are updated once new SSIDs are saved to the settings NOTE You can assign unique SSIDs for the 2 ...
Page 48: ... a maximum speed of 54Mbps N only Select N only to maximize wireless N performance This setting prevents 802 11g and 802 11b devices from connecting to the wireless router 6 Select the operating channel for your wireless router Select Auto to allow the wireless router to automatically select the channel that has the least amount of interference 7 Select any of these channel bandwidth to accommodat...
Page 49: ...EAP server or an external RADIUS back end authentication server Radius with 802 1x NOTE Your wireless router supports the maximum transmission rate of 54Mbps when the Wireless Mode is set to Auto and encryption method is WEP or TKIP 9 Select any of these WEP Wired Equivalent Privacy Encryption options for the data transmitted over your wireless network Off Disables WEP encryption 64 bit Enables we...
Page 50: ...ure that the devices support WPS To enableWPS on your wireless network 1 From the navigation panel go to Advanced Settings Wireless WPS tab 2 In the EnableWPS field move the slider to ON 3 WPS uses 2 4GHz by default If you want to change the frequency to 5GHz turn OFF the WPS function click Switch Frequency in the Current Frequency field and turn WPS ON again E10170_RT AC1200_Guide indd 50 2015 4 ...
Page 51: ...he WPS button on your wireless device This is normally identified by the WPS logo NOTE Check your wireless device or its user manual for the location of the WPS button c The wireless router will scan for any available WPS devices If the wireless router does not find any WPS devices it will switch to standby mode 5 To set up WPS using the Client s PIN code follow these steps a Locate the WPS PIN co...
Page 52: ...quency field select the frequency band that you want to use for the Wireless MAC filter 3 In the MAC Filter Mode dropdown list select either Accept or Reject Select Accept to allow devices in the MAC filter list to access to the wireless network Select Reject to prevent devices in the MAC filter list to access to the wireless network 4 On the MAC filter list click the Add button and key in the MAC...
Page 53: ...n mode is set to WPA Enterprise WPA2 Enterprise or Radius with 802 1x NOTE Please refer to section 4 1 1 General section for configuring your wireless router s Authentication Mode 2 From the navigation panel go to Advanced Settings Wireless RADIUS Setting 3 Select the frequency band 4 In the Server IP Address field key in your RADIUS server s IP Address 5 In the Connection Secret field assign the ...
Page 54: ...able wireless networking Date to Enable Radio weekdays You can specify which days of the week wireless networking is enabled Time of Day to Enable Radio You can specify a time range when wireless networking is enabled during the week 4 1 5 Professional The Professional screen provides advanced configuration options NOTE We recommend that you use the default values on this page E10170_RT AC1200_Gui...
Page 55: ...lect Short for a busy wireless network with high network traffic Select Long if your wireless network is composed of older or legacy wireless devices RTSThreshold Select a lower value for RTS Request to Send Threshold to improve wireless communication in a busy or noisy wireless network with high network traffic and numerous wireless devices DTIM Interval DTIM Delivery Traffic Indication Message I...
Page 56: ... wireless devices Select Disable to switch off WMM APSD TX Power adjustment TX Power adjustment refers to the milliWatts mW needed to power the radio signal output of the wireless router Enter a value between 0 to 100 NOTE Increasing the TX Power adjustment values may affect the stability of the wireless network 4 2 LAN 4 2 1 LAN IP The LAN IP screen allows you to modify the LAN IP settings of you...
Page 57: ...P Server Your wireless router uses DHCP to assign IP addresses automatically on your network You can specify the IP address range and lease time for the clients on your network To configure the DHCP server 1 From the navigation panel go to Advanced Settings LAN DHCP Server tab 2 In the Enable the DHCP Server field tick Yes E10170_RT AC1200_Guide indd 57 2015 4 29 15 48 31 ...
Page 58: ...ddress format of 192 168 1 xxx where xxx can be any number between 2 and 254 when specifying an IP address range An IP Pool Starting Address should not be greater than the IP Pool Ending Address 7 In the DNS and Server Settings section key in your DNS Server and WINS Server IP address if needed 8 Your wireless router can also manually assign IP addresses to devices on the network On the Enable Man...
Page 59: ...s you have advanced knowledge of routing tables To configure the LAN Routing table 1 From the navigation panel go to Advanced Settings LAN Route tab 2 On the Enable static routes field choose Yes 3 On the Static Route List enter the network information of other access points or nodes Click the Add or Delete button to add or remove a device on the list 4 Click Apply E10170_RT AC1200_Guide indd 59 2...
Page 60: ... services through an ISP or a LAN The IPTV tab provides the configuration settings needed to set up IPTV VoIP multicasting and UDP for your service Contact your ISP for specific information regarding your service E10170_RT AC1200_Guide indd 60 2015 4 29 15 48 31 ...
Page 61: ...nel go to Advanced Settings WAN Internet Connection tab 2 Configure the following settings below When done click Apply WAN ConnectionType Choose your Internet Service Provider type The choices are Automatic IP PPPoE PPTP L2TP or fixed IP Consult your ISP if the router is unable to obtain a valid IP address or if you are unsure the WAN connection type E10170_RT AC1200_Guide indd 61 2015 4 29 15 48 ...
Page 62: ... new network device is discovered automatically Once connected to the network devices can be remotely configured to support P2P applications interactive gaming video conferencing and web or proxy servers Unlike Port forwarding which involves manually configuring port settings UPnP automatically configures the router to accept incoming connections and direct requests to a specific PC on the local n...
Page 63: ...eject any unrecognized device that attempt to connect To avoid connection issues due to an unregistered MAC address you can Contact your ISP and update the MAC address associated with your ISP service Clone or change the MAC address of the ASUS wireless router to match the MAC address of the previous networking device recognized by the ISP E10170_RT AC1200_Guide indd 63 2015 4 29 15 48 32 ...
Page 64: ... at a different time An application requires specific incoming ports that are different from the outgoing ports To set up PortTrigger 1 From the navigation panel go to Advanced Settings WAN PortTrigger tab 2 Configure the following settings below When done click Apply Enable PortTrigger Choose Yes to enable Port Trigger Well Known Applications Select popular games and web services to add to the Po...
Page 65: ...ive the inbound data This incoming port closes once a specific time period has elapsed because the router is unsure when the application has been terminated Port triggering only allows one client in the network to use a particular service and a specific incoming port at the same time You cannot use the same application to trigger a port in more than one PC at the same time The router will only for...
Page 66: ...rwarding tab NOTE When port forwarding is enabled the ASUS router blocks unsolicited inbound traffic from the Internet and only allows replies from outbound requests from the LAN The network client does not have access to the Internet directly and vice versa E10170_RT AC1200_Guide indd 66 2015 4 29 15 48 32 ...
Page 67: ... IP address and leave the Local Port empty Port range accepts various formats such as Port Range 300 350 individual ports 566 789 or Mix 1015 1024 3021 NOTES When your network s firewall is disabled and you set 80 as the HTTP server s port range for your WAN setup then your http server web server would be in conflict with the router s web user interface A network makes use of ports in order to exc...
Page 68: ...se the router s WAN IP to access the server If port forwarding has been successful you should be able to access the files or applications Differences between port trigger and port forwarding Port triggering will work even without setting up a specific LAN IP address Unlike port forwarding which requires a static LAN IP address port triggering allows dynamic port forwarding using the router Predete...
Page 69: ...omain web or e mail server CAUTION Opening all the ports on a client to the Internet makes the network vulnerable to outside attacks Please be aware of the security risks involved in using DMZ To set up DMZ 1 From the navigation panel go to Advanced Settings WAN DMZ tab 2 Configure the setting below When done click Apply IP address of Exposed Station Key in the client s LAN IP address that will pr...
Page 70: ... done click Apply Enable the DDNS Client Enable DDNS to access the ASUS router via the DNS name rather than WAN IP address Server and Host Name Choose ASUS DDNS or other DDNS If you want to use ASUS DDNS fill in the Host Name in the format of xxx asuscomm com xxx is your host name If you want to use a different DDNS service click FREE TRIAL and register online first Fill in the User Name or E mail...
Page 71: ...uter may be on a network that uses multiple NAT tables 4 3 6 NAT Passthrough NAT Passthrough allows a Virtual Private Network VPN connection to pass through the router to the network clients PPTP Passthrough L2TP Passthrough IPsec Passthrough and RTSP Passthrough are enabled by default To enable disable the NAT Passthrough settings go to the Advanced Settings WAN NAT Passthrough tab When done clic...
Page 72: ... supports IPv6 To set up IPv6 1 From the navigation panel go to Advanced Settings IPv6 2 Select your ConnectionType The configuration options vary depending on your selected connection type 3 Enter your IPv6 LAN and DNS settings 4 Click Apply NOTE Please refer to your ISP regarding specific IPv6 information for your Internet service E10170_RT AC1200_Guide indd 72 2015 4 29 15 48 33 ...
Page 73: ...ect your router s performance 4 You can also monitor packets exchanged between the LAN and WAN connection On the Logged packets type select Dropped Accepted or Both 5 Click Apply 4 5 2 URL Filter You can specify keywords or web addresses to prevent access to specific URLs NOTE The URL Filter is based on a DNS query If a network client has already accessed a website such as http www abcxxx com then...
Page 74: ... 3 Enter a URL and click the button 4 Click Apply 4 5 3 Keyword filter Keyword filter blocks access to webpages containing specified keywords To set up a keyword filter 1 From the navigation panel go to Advanced Settings Firewall Keyword Filter tab 2 On the Enable Keyword Filter field select Enabled E10170_RT AC1200_Guide indd 74 2015 4 29 15 48 33 ...
Page 75: ...res previously visited websites To resolve this issue clear the DNS cache before setting up the Keyword Filter Web pages compressed using HTTP compression cannot be filtered HTTPS pages also cannot be blocked using a keyword filter 4 5 4 Network Services Filter The Network Services Filter blocks LAN to WAN packet exchanges and restricts network clients from accessing specific web services such as ...
Page 76: ... 3 Select the Filter table type Black List blocks the specified network services White List limits access to only the specified network services 4 Specify the day and time when the filters will be active 5 To specify a Network Service to filter enter the Source IP Destination IP Port Range and Protocol Click the button 6 Click Apply E10170_RT AC1200_Guide indd 76 2015 4 29 15 48 33 ...
Page 77: ...Mode tab 2 Select any of these operation modes Wireless router mode default In wireless router mode the wireless router connects to the Internet and provides Internet access to available devices on its own local network Access Point mode In this mode the router creates a new wireless network on an existing network 3 Click Apply NOTE The router will reboot when you change the modes E10170_RT AC1200...
Page 78: ...NTP Network time Protocol server in order to synchronize the time EnableTelnet Click Yes to enable Telnet services on the network Click No to disable Telnet Authentication Method You can select HTTP HTTPS or both protocols to secure router access EnableWeb Access fromWAN Select Yes to allow devices outside the network to access the wireless router GUI settings Select No to prevent access Only allo...
Page 79: ...e system refer to section 5 2 Firmware Restoration 4 6 4 Restore Save Upload Setting To restore save upload wireless router settings 1 From the navigation panel go to Advanced Settings Administration Restore Save Upload Setting tab 2 Select the tasks that you want to do To restore to the default factory settings click Restore and click OK in the confirmation message To save the current system sett...
Page 80: ...the router is rebooted or powered off To view your system log 1 From the navigation panel go to Advanced Settings System Log 2 You can view your network activities in any of these tabs General Log DHCP Leases Wireless Log Port Forwarding Routing Table E10170_RT AC1200_Guide indd 80 2015 4 29 15 48 33 ...
Page 81: ...pub ASUS LiveUpdate Release Wireless Printer zip The utilities are not supported on MAC OS 5 1 Device Discovery Device Discovery is an ASUS WLAN utility that detects an ASUS wireless router device and allows you to configure the wireless networking settings To launch the Device Discovery utility From your computer s desktop click Start All Programs ASUS Utility Wireless Router Device Discovery NOT...
Page 82: ...mware Restoration utility NOTE This feature is not supported on MAC OS To launch the rescue mode and use the Firmware Restoration utility 1 Unplug the wireless router from the power source 2 Hold the Reset button at the rear panel and simultaneously replug the wireless router into the power source Release the Reset button when the Power LED at the front panel flashes slowly which indicates that th...
Page 83: ...e upgrade utility and cannot be used on a working ASUS Wireless Router Normal firmware upgrades must be done through the web interface Refer to Chapter 4 Configuring the Advanced Settings for more details 5 3 Setting up your printer server 5 3 1 ASUS EZ Printer Sharing ASUS EZ Printing Sharing utility allows you to connect a USB printer to your wireless router s USB port and set up the print serve...
Page 84: ...ork Printer Server 2 Click Download Now to download the network printer utility NOTE Network printer utility is supported on Windows XP Windows Vista and Windows 7 only To install the utility on Mac OS select Use LPR protocol for sharing printer 3 Unzip the downloaded file and click the Printer icon to run the network printer setup program E10170_RT AC1200_Guide indd 84 2015 4 29 15 48 34 ...
Page 85: ...nscreen instructions to set up your hardware then click Next 5 Wait a few minutes for the initial setup to finish Click Next 6 Click Finish to complete the installation E10170_RT AC1200_Guide indd 85 2015 4 29 15 48 34 ...
Page 86: ...fter the printer s driver installation is complete network clients can now use the printer 7 Follow the Windows OS instructions to install the printer driver E10170_RT AC1200_Guide indd 86 2015 4 29 15 48 34 ...
Page 87: ...g system using LPR LPD Line Printer Remote Line Printer Daemon Sharing your LPR printer To share your LPR printer 1 From the Windows desktop click Start Devices and Printers Add a printer to run the Add PrinterWizard 2 Select Add a local printer and then click Next E10170_RT AC1200_Guide indd 87 2015 4 29 15 48 34 ...
Page 88: ...a new port then set Type of Port to Standard TCP IP Port Click New Port 4 In the Hostname or IP address field key in the IP address of the wireless router then click Next E10170_RT AC1200_Guide indd 88 2015 4 29 15 48 35 ...
Page 89: ...89 5 Select Custom then click Settings 6 Set Protocol to LPR In the Queue Name field key in LPRServer then click OK to continue E10170_RT AC1200_Guide indd 89 2015 4 29 15 48 35 ...
Page 90: ...e standard TCP IP port 8 Install the printer driver from the vendor model list If your printer is not in the list click Have Disk to manually install the printer drivers from a CD ROM or file E10170_RT AC1200_Guide indd 90 2015 4 29 15 48 35 ...
Page 91: ...91 9 Click Next to accept the default name for the printer 10 Click Finish to complete the installation E10170_RT AC1200_Guide indd 91 2015 4 29 15 48 35 ...
Page 92: ...l the utility automatically NOTE If you have more than one USB drive select the USB device you want to download the files to 2 After the download process is finished click the Download Master icon to start using the utility 3 Click Add to add a download task 4 Select a download type such as BitTorrent HTTP or FTP Provide a torrent file or a URL to begin downloading NOTE For details on Bit Torrent ...
Page 93: ... BitTorrent Setting page 2 Select a specific port for your download task 3 To prevent network congestion you can limit the maximum upload and download speeds under Speed Limits 4 You can limit the maximum number of allowed peers and enable or disable file encryption during downloads 5 4 1 Configuring BitTorrent download settings E10170_RT AC1200_Guide indd 93 2015 4 29 15 48 35 ...
Page 94: ...94 5 4 2 NZB settings You can set up a USENET server to download NZB files After entering USENET settings Apply E10170_RT AC1200_Guide indd 94 2015 4 29 15 48 35 ...
Page 95: ... basic steps in this section before looking for further solutions Upgrade Firmware to the latest version 1 Launch the Web GUI Go to Advanced Settings Administration Firmware Upgrade tab Click Check to verify if the latest firmware is available 2 If the latest firmware is available visit the ASUS global website at http www asus com Networks Wireless_Routers RTAC1200 download to download the latest ...
Page 96: ... When the Ethernet cable connecting your powered on computer with the router is plugged in properly the corresponding LAN LED will be on Check if the wireless setting on your computer matches that of your computer When you connect your computer to the router wirelessly ensure that the SSID wireless network name encryption method and password are correct Check if your network settings are correct E...
Page 97: ... use the MAC address of the computer initially registered on the account You can view the MAC address in the web GUI Network Map Clients page and hover the mouse pointer over your device in Client Status E10170_RT AC1200_Guide indd 97 2015 4 29 15 48 36 ...
Page 98: ...kies and files in your web browser For Internet Explorer 8 follow these steps 1 Launch Internet Explorer 8 then click Tools Internet Options 2 In the General tab under Browsing history click Delete select Temporary Internet Files and Cookies then click Delete NOTES The commands for deleting cookies and files vary with web browsers Disable proxy server settings cancel the dial up connection and set...
Page 99: ...lient Try to adjust antennas of the router to the best direction as described in section 1 4 Positioning your router DHCP server has been disabled 1 Launch the web GUI Go to General Network Map Clients and search for the device that you want to connect to the router 2 If you cannot find the device in the Network Map go to Advanced Settings LAN DHCP Server Basic Config list select Yes on the Enable...
Page 100: ...ng a wireless LAN adapter check if the wireless channel in use conforms to the channels available in your country area If not adjust the channel channel bandwidth and wireless mode If you still cannot connect to the router wirelessly you can reset your router to factory default settings In the router GUI click Administration Restore Save Upload Setting and click Restore E10170_RT AC1200_Guide indd...
Page 101: ...ddress try restarting your network as described in the section Restart your network in following sequence under Basic Troubleshooting The device has been blocked via the Parental Control function Go to General Parental Control and see if the device is in the list If the device is listed under Client Name remove the device using the Delete button or adjust the Time Management Settings E10170_RT AC1...
Page 102: ...en click Apply Reset your router to the default settings Launch the web GUI go to Administration Restore Save Upload Setting and click Restore The default login account and password are both admin How to restore the system to its default settings Go to Administration Restore Save Upload Setting and click Restore The following are the factory default settings User Name admin Password admin Enable D...
Page 103: ...grade failed Launch the rescue mode and run the Firmware Restoration utility Refer to section 5 2 Firmware Restoration on how to use the Firmware Restoration utility E10170_RT AC1200_Guide indd 103 2015 4 29 15 48 36 ...
Page 104: ...configuring your wireless router do the steps described in this section for your host computer and network clients 3 From the Local Area Network LAN Settings screen untick Use a proxy server for your LAN 4 Click OK when done NOTE The screenshots provided are for Windows 7 only The steps and options may be different for Windows 8 and Windows 8 1 E10170_RT AC1200_Guide indd 104 2015 4 29 15 48 36 ...
Page 105: ...browser s help feature for details on disabling the proxy server B Set theTCP IP settings to automatically obtain an IP address Windows 7 8 1 Click Start Control Panel Network and Internet Network and Sharing Center Manage network connections 2 Select Internet Protocol Version 4 TCP IPv4 or Internet ProtocolVersion 6 TCP IPv6 then click Properties E10170_RT AC1200_Guide indd 105 2015 4 29 15 48 37...
Page 106: ...done MAC OS 1 Click the Apple icon located on the top left of your screen 2 Click System Preferences Network Configure 3 From the TCP IP tab select Using DHCP in the Configure IPv4 dropdown list 4 Click Apply Now when done NOTE Refer to your operating system s help and support feature for details on configuring your computer s TCP IP settings E10170_RT AC1200_Guide indd 106 2015 4 29 15 48 37 ...
Page 107: ...ternet Explorer to launch the browser 2 Click Tools Internet options Connections tab 3 Tick Never dial a connection 4 Click OK when done NOTE Refer to your browser s help feature for details on disabling the dial up connection E10170_RT AC1200_Guide indd 107 2015 4 29 15 48 37 ...
Page 108: ...nd Restriction of Chemicals regulatory framework we published the chemical substances in our products at ASUS REACH website at http csr asus com english index aspx Federal Communications Commission Statement This device complies with Part 15 of the FCC Rules Operation is subject to the following two conditions This device may not cause harmful interference This device must accept any interference ...
Page 109: ...y energy and if not installed and used in accordance with the instructions may cause harmful interference to radio communications However there is no guarantee that interference will not occur in a particular installation If this equipment does cause harmful interference to radio or television reception which can be determined by turning the equipment off and on the user is encouraged to try to co...
Page 110: ...e Industry Canada IC radio frequency exposure limits The ASUS Wireless Device should be used in such a manner such that the potential for human contact during normal operation is minimized This device has been evaluated for and shown compliant with the IC Specific Absorption Rate SAR limits when installed in specific host products operated in portable exposure conditions antennas are less than 20 ...
Page 111: ...user d interférence et 2 cet appareil doit accepter toute interférence notamment les interférences qui peuvent a ecter son fonctionnement NCC 警語 經型式認證合格之低功率射頻電機 非經許可 公司 商號或 使用者均不得擅自變更頻率 加大功率或變更原設計之特性及 功能 低功率射頻電機之使用不得影響飛航安全及干擾合法通 信 經發現有干擾現象時 應立即停用 並改善至無干擾時方 得繼續使用 前項合法通信 指依電信法規定作業之無線電通 信 低功率射頻電機須忍受合法通信或工業 科學及醫療用電 波輻射性電機設備之干擾 電磁波曝露量 MPE 標準值 1mWcm2 送測產品實測值 為 0 529 mWcm2 E10170_RT AC1200_Guide indd 111...
Page 112: ... Software Foundation Inc 59 Temple Place Suite 330 Boston MA 02111 1307 USA Everyone is permitted to copy and distribute verbatim copies of this license document but changing it is not allowed Preamble The licenses for most software are designed to take away your freedom to share and change it By contrast the GNU General Public License is intended to guarantee your freedom to share and change free...
Page 113: ...give the recipients all the rights that you have You must make sure that they too receive or can get the source code And you must show them these terms so they know their rights We protect your rights with two steps 1 copyright the software and 2 offer you this license which gives you legal permission to copy distribute and or modify the software Also for each author s protection and ours we want ...
Page 114: ...ification Each licensee is addressed as you Activities other than copying distribution and modification are not covered by this License they are outside its scope The act of running the Program is not restricted and the output from the Program is covered only if its contents constitute a work based on the Program independent of having been made by running the Program Whether that is true depends o...
Page 115: ...distribute the program under these conditions and telling the user how to view a copy of this License Exception if the Program itself is interactive but does not normally print such an announcement your work based on the Program is not required to print an announcement These requirements apply to the modified work as a whole If identifiable sections of that work are not derived from the Program an...
Page 116: ...be distributed under the terms of Sections 1 and 2 above on a medium customarily used for software interchange or c Accompany it with the information you received as to the offer to distribute corresponding source code This alternative is allowed only for noncommercial distribution and only if you received the program in object code or executable form with such an offer in accord with Subsection b...
Page 117: ...y or distribute the Program or its derivative works These actions are prohibited by law if you do not accept this License Therefore by modifying or distributing the Program or any work based on the Program you indicate your acceptance of this License to do so and all its terms and conditions for copying distributing or modifying the Program or works based on it 6 Each time you redistribute the Pro...
Page 118: ...e sole purpose of protecting the integrity of the free software distribution system which is implemented by public license practices Many people have made generous contributions to the wide range of software distributed through that system in reliance on consistent application of that system it is up to the author donor to decide if he or she is willing to distribute software through any other sys...
Page 119: ...Foundation If the Program does not specify a version number of this License you may choose any version ever published by the Free Software Foundation 10 If you wish to incorporate parts of the Program into other free programs whose distribution conditions are different write to the author to ask for permission For software which is copyrighted by the Free Software Foundation write to the Free Soft...
Page 120: ...E THE COST OF ALL NECESSARY SERVICING REPAIR OR CORRECTION 12 IN NO EVENT UNLESS REQUIRED BY APPLICABLE LAW OR AGREED TO IN WRITING WILL ANY COPYRIGHT HOLDER OR ANY OTHER PARTY WHO MAY MODIFY AND OR REDISTRIBUTE THE PROGRAM AS PERMITTED ABOVE BE LIABLE TOYOU FOR DAMAGES INCLUDING ANY GENERAL SPECIAL INCIDENTAL OR CONSEQUENTIAL DAMAGES ARISING OUT OF THE USE OR INABILITY TO USE THE PROGRAM INCLUDIN...
Page 121: ...BURGAZ CAD NO 10 AYAZAGA ISTANBUL CIZGI Elektronik San Tic Ltd Sti Tel No 90 212 3567070 Address CEMAL SURURI CD HALIM MERIC IS MERKEZI No 15 C D 5 6 34394 MECIDIYEKOY ISTANBUL KOYUNCU ELEKTRONiK BiLGi iSLEM SiST SAN VE DISTIC A S Tel No 90 216 5288888 Address EMEK MAH ORDU CAD NO 18 SARIGAZi SANCAKTEPE ISTANBUL E10170_RT AC1200_Guide indd 121 2015 4 29 15 48 37 ...
Page 122: ...107393777 Fax 15106084555 Website usa asus com Online support support asus com ASUS COMPUTER GmbH Germany and Austria Address Harkort Str 21 23 D 40880 Ratingen Germany Support Fax 49 2102 959931 Website asus com de Online contact eu rma asus com sales Technical Support Telephone Component 49 2102 5789555 Telephone Germany System Notebook Eee LCD 49 2102 5789557 Telephone Austria System Notebook E...
Page 123: ...047 2316 2682 09 00 18 00 Mon Fri Sweden 0046 858769407 09 00 18 00 Mon Fri Finland 00358 969379690 10 00 19 00 Mon Fri Denmark 0045 38322943 09 00 18 00 Mon Fri Poland 0048 225718040 08 30 17 30 Mon Fri Spain 0034 902889688 09 00 18 00 Mon Fri Portugal 00351 707500310 09 00 18 00 Mon Fri Slovak Republic 00421 232162621 08 00 17 00 Mon Fri Czech Republic 00420 596766888 08 00 17 00 Mon Fri Switzer...
Page 124: ...57917 11 00 19 00 Mon Fri 0065 67203835 11 00 19 00 Mon Fri Repair Status Only 11 00 13 00 Sat Malaysia 0060 320535077 10 00 19 00 Mon Fri Philippine 1800 18550163 09 00 18 00 Mon Fri India 1800 2090365 09 00 18 00 Mon Sat India WL NW 09 00 21 00 Mon Sun Indonesia 0062 2129495000 09 30 17 00 Mon Fri 500128 Local Only 9 30 12 00 Sat Vietnam 1900 555581 08 00 12 00 13 30 17 30 Mon Sat Hong Kong 0085...
Page 125: ...Countries Romania 0040 213301786 09 00 18 30 Mon Fri Bosnia Herzegovina 00387 33773163 09 00 17 00 Mon Fri Bulgaria 00359 70014411 09 30 18 30 Mon Fri 00359 29889170 09 30 18 00 Mon Fri Croatia 00385 16401111 09 00 17 00 Mon Fri Montenegro 00382 20608251 09 00 17 00 Mon Fri Serbia 00381 112070677 09 00 17 00 Mon Fri Slovenia 00368 59045400 08 00 16 00 Mon Fri 00368 59045401 Estonia 00372 6671796 0...
Page 126: ...Address CEMAL SURURI CD HALIM MERIC IS MERKEZI No 15 C D 5 6 34394 MECIDIYEKOY ISTANBUL KOYUNCU ELEKTRONiK BiLGi iSLEM SiST SAN VE DISTIC A S Tel 90 216 5288888 Address EMEK MAH ORDU CAD NO 18 SARIGAZi SANCAKTEPE ISTANBUL AEEE Yönetmeliğine Uygundur SUPPORT HOTLINE USA CANADA Hotline Number 1 812 282 2787 Language English Availability Mon to Fri 8 30 12 00am EST 5 30am 9 00pm PST Sat to Sun 9 00am...