5-8
Chapter 5: Multiple GPU technology support
Chapter 5
d-Mode (output from the discrete GPU)
i-Mode (output from the
Sandy Bridge GPU)
5.3
LucidLogix
®
Virtu™ solution
LucidLogix
®
Virtu™ is a new generation GPU virtualization software that blurs the line
between embedded graphics and discrete GPU for increased graphics performance. Its GPU
virtualization dynamically assigns tasks to the best available graphics resources based on
power, performance and system load. It allows users to fully utilize the unique capabilities
of advanced Sandy Bridge multimedia features alongside the high end 3D rendering
performance provided by installed graphics cards. For users with diverse needs, LucidLogix
®
Virtu™ GPU virtualization provides great flexibility and efficiency.
•
LucidLogix
®
Virtu™ supports Windows
®
7 operating systems.
•
Intel
®
Quick Sync Video feature is supported by 2nd generation Intel
®
Core™
processor family.
•
iGPU Multi-Monitor support option has to be enabled in BIOS before installing
LucidLogix
®
Virtu™.
•
Supports NVIDIA
®
GF4xx/ 5xx series & AMD
®
HD5xxx/ 6xxx series graphic cards.
5.3.1
Hardware installation
To install LucidLogix
®
Virtu™:
1.
Place the support DVD to the optical drive. The Drivers installation tab appears if your
computer has enabled the Autorun feature.
2.
Click the Drivers tab, then click LucidLogix
®
Virtu™ software.
3.
Follow the onscreen instructions to complete installation.
Both i-Mode and d-Mode enjoy the performance of Intel
®
Sandy Bridge built-in
media features and discrete card. d-Mode is recommended for enhanced 3D gaming
performance.
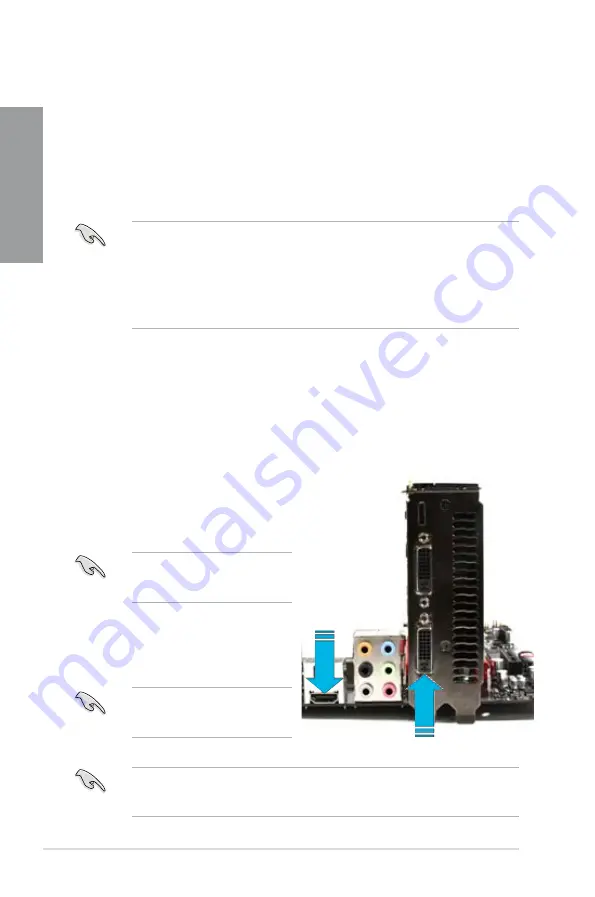
i-Mode
To use LucidLogix
®
Virtu™ solution in i-Mode,
display must be always connected to Sandy
Bridge motherboard video output.
Be sure to set Initial Graphic Adaptor
to iGPU in BIOS to activate i-Mode
support.
d-Mode (recommended mode)
To use LucidLogix
®
Virtu™ solution in
d-Mode, display must be connected to the
discrete GPU installed in the system.
Be sure to set Initial Graphic Adaptor
to PCIE or PCIE/ PCI in BIOS to
enable d-Mode support.
Summary of Contents for P8Z68-V PRO
Page 1: ...Motherboard P8Z68 V PRO ...
Page 50: ...2 32 Chapter 2 Hardware information Chapter 2 C B A 5 6 4 ...
Page 53: ...ASUS P8Z68 V PRO 2 35 Chapter 2 1 2 3 To remove a DIMM 2 3 4 DIMM installation B A ...
Page 56: ...2 38 Chapter 2 Hardware information Chapter 2 2 3 6 ATX Power connection 1 2 OR OR ...
Page 57: ...ASUS P8Z68 V PRO 2 39 Chapter 2 2 3 7 SATA device connection OR 2 OR 1 ...
Page 106: ...3 40 Chapter 3 BIOS setup Chapter 3 ...


