background image

2-12

Chapter 2: BIOS Information

Boot Up NumLock Status [On]

This field enables users to activate the Number Lock function upon system
boot. Configuration options: [Off] [On]

Keyboard Auto-Repeat Rate [6/Sec]

This controls the speed at which the system registers repeated keystrokes.
Options range from 6 to 30 characters per second. Configuration options:
[6/Sec] [8/Sec] [10/Sec] [12/Sec] [15/Sec] [20/Sec] [24/Sec] [30/Sec]

Keyboard Auto-Repeat Delay [1/4 Sec]

This field sets the time interval for displaying the first and second
characters. Configuration options: [1/4 Sec] [1/2 Sec] [3/4 Sec] [1 Sec]

2.4

Advanced Menu

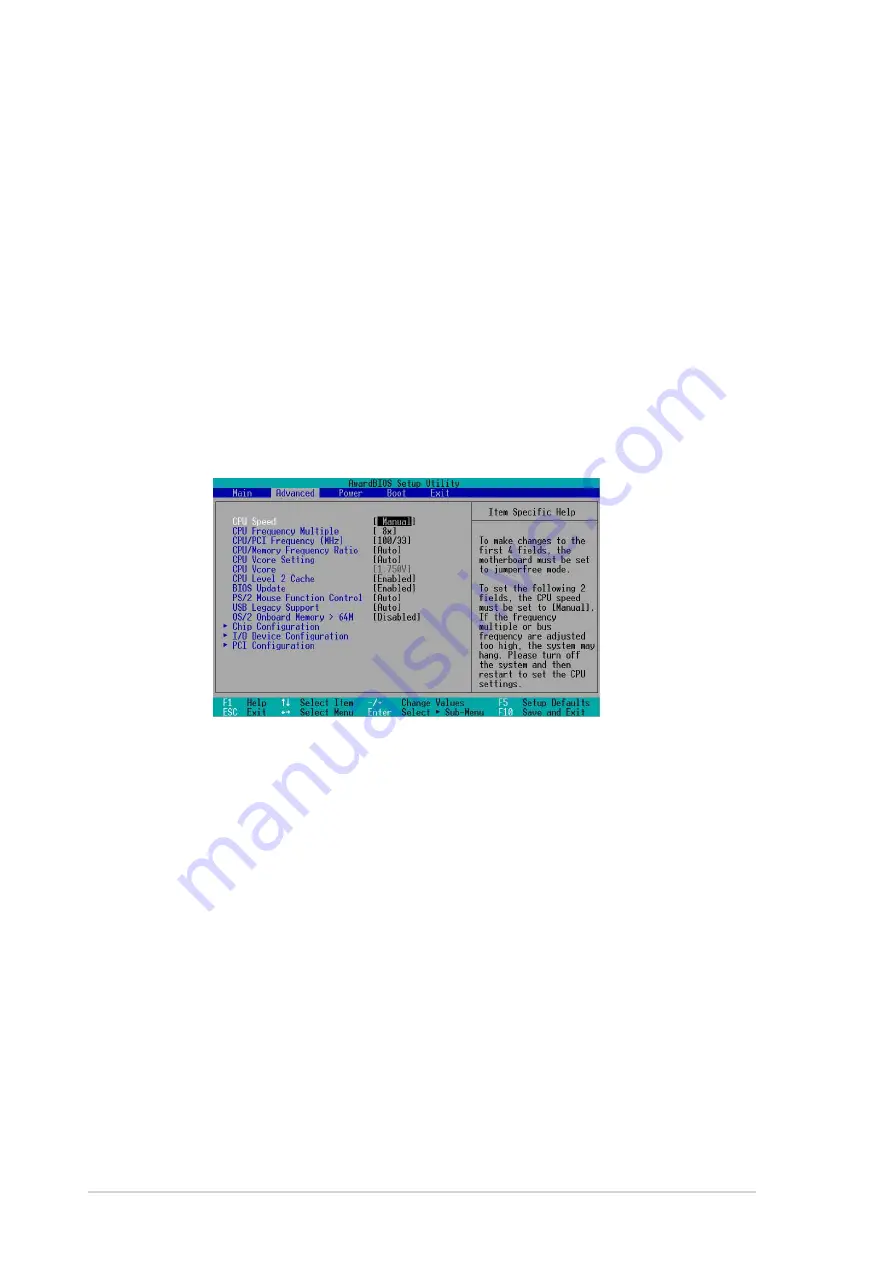
CPU Speed

This displays the current speed of the CPU installed.

CPU Frequency Multiple 

(when CPU Speed is set to [Manual])

This field displays frequency multiple value between the CPU’s internal
frequency (CPU speed) and external frequency.

CPU/PCI Frequency (MHz) 

(when CPU Speed is set to [Manual])

This feature tells the clock generator what frequency to send to the system
bus and PCI bus. The bus frequency (external frequency) multiplied by the
bus multiple equals the CPU speed.

CPU/Memory Frequency Ratio [Auto]

This field determines whether the memory clock frequency is set to be in
synchronous or asynchronous mode with respect to the system frequency.
The options that appear in the popup menu vary according to the CPU
Frequency (MHz). Configuration options: [Auto] [1:1] [3:4] [3:5]

Summary of Contents for P4SE

Page 1: ...Motherboard P4SE User Guide ...

Page 2: ...A PARTICULAR PURPOSE IN NO EVENT SHALL ASUS ITS DIRECTORS OFFICERS EMPLOYEES OR AGENTS BE LIABLE FOR ANY INDIRECT SPECIAL INCIDENTAL OR CONSEQUENTIAL DAMAGES INCLUDING DAMAGES FOR LOSS OF PROFITS LOSS OF BUSINESS LOSS OF USE OR DATA INTERRUPTION OF BUSINESS AND THE LIKE EVEN IF ASUS HAS BEEN ADVISED OF THE POSSIBILITY OF SUCH DAMAGES ARISING FROM ANY DEFECT OR ERROR IN THIS MANUAL OR PRODUCT SPECI...

Page 3: ... Welcome 1 2 1 2 Package contents 1 2 1 3 Motherboard components 1 3 1 4 Motherboard layout 1 6 1 5 Before you proceed 1 7 1 6 Central Processing Unit CPU 1 7 1 7 System memory 1 8 1 8 Expansion Slots 1 9 1 8 1 Configuring an expansion card 1 9 1 8 2 Standard Interrupt Assignments 1 9 1 9 Switches and Jumpers 1 10 1 10 Connectors 1 14 Chapter 2 BIOS Information 2 1 2 1 Managing and updating your B...

Page 4: ...2 PCI IRQ Resource Exclusion 2 18 2 5 Power Menu 2 19 2 5 1 Power up Control 2 21 2 5 2 Hardware Monitor 2 22 2 6 Boot Menu 2 22 2 7 Exit Menu 2 24 Chapter 3 Starting Up 3 1 3 1 Install an operating system 3 3 3 2 Support CD information 3 3 3 2 1 Running the support CD 3 3 3 2 2 Software drivers and installation menus 3 4 3 3 Software Information 3 5 3 3 1 ASUS Update 3 5 3 3 2 ASUS PC Probe 3 6 S...

Page 5: ...cause harmful interference to radio or television reception which can be determined by turning the equipment off and on the user is encouraged to try to correct the interference by one or more of the following measures Reorient or relocate the receiving antenna Increase the separation between the equipment and receiver Connect the equipment to an outlet on a circuit different from that to which th...

Page 6: ...your area If you are not sure about the voltage of the electrical outlet you are using contact your local power company If the power supply is broken do not try to fix it by yourself Contact a qualified service technician or your retailer Operation safety Before installing the motherboard and adding devices on it carefully read all the manuals that came with the package Before using the product ma...

Page 7: ...roducts The ASUS websites are listed in the ASUS Contact Information on page viii 2 Optional Documentation Your product package may include optional documentation such as warranty flyers that may have been added by your dealer These documents are not part of the standard package WARNING DANGER Information to prevent injury to yourself when trying to complete a task CAUTION Information to prevent d...

Page 8: ...US COMPUTER INTERNATIONAL America Address 6737 Mowry Avenue Mowry Business Center Building 2 Newark CA 94560 USA General Fax 1 510 608 4555 General Email tmd1 asus com Technical Support Support Fax 1 510 608 4555 General Support 1 502 933 8713 Web Site www asus com Support Email tsd asus com ASUS COMPUTER GmbH Europe Address Harkortstr 25 40880 Ratingen BRD Germany General Fax 49 2102 442066 Gener...

Page 9: ... PCI 2 x UltraDMA 133 100 66 C Media 4 channel CODEC S PDIF out interface ASUS EZPlug for flexible power connectivity ASUS MyLogo for customized boot logos ASUS Jumperfree support S PDIF out interface on audio model only SFS Stepless Frequency Selection Suspend to RAM 1 x Parallel 2 x Serial 1 x PS 2 Keyboard 1 x PS 2 Mouse 2 x USB 1 1 1 x Audio I O Game MIDI on audio models only CPU power Chassis...

Page 10: ...EPROM ASUS JumperFree ASUS MyLogo Award BIOS with ACPI DMI2 0 PnP WfM2 0 Green TCAV Trend Chip Away Virus PCI 2 2 USB 1 1 WfM2 0 DMI2 0 WOR WOL Chassis Intrusion SM Bus ATX form factor 12 in x 8 6 in 30 5 cm x 21 9 cm Device drivers ASUS PC Probe Trend Microtm PC cillin 2002 anti virus software ASUS LiveUpdate Utility User s manual Support CD 1 x UltraDMA 133 100 66 cable FDD cable ...

Page 11: ...E Motherboard This chapter gives information about the ASUS P4SE motherboard that came with the system This chapter includes the motherboard layout jumper settings and connector locations Motherboard Info Chapter 1 ...

Page 12: ...ive desktop platform solution Up to 3GB of system memory of PC 2700 2100 1600 DDR Note PC2700 max to 2GB only High resolution graphics via an AGP 4X slot Digital Audio Interface for 3D sound Two USB ports plus headers for four more 1 2 Package contents Check your ASUS P4SE package for the following items ASUS P4SE motherboard ATX form factor 12 in x 8 6 in ASUS P4SE support CD 1 pc 80 conductor ri...

Page 13: ...ASUS P4SE Motherboard 1 3 1 3 Motherboard components 17 18 19 20 21 22 25 24 23 2 3 4 15 1 11 5 14 12 10 8 6 13 7 16 9 ...

Page 14: ...er supply to this connector to provide sufficient power to the CPU Floppy Disk connector This connector connects the provided ribbon cable for the floppy disk drive One side of the connector is slotted to prevent incorrect insertion of the floppy disk cable Northbridge Controller This SiS 645 controller integrates a high performance host interface for the Intel Pentium 4 processor a memory control...

Page 15: ...I 2 2 expansion slots support bus master PCI cards like SCSI and LAN cards with 133MB s maximum output PS 2 mouse port This green 6 pin connector is for a PS 2 mouse Parallel port This 25 pin port connects a parallel printer a scanner or other devices GAME MIDI port This connector supports a joystick or a game pad for playing games and MIDI devices for playing or editing audio files on audio model...

Page 16: ... 64 72 bit 184 pin module 0 1 DDR DIMM3 64 72 bit 184 pin module 4 5 DDR DIMM2 64 72 bit 184 pin module 2 3 USB2 PARALLEL PORT COM1 COM2 CPUFAN1 PCI5 PCI6 PCI4 PCI3 PCI2 PCI1 ATX Power Connector USB1 USB2 VEN1 SECONDARY IDE LED1 USB3 USBV2 SMB1 CLRCMOS1 JEN1 PS 2KBMS T Mouse B Keyboard AUX12V1 DDRVOL1 ATX12V1 FLOPPY1 ASUS ASIC with Hardware Monitor SiS645 HOST Memory Controller SiS961B MuTLOL Medi...

Page 17: ...edges to avoid touching the ICs on them 4 Whenever you uninstall any component place it on a grounded antistatic pad or in the bag that came with the component 5 Before you install or remove any component ensure that the ATX power supply is switched off or the power cord is detached from the power supply Failure to do so may cause severe damage to the motherboard peripherals and or components P4SE...

Page 18: ...R DIMM is single notched while an SDR DIMM is double notched Note PC2700 max to 4 banks only 1 A DDR DIMM is keyed with a notch so that it fits in only one direction DO NOT force a DIMM into a socket to avoid damaging the DIMM P4SE P4SE 184 Pin DDR DIMM Sockets 80 Pins 104 Pins 1 6 Central Processing Unit CPU The motherboard comes with a surface mount 478 pin Zero Insertion Force ZIF socket This s...

Page 19: ...Onboard USB controller HC0 shared Onboard USB controller HC1 shared AGP shared When using PCI cards on shared slots ensure that the drivers support Share IRQ or that the cards do not need IRQ assignments Otherwise conflicts will arise between two PCI groups 1 8 2 Standard Interrupt Assignments IRQ Priority Standard Function 0 1 System Timer 1 2 Keyboard Controller 2 N A Programmable Interrupt Cont...

Page 20: ...ough the BIOS setup instead of using the DIP switches P4SE P4SE DIP Switches DSW1 1 Frequency Selection 2 Frequency Selection 3 Frequency Selection 4 Frequency Selection 5 Frequency Selection ON OFF ON 1 2 3 4 5 P4SE P4SE JumperFree Mode Setting JEN1 Jumper Free Default Jumper Mode DSW1 ON 1 2 3 4 5 ON OFF 2 3 1 2 The JEN jumper see below must be set to pins 1 2 for Jumper Mode if you wish to use ...

Page 21: ...z ON 1 2 3 4 5 133MHz 166MHz ON 1 2 3 4 5 133MHz 133MHz ON 1 2 3 4 5 100MHz 200MHz 3 Keyboard Power 3 pin KBPWR1 This jumper allows you to enable or disable the keyboard wake up feature Set this jumper to pins 2 3 5VSB if you wish to wake up the computer when you press a key on the keyboard the default is the Space Bar This feature requires an ATX power supply that can supply at least 1A on the 5V...

Page 22: ...4SE USB Device Wake Up USBV1 USBV2 5V 1 2 5VSB 2 3 Default 5VSB 2 3 5V 1 2 Default USBV3 1 This feature requires a power supply that can provide at least 1A on the 5VSB lead when these jumpers are set to 5VSB Otherwise the system does not power up 2 The total current consumed must NOT exceed the power supply capability 5VSB whether under normal condition or in sleep mode 5 CPU voltage selector 3 p...

Page 23: ...ard button cell battery To erase the RTC RAM 1 Turn OFF the computer and unplug the power cord 2 Remove the motherboard battery 3 Remove the jumper cap from the CLRTC jumper 1 2 and place it on jumpers 2 3 for a few seconds 4 Replace the jumper cap to the Normal postion 1 2 5 Replace the battery 6 Plug the power cord and turn ON the computer 7 Hold down the Del key during the boot process and ente...

Page 24: ... that you connect non UltraDMA133 100 66 devices to the secondary IDE connector If you install two hard disks you must configure the second drive as a slave device by setting its jumper accordingly Refer to the hard disk documentation for the jumper settings BIOS supports specific device bootup If you have more than two UltraDMA133 100 66 devices purchase another UltraDMA133 100 66 cable You may c...

Page 25: ... If the case mounted LED does not light try reversing the 2 pin plug IDELED1 3 Floppy disk drive connector 34 1 pin FLOPPY This connector supports the provided floppy drive ribbon cable After connecting one end to the motherboard connect the other end to the floppy drive Pin 5 is removed to prevent incorrect insertion when using ribbon cables with pin 5 plug P4SE NOTE Orient the red markings on th...

Page 26: ...r cap over the pins labeled Chassis Signal and Ground to close the circuit P4SE P4SE Chassis Alarm Lead CHASSIS1 5VSB_MB Chassis Signal GND 5 USB headers two 10 1 pin USB2 USB3 If the USB port connectors on the rear panel are inadequate two USB headers are available for additional USB port connectors Connect the bundled 2 port USB connector set to this header and mount the USB bracket to an open s...

Page 27: ...ectors Lack of sufficient air flow within the system may damage the motherboard components These are not jumpers DO NOT place jumper caps on the fan connectors P4SE P4SE 12 Volt Fan Connectors CPUFAN1 PWRFAN1 CHASFAN1 GND Rotation 12V GND Rotation 12V GND Rotation 12V 7 SMBus connector 6 1 pin SMB This connector allows you to connect SMBus System Management Bus devices Devices communicate with an ...

Page 28: ...optional wireless transmitting and receiving infrared module This module mounts to a small opening on system chassis that support this feature You must also configure the UART2 Use As parameter in BIOS to set UART2 for use with IR See section 4 4 2 I O Device Configuration for details Use the five pins as shown in Back View and connect a ribbon cable from the module to the motherboard SIR connecto...

Page 29: ...ing a standard ATX power supply that does not have the added ATX 12V plug then simply connect one of the 4 pin device power plugs into the ASUS EZ Plug connector labeled AUX12V P4SE P4SE ATX Auxiliary Power Connectors ATXPWR1 ATX12V1 AUX12V1 12V GND 5V GND Pin 1 3 3VDC 12 0VDC COM PS_ON COM COM COM 5 0VDC 5 0VDC 5 0VDC PWR_OK 12 0VDC 3 3VDC 3 3VDC COM 5 0VDC COM 5 0VDC COM 5VSB 12V DC COM 12V DC C...

Page 30: ... Audio Channel Ground Ground CD1 Black Right Audio Channel Left Audio Channel Ground Ground MODEM Modem Out Ground Modem In Ground 12 Front panel audio connector 10 1 pin IAPANEL1 on audio models only This is an interface for the Intel front panel audio cable that allow convenient connection and control of audio devices P4SE P4SE Audio Panel Connector IAPANEL1 LineOut_RL MIC LineOut_FR LineOut_FL ...

Page 31: ...to the S PDIF Out connector on the motherboard and the other end to the S PDIF module 14 Line out connector 5 pin ALOUT1 on audio models only This connector supplies a front panel Line out jack for stereo output P4SE P4SE ALOUT Connector ALOUT1 1 ALOUT1_LOUT_R BLOUT1_LOUT_L ALOUT1_LOUT_R BLOUT1_LOUT_L P4SE P4SE Digital Audio Connector 5V SPDIFOUT GND SPDIF_OUT1 The S PDIF Out module is not include...

Page 32: ... optional This connector accommodates a Smart Card Reader that allows you to conveniently make transactions such as financial health care telephony or traveling services through a Smart Card user interface software P4SE P4SE Smartcard SMARTCON1 NC SCPWR NC NC NC2 VCC GND SCIO SCRRES NC SCRCLK 1 NC SCRREST System Power LED Lead 3 1 pin PLED This 3 1 pin connector connects to the system power LED Th...

Page 33: ...witch to this 2 pin connector ATX Power Switch Soft Off Switch Lead 2 pin PWRBTN This connector connects a switch that controls the system power Pressing the power switch turns the system between ON and SLEEP or ON and SOFT OFF depending on the BIOS or OS settings Pressing the power switch while in the ON mode for more than 4 seconds turns the system OFF Reset Switch Lead 2 pin RESET This 2 pin co...

Page 34: ...1 24 Chapter 1 Motherboard Information ...

Page 35: ...ard 2 1 This chapter gives information about the ASUS P4SE Binary Input Output System BIOS This chapter includes updating the BIOS using the ASUS AFLASH BIOS that is bundled with the support CD BIOS Information Chapter 2 ...

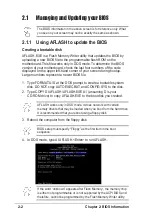
Page 36: ...pe FORMAT A S at the DOS prompt to create a bootable system disk DO NOT copy AUTOEXEC BAT and CONFIG SYS to the disk 2 Type COPY D AFLASH AFLASH EXE A assuming D is your CD ROM drive to copy AFLASH EXE to the boot disk you created 4 In DOS mode type A AFLASH Enter to run AFLASH 3 Reboot the computer from the floppy disk AFLASH works only in DOS mode It does not work with certain memory drivers tha...

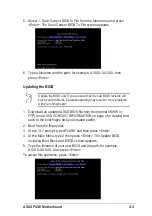
Page 37: ...ncluding Boot Block and ESCD screen appears 5 Type the filename of your new BIOS and the path for example A XXX XX XXX then press Enter To cancel this operation press Enter Updating the BIOS 5 Select 1 Save Current BIOS to File from the Main menu and press Enter The Save Current BIOS To File screen appears 6 Type a filename and the path for example A XXX XX XXX then press Enter Update the BIOS onl...

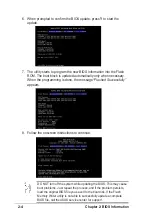
Page 38: ...y When the programming is done the message Flashed Successfully appears 8 Follow the onscreen instructions to continue DO NOT turn off the system while updating the BIOS This may cause boot problems Just repeat the process and if the problem persists load the original BIOS file you saved to the boot disk If the Flash Memory Writer utility is not able to successfully update a complete BIOS file cal...

Page 39: ... Setup utility otherwise POST continues with its test routines The Setup program is designed to make it as easy to use as possible It is a menu driven program which means you can scroll through the various sub menus and make your selections among the predetermined choices Because the BIOS software is constantly being updated the following BIOS setup screens and descriptions are for reference purpo...

Page 40: ...r the highlighted field Home or PgUp Moves the cursor to the first field End or PgDn Moves the cursor to the last field F5 Resets the current screen to its Setup Defaults F10 Saves changes and exits Setup General help In addition to the Item Specific Help window the BIOS setup program also provides a General Help screen You may launch this screen from any menu by simply pressing F1 or the Alt H co...

Page 41: ... some time to familiarize yourself with the legend keys and their corresponding functions Practice navigating through the various menus and sub menus If you accidentally make unwanted changes to any of the fields use the set default hot key F5 to load the Setup default values While moving around through the Setup program note that explanations appear in the Item Specific Help window located to the...

Page 42: ...his password allows full access to the BIOS Setup menus To clear the password highlight this field and press Enter The same dialog box as above appears Press Enter The password is set to Disabled Make a copy of the original BIOS on a bootable floppy disk before setting passwords Label it as CMOS Backup copy A note about passwords The BIOS Setup program allows you to specify passwords in the Main m...

Page 43: ...HDD Manually enter the number of cylinders heads and sectors per track for the drive Refer to the drive documentation or label for this information Before attempting to configure a hard disk drive make sure you have the correct configuration information supplied by the drive manufacturer Halt On All Errors This field specifies the types of errors that will cause the system to halt Configuration op...

Page 44: ... Note that LBA Mode is necessary for drives with more than 504MB storage capacity Configuration options LBA LARGE Normal Match Partition Table Manual Cylinders This field configures the number of cylinders Refer to the drive documentation to determine the correct value To make changes to this field set the Type field to User Type HDD and the Translation Method field to Manual Head This field confi...

Page 45: ...evices Set to Disabled to suppress Ultra DMA capability To make changes to this field set the Type field to User Type HDD Configuration options 0 1 2 3 4 5 Disabled Maximum LBA Capacity This field shows the drive s maximum LBA capacity as calculated by the BIOS based on the drive information you entered Multi Sector Transfers Maximum This option automatically sets the number of sectors per block t...

Page 46: ...anced Menu CPU Speed This displays the current speed of the CPU installed CPU Frequency Multiple when CPU Speed is set to Manual This field displays frequency multiple value between the CPU s internal frequency CPU speed and external frequency CPU PCI Frequency MHz when CPU Speed is set to Manual This feature tells the clock generator what frequency to send to the system bus and PCI bus The bus fr...

Page 47: ...etect a USB device at startup If detected the USB controller legacy mode is enabled If not detected the USB controller legacy mode is disabled When you set this field to Disabled the USB controller legacy mode is disabled whether or not you are using a USB device Configuration options Disabled Enabled Auto OS 2 Onboard Memory 64M Disabled When using OS 2 operating systems with installed DRAM of gr...

Page 48: ...is parameter allows you to set the optimal timings for items 2 5 depending on the memory modules that you are using The default setting is By SPD which configures items 2 5 by reading the contents in the SPD Serial Presence Detect device The EEPROM on the memory module stores critical information about the module such as memory type size speed voltage interface and module banks Configuration optio...

Page 49: ...uncacheable if your display card does not support this feature otherwise the system may not boot Configuration options UC USWC Memory Hole At 15M 16M Disabled This field allows you to reserve an address space for ISA expansion cards Setting the address space to a particular setting makes that memory space unavailable to other system components Expansion cards can only access memory up to 16MB Conf...

Page 50: ...7 This field allows you to set the address of the onboard parallel port connector If you disable this field the Parallel Port Mode and ECP DMA Select configurations are not available Configuration options Disabled 378H IRQ7 278H IRQ5 Parallel Port Mode ECP EPP This field allows you to set the operation mode of the parallel port Normal allows normal speed operation but in one direction only EPP all...

Page 51: ... Latency Timer 32 Leave this field to the default setting 32 for best performance and stability Primary VGA BIOS PCI VGA Card This field allows you to select the primary graphics card or the onboard VGA The option Onboard VGA appears only if you installed a PCI or AGP card Configuration options PCI VGA Card AGP VGA Card USB Function Enabled This field allows you to select the number of USB 1 1 con...

Page 52: ...ll a legacy ISA card that requires a unique IRQ and you are NOT using ICU Configuration options No ICU Yes 2 4 3 2 PCI IRQ Resource Exclusion 4 4 3 1 Onboard PCI Devices Control Onboard AC97 Audio Controller Auto Auto allows the BIOS to detect whether you are using any modem audio device If a modem audio device is detected the onboard modem audio controller is enabled if no modem audio device is d...

Page 53: ...cally puts the system into suspend mode after a brief period of system inactivity Min Saving allows the least power saving as the system enters suspend mode only after a long period of inactivity Configuration options User Defined Disabled Min Saving Max Saving You should install the Advanced Power Management APM utility to keep the system time updated even when the computer enters suspend mode In...

Page 54: ...e setting holding the ATX switch for more than 4 seconds powers off the system Configuration options Soft off Suspend V H SYNC Blank blanks the screen and turns off vertical and horizontal scanning Configuration options Blank Screen V H SYNC Blank DPMS Standby DPMS Suspend DPMS OFF DPMS Reduce ON HDD Power Down Disabled Shuts down any IDE hard disk drives in the system after a period of inactivity...

Page 55: ...or automatic system power up You may configure your system to power up at a certain time of the day by selecting Everyday or at a certain time and day by selecting By Date Configuration options Disabled Everyday By Date 2 5 1 Power Up Control AC PWR Loss Restart Disabled This allows you to set whether or not to reboot the system after power interruptions Disabled leaves your system off while Enabl...

Page 56: ...utomatically detects and displays the CPU chassis and power fan speeds in rotations per minute RPM If any of the fans is not connected to the motherboard that field shows N A VCORE Voltage 3 3V Voltage 5V Voltage 12V Voltage The onboard hardware monitor automatically detects the voltage output through the onboard voltage regulators 2 6 Boot Menu 2 5 2 Hardware Monitor MB Temperature xxxC xxxF CPU ...

Page 57: ...ows you to select which ATAPI CD ROM drive to use in the boot sequence Pressing Enter will show the product IDs of all your connected ATAPI CD ROM drives Other Boot Device Select INT18 Device Network Configuration options Disabled SCSI Boot Device INT18 Device Network Boot Sequence The Boot menu allows you to select four types of boot devices using the up and down arrow keys By using the or Space ...

Page 58: ... retesting a second third and fourth time Configuration options Disabled Enabled Boot Up Floppy Seek Enabled When enabled the BIOS will seek the floppy disk drive to determine whether the drive has 40 or 80 tracks Configuration options Disabled Enabled Full Screen Logo Enabled This allows you to enable or disable the full screen logo display feature Configuration options Disabled Enabled Interrupt...

Page 59: ...s After you select this option a confirmation window appears Select Yes to save any changes to the non volatile RAM Exit Saving Changes Once you are finished making your selections choose this option from the Exit menu to ensure the values you selected are saved to the CMOS RAM The CMOS RAM is sustained by an onboard backup battery and stays on even when the PC is turned off When you select this o...

Page 60: ...2 26 Chapter 2 BIOS Information ...

Page 61: ...3 1 ASUS P4SE Motherboard This chapter helps you power up your system and install drivers and utilities that came with the support CD Starting Up Chapter 3 ...

Page 62: ... To begin using the support CD simply insert the CD into your CD ROM drive If Autorun is enabled in your computer the software and drivers menu automatically appears on your screen If the installation menu did not appear automatically locate and double click on the file ASSETUP EXE from the BIN folder in the support CD to display the menu The contents of the support CD are subject to change at any...

Page 63: ...stalling the C Media audio driver and software applications ASUS PC Probe This smart utility monitors the fan speed CPU temperature and system voltages and alerts you on any detected problems This utility helps you keep your computer at a healthy operating condition ASUS Update This item installs the ASUS Update This program allows you to download the latest version of the BIOS from the ASUS websi...

Page 64: ...3Deep is the first application that gives online gamers the competitive edge in multi player skirmishes This application removes dark washed out graphics to deliver true vibrant colors CLICK THE RIGHT ARROW TO SEE THE NEXT MENU Show Motherboard Information Click this item to display the general specifications for the P4SE motherboard Browse Support CD Click this item to display the support CD cont...

Page 65: ...e the file Select the file click Save then follow the screen instructions to complete the update process 2 Select desired update method Click Next 1 Launch the utility from your Windows Start menu Programs AsusUpdate Vx xx xx AsusUpdate The ASUS Update initial screen appears 3 If you selected Updating or Downloading from the Internet select the ASUS FTP site nearest you to avoid network traffic or...

Page 66: ...lso has a utility that lets you review useful information about your computer such as hard disk space memory usage and CPU type CPU speed and internal external frequencies through the DMI Explorer Starting ASUS PC Probe When ASUS PC Probe starts a splash screen appears allowing you to select whether to show the screen again when you open PC Probe or not To bypass this startup screen clear the Show...

Page 67: ... Adjustment Move the slider up to increase the threshold level or down to decrease the threshold level Fan Monitor Shows the PC fan rotation Fan Warning Threshold Adjustment Move the slider up to increase the threshold level or down to decrease the threshold level Voltage Monitor Shows the PC voltages Monitor Summary Shows a summary of the items being monitored ...

Page 68: ...r the CPU temperature reaches the threshold value History Lets you record the monitoring activity of a certain component of your PC for future reference Fan Control Lets you enable disable Smart Fan Control Smart Fan Control adjusts the fan speed automatically based on the current CPU temperature and predefined threshold Hard Drives Shows the used and free space of the PC s hard disk drives and th...

Page 69: ...US PC Probe senses a problem with your PC portions of the ASUS PC Probe icon change to red the PC speaker beeps and the ASUS PC Probe monitor appears Device Summary Shows a summary of devices present in your PC DMI Explorer Shows information pertinent to the PC such as CPU type CPU speed and internal external frequencies and memory size Utility NOTE This feature is currently unavailable ...

Page 70: ...3 10 Chapter 3 Starting Up ...

Reviews: