


4-28
Chapter 4: Software support
4.4.5
Marvell RAID utility
The onboard Marvell SATA 6.0 Gb/s controller allows you to create a RAID 0 or
RAID 1 array using two SATA hard disk drives. Refer to Chapter 2 of your
motherboard user manual for the exact location of the Marvell SATA 6.0 Gb/s
connector.
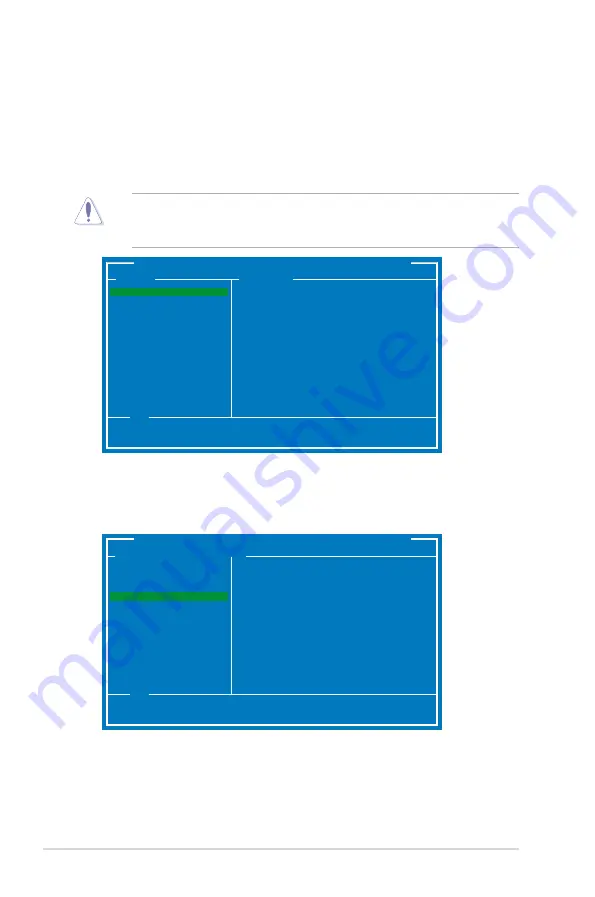
To enter the Marvell utility, press
<Ctrl>
+
<M>
during POST.
All exisiting data on the hard disk drives will be erased when creating or deleting
a RAID array. Ensure that you have back up all your data in your hard disk
drives before making any change to the drive status.
Marvell BIOS Setup (c) 2009 Marvell Technology Group Ltd.
Topology
Information
Help
Marvell RAID on chip controller.
ENTER: Operation F10: Exit/Save ESC: Return
HBA 0: Marvell 0
├
Virtual Disks
└
Free Physical Disks
├
PD 0: ST3160812AS
└
PD 8: ST3160812AS
Vendor ID :
1B4B
Device ID :
9130
Revision ID :
B1
BIOS Version :
1.0.0.1028
Firmware Version:
2.2.0.1105
PCIe Speed Rate :
5.0Gbps
Configure SATA as:
AHCI Mode
▶
▶
Create a RAID Array
1. Move the selection bar to
HBA 0: Marvell 0
and press <Enter>.
2. Select Configuration Wi��ard and press <Enter>.
3. Press <Space> to select the hard drives to be included in the RAID array.
An asterisk (*) appears in front of the selected hard drive. After selecting all
the drives needed for the RAID array, press <Enter> to continue.
Marvell BIOS Setup (c) 2009 Marvell Technology Group Ltd.
Configure->Select free disks
Help
Use space bar to select the free disks to be used in the array.
ENTER: Operation SPACE: Select F10: Exit/Save ESC: Return
HBA 0: Marvell 0
├
Virtual Disks
└
Free Physical Disks
*
├
PD 0: ST3160812AS
└
PD 8: ST3160812AS
Port ID :
0
PD ID :
0
Type :
SATA PD
Status :
Unconfigured
Size :
152626MB
Feature Support :
MCQ 3G 48Bits
Current Speed :
3G
Model :
ST3160812AS
Serial :
9LS0F4HL
FW Version :
3.AAE
▶
▶
Summary of Contents for Maximus iv extreme rev 3
Page 1: ...Motherboard Maximus IV Extreme Z ...
Page 73: ...A B 1 2 3 2 3 2 CPU installation ASUS Maximus IV Extreme Z 2 41 ...
Page 74: ...C B A 5 6 4 2 42 Chapter 2 Hardware information ...
Page 77: ...1 2 3 To remove a DIMM 2 3 4 DIMM installation B A ASUS Maximus IV Extreme Z 2 45 ...
Page 80: ...2 3 6 ATX Power connection 1 2 OR OR 2 48 Chapter 2 Hardware information ...
Page 81: ...2 3 7 SATA device connection OR 2 OR 1 ASUS Maximus IV Extreme Z 2 49 ...
Page 90: ...2 58 Chapter 2 Hardware information ...
Page 180: ...4 36 Chapter 4 Software support ...