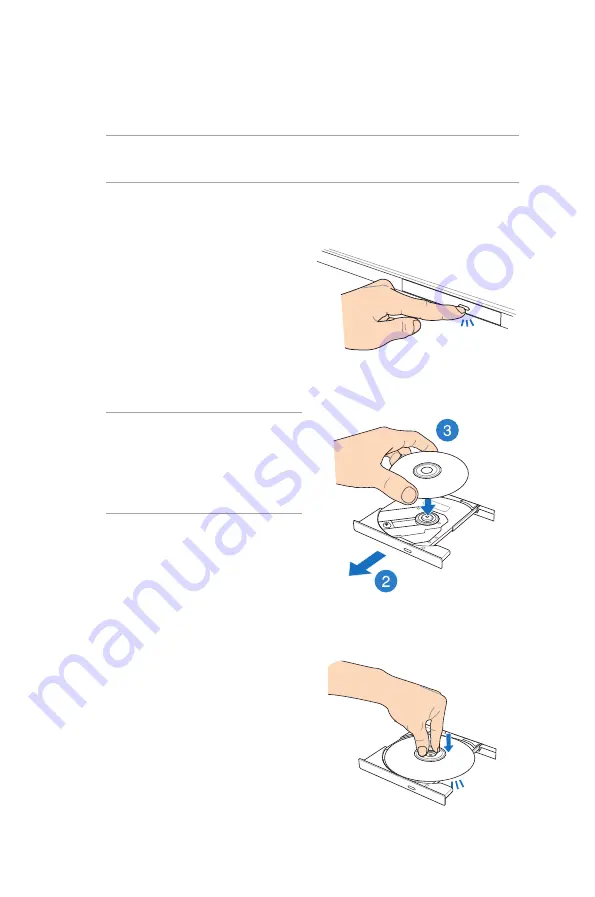
Inserting an optical disc
1. While the Notebook PC is
on, press the electronic eject
button to partially eject the
optical drive tray.
2. Gently pull out the drive tray.
IMPORTANT!
Be careful not
to touch the optical drive lens.
Ensure that there are no objects
that may get jammed under the
drive tray.
Using the optical drive
(on selected models)
3. Hold the disc by the edge,
with its printed side up, then
gently place it inside the hub.
4. Push down the disc’s plastic
hub until it snaps onto the
optical drive hub.
NOTE:
The actual location of the electronic eject button may vary
depending on your Notebook PC model.
Summary of Contents for E7545
Page 1: ...Notebook PC E Manual ...
Page 11: ...Notebook PC E Manual 11 Chapter 1 Hardware Setup ...
Page 22: ...22 Notebook PC E Manual ...
Page 23: ...Notebook PC E Manual 23 Chapter 2 Using your Notebook PC ...
Page 25: ...Notebook PC E Manual 25 Lift to open the display panel Press the power button ...
Page 35: ...Notebook PC E Manual 35 Chapter 3 Working with Windows 8 ...
Page 61: ...Notebook PC E Manual 61 Chapter 4 ASUS apps ...
Page 68: ...68 Notebook PC E Manual ...
Page 69: ...Notebook PC E Manual 69 Chapter 5 Power on Self test POST ...
Page 82: ...82 Notebook PC E Manual ...
Page 83: ...Notebook PC E Manual 83 Appendices ...
Page 104: ...104 Notebook PC E Manual ...


