


PROGRAMMING THE TABBER
66
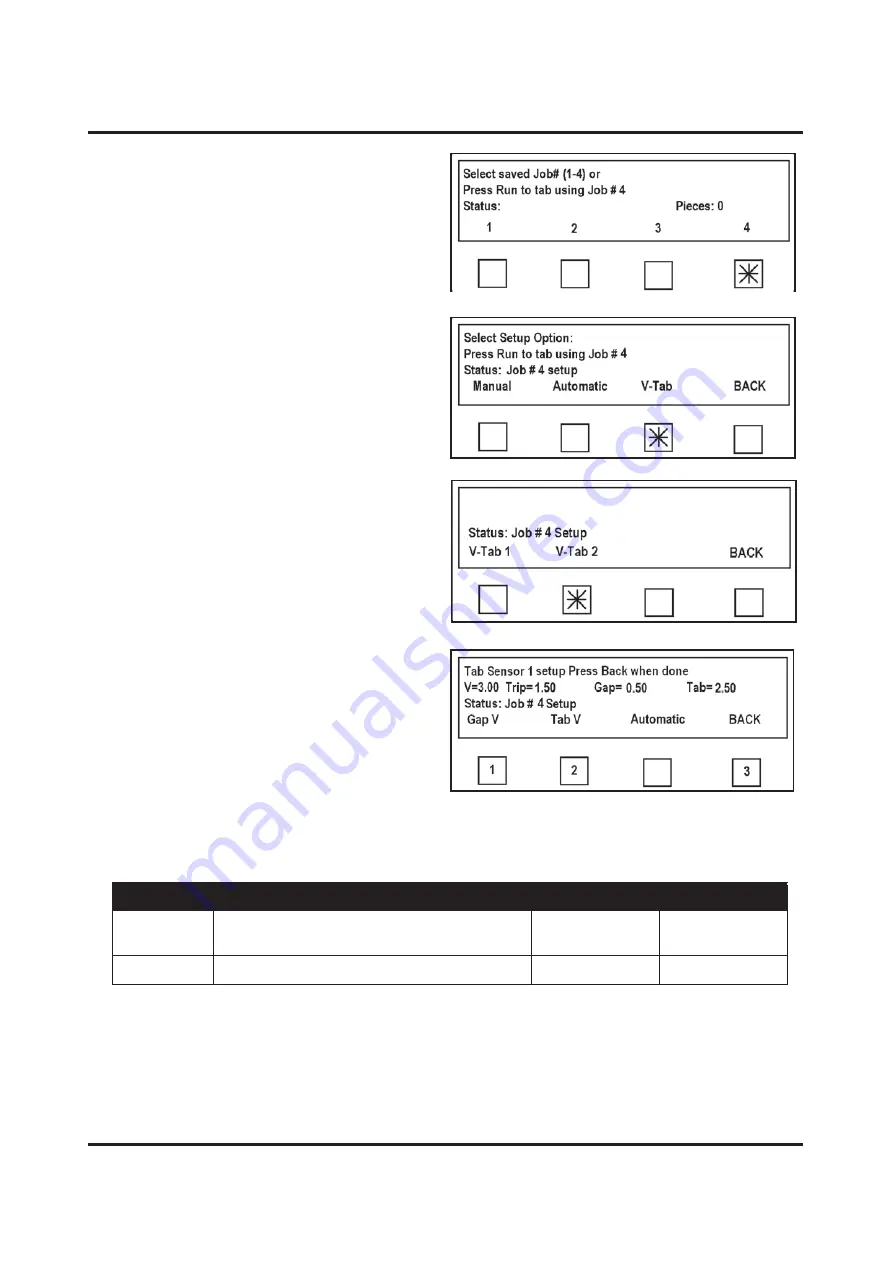
2.
Then select Job #
4
from
“
Select saved Job#
”
screen.
3.
Before you can set up Job, you must set
up Tabber Sensors to read tab. Select
V-Tab
and follow instructions.
4.
Next screen allows you to select Head
that you are using to tab. In this case,
we are using Head 2, so select
V Tab 2
.
5.
To manually programming V Tab
voltage:
Begin by finding Gap V (
or
voltage return from space between
Stamps in this case.
) Release Hold
Down Roller Latch so stamps can slide
easily through Sensor. Move stamp
web through Sensor until you obtain
lowest voltage reading , then press
Gap
V
key (1). Continue moving stamp web through Sensor until you obtain highest reading,
then press
Tab V
key (2). When finished, press
BACK
key (3).
NOTE: When setting Gap Voltage and Tab Voltage manually, software determines if
Tab Type is Opaque or Clear based on voltage readings.
Tab Type
Description
Gap V Level
Tab V Level
Opaque
Tabs in which space between tabs is lighter
than Tab even if tab is white.
Low
High
Clear
Tabs that have a black line between tabs.
High
Low
Summary of Contents for ATS-309
Page 1: ...ASTRO ATS 309 MULTI TABBER STAMP AFFIXER OPERATOR MANUAL ...
Page 90: ...APPENDIX 86 TABBER SETUP 1 JOB TEMPLATES ...
Page 91: ...APPENDIX 87 TABBER SETUP 2 JOB TEMPLATES ...
Page 92: ...APPENDIX 88 TABBER SETUP 3 JOB TEMPLATES ...
Page 93: ...APPENDIX 89 TABBER SETUP 4 JOB TEMPLATES ...
Page 94: ...APPENDIX 90 TABBER SETUP 5 JOB TEMPLATES ...
Page 98: ......
Page 99: ......
Page 100: ...Copyright 2015 All rights reserved 05 20 2015 Part Number 100 ATS 309 Rev G ...