


11
KEYPAD START UP SEQUENCE FOR NEW SETUPS OR SETUP IN
NEW LOCATION
Set your keypad to AutoConnect: NO
if your mount is used under the following circumstances:
●
Your initial setup and when travelling to different locations. This is the default setting when you receive your new
keypad.
●
You are not using an external computer to control your mount.
Background Information: In order for your mount to operate properly, it must have basic information: location, date, time,
time zone and daylight savings. This information must come from an external computer source, in this case, the keypad.
You will have to enter (or confirm) this information each time you start up when you are set to AutoConnect:NO.
This feature can be activated or de-activated by pressing 2=Setup > 4=Kpd,Mt,Park Opt. Press button 7 to toggle between
YES, NO and EXT. Information regarding Auto-Connect: YES provided on page 13 and Auto:Connect: EXT on page
Assemble Your Mount
Refer to the instruction manual for your mount to set up at your observing site. Be sure that you connect your RA and Dec
cables, keypad cable and power cable, preferably in that order.
Refer to your mount manual for polar alignment recommendations. The more accurately you polar align, the more accurate
will be the centering of objects in a high-power field-of-view.
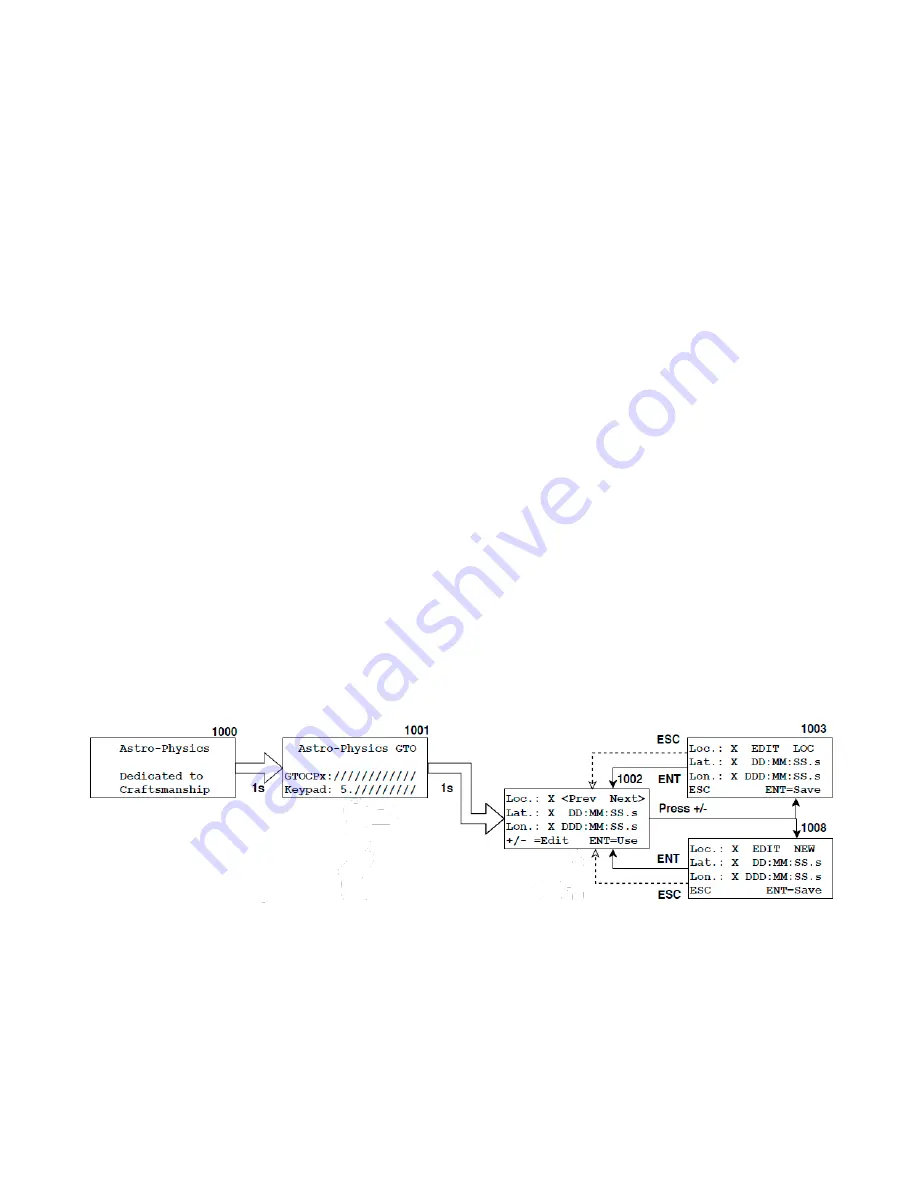
Startup Sequence
When you turn on the power, the first display of the keypad will briefly read “Astro-Physics Dedicated to Craftsmanship”
and then the window changes to display the firmware version number of your CP4/5 and keypad version number for a few
seconds. The location selection/setup window will follow automatically.
Note:
If the Main Menu window appears, that means that the Auto-Connect feature is set to YES. If you wish to set the
Auto-Connect feature to NO, select 2=Setup > 4=Kpd,Mnt,Park Opt. Press 7 to toggle Auto-Connect to NO. This setting
will be remembered for your next session.
Location
Select Existing Location
The <PREV NEXT> buttons allows you to scroll between the location numbers in order to select a location that you
entered previously or advance to the next blank entry window.
●
- button to modify the data for the chosen location number. You will be given the choice to save it or not.
●
Select ENT button to use the selected location in your session.
Set Up New Location
●
Scroll <PREV OR NEXT> until you find a location with no values or edit an existing location.
●
The Lat and Lon values will be zeros for new location windows.