background image

August 2013 ©copyright by ASSA ABLOY 

Elevation

Window Control System

Keypad installation and user guide

Summary of Contents for Interlock Elevation Window Control System

Page 1: ...August 2013 copyright by ASSA ABLOY Elevation Window Control System Keypad installation and user guide...

Page 2: ...nstallation of the network is paramount to the function of the keypad Ensure all details are carried out as per the wiring diagram in the installation instructions FINISH CARE This keypad is designed...

Page 3: ...to Zones 6 Restoring Previous Settings 11 7 Rain Sensor Setup 12 17 a Adding Rain Sensors to Zones b Removing Rain Sensors from Zones c Configuring Rain Sensor Function 8 Restarting the Keypad 18 9 Tr...

Page 4: ...ctuators have not been recognized press Restart Keypad in the Setup page Then proceed to Zone Setup to allocate the Actuators that have not previously registered POWERING UP THE SYSTEM Once all Actuat...

Page 5: ...ll matching the serial number on the left with the desired Zone on the right Press Add to Zone and confirm your selection 2 If serial numbers are not known Press each Actuator button on the left The c...

Page 6: ...check that the Actuators are assigned to the correct Zones Repeat steps 1 2 and 3 until all Zones have been checked SYSTEM SETUP AND CONFIGURATION continued Checking Zone Allocation 1 Use the arrow b...

Page 7: ...ich Actuators have been assigned to a particular Zone 1 Press View Zones 2 Use the appropriate arrow buttons to scroll through either the Actuator list or the Zone list Note No changes can be made in...

Page 8: ...e From Zone and confirm your selection the Actuator will close automatically when confirmed 7 If it is not press the Actuator button again to close this Actuator MODIFYING SYSTEM CONFIGURATION Removin...

Page 9: ...may have also been previously noted on pages 26 27 9 Press Setup to exit You will not be prompted to save at this point The reason for this is explained in the Restore Previous section page 11 Howeve...

Page 10: ...n Important Repeat the process ensuring all Actuators are allocated to your desired Zones before exiting and saving 5 Press Exit Save and then Yes to save your modified Zone settings Note Serial Numbe...

Page 11: ...e reprogrammed if Restore Previous is used 1 Press Setup on the Home screen to display this screen 2 Press Restore Previous You will be prompted Yes or No 1 Press Yes to restore the previously saved Z...

Page 12: ...Add RS To Zone RAIN SENSOR SETUP Adding Rain Sensors to Zones Note A maximum of 4 Rain Sensors can be connected to a Network 1 Press Setup on the Home screen to view this screen 2 Press Rain Sensor S...

Page 13: ...the Setup page and then back into the Rain Sensor Setup page if the incorrect number of Rain Sensors has been displayed IMPORTANT Rain Sensors are assigned to Zones and before Rain Sensors can be adde...

Page 14: ...ued 6 Confirm your selection by pressing Yes A confirmation screen will be displayed and the system will return to the Add RS To Zone page The Rain Sensor will no longer be displayed on the left hand...

Page 15: ...ss Remove RS From Zone RAIN SENSOR SETUP continued Removing Rain Sensors from Zones Confirm that the message displays the correct number of Rain Sensors online 2 Press Yes to proceed to the next scree...

Page 16: ...the Zone 6 Press Exit Save once all desired Rain Sensors have been removed Note Restore Previous will not restore Rain Sensor settings These will be deleted See page 11 There are options in the Rain...

Page 17: ...d Configuring Rain Sensor Function continued Basic Rain Sensor Function Once the Rain Sensor detects rain it will immediately activate the windows to start closing to the chosen configuration i e shut...

Page 18: ...is displaying an explanation mark on the Home page 4 If necessary press the left hand side arrow keys and scroll to the Actuator that is coloured red 5 Press Remove From Zone 6 Press Setup to go back...

Page 19: ...sponding windows in that Zone Scroll up down Press these buttons to scroll through the entire Zone list Displayed if more than 3 Zones are set up Setup Pressing this button takes the user to another s...

Page 20: ...t position Note Maximum default chain length is 300mm Your window might be limited to a shorter length due to restrictions Contact your window manufacturer if the chain length needs to be adjusted Ful...

Page 21: ...olding the Backlit Home Button for 10 seconds before releasing will allow the user to deactivate the screen so that it can be cleaned An audible sound will be heard at the 10 second mark Upon release...

Page 22: ...w active DISABLE PIN CODE From the Setup Page press PIN Code Disable You will be prompted Do you want to disable the PIN Code Press Yes to confirm this action Note The default override PIN code is 481...

Page 23: ...uld be during either the opening or closing sequence of the windows If a window has been obstructed it must be run in the opposite direction and the obstruction removed before the window can continue...

Page 24: ...STEM LOCKED BY PIN CODE Press Unlock located at the bottom of the screen to enter your PIN Code INCORRECT PIN CODE HAS BEEN ENTERED If you have forgotten your PIN Code type in 4811 This is a default o...

Page 25: ...add Rain Sensors to Zones but there are no new Zones available and every Rain Sensor has been added to every Zone It is possible for this error to occur mainly on large networks with over 20 Actuator...

Page 26: ...write the serial number in one column and the location and or Zone name in the next See example below Note Only the bottom line of the label refers to the serial number NETWORK ADAPTOR SERIAL NUMBER...

Page 27: ...27 RAIN SENSOR ACTUATOR LOCATION MATRIX continued ACTUATOR SERIAL NUMBER ZONE LOCATION ACTUATOR SERIAL NUMBER ZONE LOCATION...

Page 28: ...continue to appear until it has been dry for 15 minutes and the Keypad touch screen has been activated When I touch the Full position button some of my windows do not fully open Why is this 1 The cha...

Page 29: ...acing Zone 6 Bedroom 4 East Facing Window 1 Study West Facing Window 2 Bathroom 1 Factory Window 3 Bathroom 2 Store Room Window 4 Kitchen Zone 1 Window 5 FREQUENTLY ASKED QUESTIONS continued ZONE NAME...

Page 30: ...uire adjusting for use with a Rain Sensor They must all be in the left hand position as shown KEYPAD Maximum of 2 per Network They can be placed anywhere on the network Max current 100mA VE 24VDC BROW...

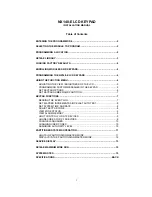
Page 31: ...31 NOTES...

Page 32: ...regions in both mature and emerging markets with leading positions in Australia Europe and North America As the world s leading lock group ASSA ABLOY offers a more complete product range of door open...

Reviews: