MANUAL DE USUARIO
CAMPANA TELESCÓPICA
ACE648X
Lea atentamente este manual y guárdelo para futuras consultas.
Page 1: ...MANUAL DE USUARIO CAMPANA TELESCÓPICA ACE648X Lea atentamente este manual y guárdelo para futuras consultas ...
Page 2: ...Si tiene preguntas rogamos que se ponga en contacto con un servicio técnico autorizado El manual de uso sirve para utilizar el producto de forma correcta y segura Antes de usar y hacer funcionar el producto lea este manual de uso Es esencial que lea las instrucciones vinculadas a la seguridad Luego guarde el manual de uso en un lugar de fácil acceso dado que lo pueden necesitar más adelante Lea ta...
Page 3: ...POSITIVO 4 PRECAUCIONES Y ADVERTENCIAS DE SEGURIDAD 6 MONTAJE Y ACCESORIOS 12 MONTAJE DE LA CAMPANA 13 FUNCIONAMIENTO Y UTILIZACIÓN DE LA CAMPANA 16 MANTENIMIENTO Y LIMPIEZA 19 SERVICIO TÉCNICO REEMPLAZO DE PIEZAS GARANTÍA 21 CONTENIDOS ...
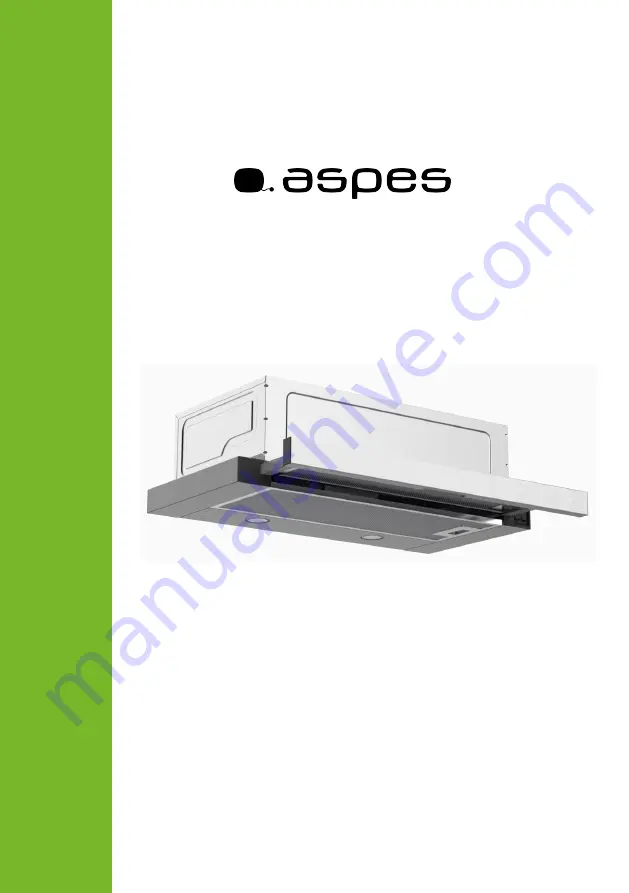
Page 4: ...ES VISTA GENERAL Nota La ilustración es una imagen de referencia su aparato podría diferir 1 Cuerpo 2 Panel Frontal 3 Filtro 4 Iluminaión Figura 1 CARACTERÍSTICAS TÉCNICAS DEL DISPOSITIVO ...
Page 5: ... Tensión y frecuencia 220 240Vac 50Hz Potencia total del dispositivo Mín 2W Máx 102W Potencia del motor 100W Potencia de las luces 2 x 1W Panel de control 2 Grados de Velocidad Diámetro de conexión a ventilación de aire 120mm Amplitud del producto 595 mm Profundidad del producto 300 mm Altura del producto 176mm ...
Page 6: ...cos cuando se haga funcionar a la vez que otros dispositivos alimentados con gas u otros combustibles ventilar la habitación debería ser suficiente podría no ser aplicable a dispositivos que solamente hacen circular el aire por el interior de la habitación Preserve los materiales de embalaje en un lugar alejado de los niños o deshágase de ellos Si los niños entran en contacto con los materiales de...
Page 7: ...n lugar donde pueda ser chafado o comprimido Si se daña el cable eléctrico debe ser reemplazado por parte de un experto o electricista de un servicio técnico autorizado Lo mismo es aplicable en casos futuros en los cuales el cable de energía resulte dañado La conexión del producto a la red de alimentación eléctrica solo puede realizarse por parte de una persona experta o competente La garantía del...
Page 8: ...lentar aquellas partes a las cuales tenga acceso Las comidas inflamables no deberían cocinarse debajo de la campana Las llamas no tapadas por cacerolas o sartenes podrían ser extremadamente peligrosas para la campana y podrían desatar incendios y por esa razón es necesario prevenir este tipo de situaciones De prenderse fuego corte inmediatamente la energía de la campana y los dispositivos de cocci...
Page 9: ...nción a las instrucciones de mantenimiento No utilice materiales de filtración vulnerables al calor y las llamas en vez del filtro que viene con el producto No haga funcionar el producto sin filtro El cable de energía no debe pasar cerca de los fogones ya que de estar expuesto a temperaturas elevadas podría derretirse y ocasionar incendios Si han utilizado las luces del producto durante un largo p...
Page 10: ... de un diámetro de 120 mm Para un buen rendimiento la conexión de tubería realizada debería ser lo más corta lisa y menos torcida posible La tubería de escape no se suministra junto al producto Debe adquirirse por separado El diámetro de la tubería de escape debe ser igual al diámetro del aro de la conexión Ya que la campana expulsa el aire del ambiente es posible que sea necesario considerar su e...
Page 11: ...residencia Eliminacıon De Los Embalajes Y Del Producto Deseche el material de embalaje del aparato correctamente Todos los materiales de embalaje pueden ser reciclados Las piezas de plástico están marcadas con las abreviaturas internacionales estándar por ejemplo PS para poliestireno material de relleno Este aparato está identificado de acuerdo con la directriz europea 2012 19 UE sobre residuos de...
Page 12: ...producto funcione de forma segura es necesaria que en la habitación haya una buena ventilación Si no hay ninguna ventana que pueda utilizarse para ventilar la habitación deberá proporcionarse ventilación adicional como por ejemplo abrir un orificio en el cristal Si en su cocina hay un orificio que da al exterior no lo tape nunca Saque de la caja los otros materiales que se encuentran dentro de la ...
Page 13: ... la superficie donde se ensamblará el producto la plantilla de montaje que se encuentra junto a los equipamientos de montaje del interior de la caja del producto 2 Perfore orificios de un diámetro de Ø4 mm en los puntos señalados con A B C D en la Plantilla de Montaje 3 Perfore el orificio del conducto de salida tal como se indica en la plantilla de montaje adecuándose a las medidas estipuladas 4 ...
Page 14: ... mueven correctamente hacia arriba y que permiten la salida de aire De lo contrario modifique la posición o dirección de las solapas Figura 7 Cuando esté realizando la conexión a la tubería apretar en demasía la abrazadera o brida que esté utilizando para retener el cable de plástico podría perjudicar el buen funcionamiento de las solapas Por lo tanto antes de conectar la tubería que habilita la c...
Page 15: ...m o 150 mm dependiendo del producto y asegúrese en la medida de lo posible de que no quede torcida En tuberías de aluminio deberían evitarse tanto como sea posible torceduras y dobladuras ya que éstas podrían disminuir la capacidad de succión de aire Imagen 1 Encárguese de realizar de forma periódica la limpieza del filtro de casete de aluminio y la sustitución de filtros de carbón Figura 7 Correc...
Page 16: ...a campana ya que podría prender fuego Por favor no se olvide de arrancar esta cinta de protección ya que al ser un material de características inflamables podría incrementar el riesgo de incendio Selección de Velocidad En el dispositivo pueden seleccionarse 2 niveles de ventilación Dependiendo del vapor generado en el momento de cocción escoja uno de las velocidades de funcionamiento baja 1er cicl...
Page 17: ...gado de Luces Para hacer funcionar el dispositivo en el primer nivel de velocidad sitúe el interruptor de ciclo en la posición Figura 8 A Para hacer funcionar el dispositivo en el segundo nivel de velocidad sitúe el interruptor de ciclo en la posición Figura 8 A Para encender las luces del dispositivo sitúe el interruptor de control en la posición Figura 8 B Figura 8 ...
Page 18: ...o de carbón Para emplazar en su sitio el filtro de carbón alinee los canales ubicados sobre la tapa del motor con los dientes ubicados en el filtro de carbón y realice medio giro en dirección a las agujas del reloj Si quiere extraerlo realice medio giro en dirección contraria a las agujas del reloj Figure 9 Nota La ilustración es una imagen de referencia su aparato podría diferir Imagen 3 Filtro d...
Page 19: ...e recomienda lavarlo con agua caliente enjabonada o de ser posible meterlo en el lavavajillas por si solo a una temperatura máxima de 60 C Luego de lavarlo es posible que cambie el color del filtro de casete de aluminio o su marco Esto es algo normal y no afectará el rendimiento de los filtros Alüminyum kaset filtreyi uç taraftaki yaylı mandala basarak yerinden çıkartınız Extraiga de su sitio el f...
Page 20: ... reparación autorizado para reemplazarlas Si resulta necesario cambiar las luces por favor revise la información que sigue y sustitúyalas por una alternativa equipada con estas características técnicas Código ILCOS D DBR 1 H Código ILCOS D según los estándares IEC 61231 Módulo LED Plástico translúcido Potencia nominal de cada luz 1W Potencia máxima de luz para cambio potencial 2 x 1W Gama de tensi...
Page 21: ...garantía elaborada por Femaş Metal Sanayi ve Ticaret A Ş no cubre la reparación de daños ocasionados debido a una utilización anormal del producto o un uso que no se adecúa a sus objetivos comerciales las siguientes situaciones no están cubiertas por la garantía SERVICIO TÉCNICO REEMPLAZO DE PIEZAS GARANTÍA 1 Después de liberar el mecanismo de cierre presionando los conectores macho y dientes de l...
Page 22: ...rá ser aceptado corre a cargo del vendedor mayorista representante o agente que haya obtenido el producto En caso de que se hayan realizado falsificaciones en el documento de garantía se haya arrancado el número de serie original que consta en el producto o se haya adulterado esta garantía dejará de ser válida Los filtros de aluminio que se utilizan en la campana deben limpiarse con la regularidad...
Page 23: ...o técnico Asegúrese de que el enchufe tiene corriente y que el seguro eléctrico de la instalación sea el adecuado No realice ninguna acción que pudiera dañar el producto Antes de contactar con el servicio técnico consulte la Tabla 1 para revisar la campana Si el problema persiste póngase en contacto con el servicio técnico autorizado más cercano Servicio Técnico y Piezas de Repuesto Puede solicita...
Page 24: ...uncionamiento hace mucho ruido Si utiliza la campana sin chimenea compruebe que el filtro de carbón no se anterior a 4 meses Sustituya el filtro de carbón por uno nuevo Es posible que la entrada de aire limpio sea de un nivel insuficiente para que la cocina cuente con una buena ventilación de aire Encárguese de ventilar el entorno abriendo la ventana de la cocina Es posible que la totalidad o part...
Page 25: ...ADING S L C Ciudad de Cartagena 20 Paterna 46988 SPAIN info svanelectro com 96060034 SERVITECNICA Número de teléfono 96 324 67 51 96 324 67 52 Email avisos servictecnica es Horario 9 00 to 14 00h 16 00 to 19 00h ...
Page 26: ...USER MANUAL TELESCOPIC HOOD ACE648X Read this manule carefully and kepp it for future reference ...
Page 27: ...n this manual Please contact with the authorized service centre for all questions Operating manual help you use the product correctly and safely Read the operating manual prior to setting up and operating the product Comply with the safety related instructions definitely Please keep the operating manual in a handy place for any possible need Read other documents given together with the product as ...
Page 28: ...TIONS OF THE EQUIPMENT 29 WARNING AND SAFETY PRECAUTIONS 31 INSTALLATION AND ACCESSORIES 36 INSTALLATION OF THE HOOD 37 OPERATING AND USE OF THE HOOD 40 CLEANING AND MAINTENANCE 43 SERVICE SPARE PARTS AND WARRANTY 45 CONTENT ...
Page 29: ...EN OVERALL VIEW Note The illustration is a reference image your device may differ TECHNICAL SPECIFICATIONS OF THE HOOD Fıgure 1 1 Body 2 Front Panel 3 Filter 4 Lighting ...
Page 30: ...ffer TECHNICAL SPECIFICATIONS Voltage Frequency 220 240Vac 50Hz Total product power Min 2W Max 102W Motor power 107W Lamp power 2 x 1W Control Panel 2 Speed Air outlet connection diameter 120 mm Product width 595 mm Product depth 300 mm Product height 176mm Figure 2 ...
Page 31: ...eously used with other equipment using gas or other fuels the room should be ventilated well It may not be applicable for equipment which only recirculate the air in the room Keep the packaging materials in places out of reach of the children or destroy them Access to the packaging materials by the children may lead to dangerous consequences Unless there is no supervision and management with respe...
Page 32: ...fied electrician Product warranty starts only after correct installation of it Do not plug the product before you fix it on the wall Grounded plug is installed to the power cable of your product This cable should definitely be insert into a grounded socket Disconnect power connection of the product prior to cleaning and maintenance Remove the plug of the product from the socket for disconnection W...
Page 33: ... of your product Switch the range off before you take the cooking containers such as pot or frying pan from the range Do not leave the cooking containers such as pot or frying pan on the range when they contain hot oil Cooking containers with hot oil in them may cause to self ignition Especially be careful when you fry Watch the curtains and cloth covers due to easily flammable character of the oi...
Page 34: ... purchase proper type of screws For installation use screws with correct diameter and height as specified in the manual Regulations related to exhaust of the outlet air should be observed Air should never be exhausted into the flue which is intended for exhaust of the smokes emitted from the equipment using gas or other fuels to outside It may not be applied for the equipment which only recirculat...
Page 35: ...uipment should not be considered as domestic waste The equipment should be delivered to the gathering site of recyclable products where this type of electric and electronic equipment is disposed Disposal of waste should be performed in accordance with the current local environmental regulations with respect to disposal For detailed information about recycling conditions of this product consult to ...
Page 36: ...ll it Otherwise the defective product may pose risk for safety The room should be ventilated well for safe operation of the product If there is no window for ventilation of the room you should provide an extra ventilation vent on the window pane etc If there is vent in your kitchen never block it Inspect condition of other materials inside the hood e g installation accessories operating manual in ...
Page 37: ...points by using the 4 8x50 screws supplied with the device When the slide set moves the front panel should not rub against the cabinet door Figure 4 Position of the Product When installation of the product is completed there should be a clearance of 60cm between the product and electric ranges and 65 cm between the product and ranges using gas or other fuels Figure 3 INSTALLATION OF THE HOOD Pleas...
Page 38: ...e connection operate the hood and make sure the flaps move upwards correctly and allow air exit Otherwise change direction of the flaps Figure 7 Overtightening of the cable holder or clamp when making pipe connection may prevent operation of the flaps Prior to connecting the pipe with the chimney of your house you therefore control whether the hood operates properly by operating it Figure 5 Figure...
Page 39: ... 120 mm and minimum number of bends as far as possible As the bends and elbows on the aluminum pipe will cause reduction in the air suction power you should avoid use of much bends and elbows as far as possible Picture 1 Give heed to regular use of the aluminum cartridge filters and replacement times of the carbon filters Figure 7 Correct Incorrect Picture 1 ...
Page 40: ...rtridge filter on the hood Please remember that if this protective band is not removed it poses burning risk as it is not of inflammable character Selection of Speed There is 2 speed ventilation on the product Depending on the steam which occurs during the cooking process select of the operating speeds i e low 1st speed medium and high 2nd speed After you complete the cooking operation leave the h...
Page 41: ...witch To operate the device in the first speed stage turn the speed switch to the position Figure 8 A To operate the device in the first speed stage turn the speed switch to the position Figure 8 A In order to turn on the lamp of the device turn the cycle switch to the position to operate the lamp on off switch Figure 8 B Figure 8 ...
Page 42: ...rs on the product In order to put the carbon filter in place the channels on the motor cover should be brought to alignment with the lugs on the filter and rotate it half turn clockwise To remove it you should rotate it anticlockwise by half turn Figure 9 Note The illustration is a reference image your device may differ Figure 9 Activated Carbon Filter In the places without any pipe for connection...
Page 43: ...fter each 40 operating hours in average depending on frequency of use with hot soapy water or if possible individually in the dishwashing machine maximum 60 C After washing aluminum cartridge filter and its frame may discolour This is normal and does not affect function of the filters Remove the aluminum cartridge filter by pushing the spring catch at the end After cleaning allow it to dry Do not ...
Page 44: ...ng info and replace it with an alternative having the same technical specifications ILCOS D code DBR 1 H ILCOS d code as per standard IEC 61231 LED module semi transparent plastic Rated power of each lamp 1W Maximum lamp potential power for replacement 2 x 1W Voltage range of the lamp 220 240V Product sizes diameter 35 8 mm height 30 mm If required you may acquire new lamps from the authorized ser...
Page 45: ...the manual 2 Any damage and failure which occur during loading unloading and handling of the product after it is delivered to the customers 3 Any damage and failure due to low or excessive voltage defective electric installation use of it at such voltage that is different from the one indicated on the nameplate of the product 4 Damage and failure due to fire and or lightning 5 Failure arising from...
Page 46: ...portation is required Keep its original package Transport it in its original package and observe the handling signs on the package If the original package is not available Do not put any heavy object on the hood Please observe the following measures 1 When you purchase the product have the Warrant Certificated approved by your Authorized Dealer 2 When you need service for your product you may call...
Page 47: ...lugged in On off button is not pressed Press On Off button Lighting fails It is not plugged in Make sure it is plugged in Product key does not work Check the button Lamp is defective Replace the lamp Performance of the equipment is not sufficient or it makes high noise when working If you use the hood without flue make sure the carbon filters are not older than 4 months Replace the carbon filters ...
Page 48: ...EN SERVITECNICA Address C Ciudad de Cartagena nº 20 Phone 96 324 67 51 96 324 67 52 Email avisos servictecnica es Schedule 9 00 to 14 00h 16 00 to 19 00h www aspes es ...